> ## Documentation Index
> Fetch the complete documentation index at: https://docs.spline.design/llms.txt
> Use this file to discover all available pages before exploring further.
# Image Layer
The Image layer allows you to upload, or generate with AI, an image to texture your 3D objects.
## How to create an Image Layer
To add an image layer, you’ll need to:
1. Select an object and add a new layer on the Material Panel.
2. Change the layer to **“Image”** by clicking on the dropdown on the newly created layer.
3. Open the **Image Layer** settings by clicking on the layer thumbnail.
 ## Image Layer Settings
You can either upload an image or generate a texture with AI to get started.
### Mode
Some layers, including Image Layer, can be used as masks, which you can do by selecting Mask on the layer mode. Learn more here: [Layer Masking](/materials-shading/layer-masking).
### Settings
#### Projection
Determines how the texture fits onto the model's surface, like adjusting a sticker on a curved or flat area.
* **UV** - Maps textures based on the model's UV coordinates.
* **Planar** - Projects the texture onto the model from a single direction.
* **Spherical** - Wraps the texture around the model as if it were a globe, ideal for round objects.
* **Cylindrical** - Applies the texture around the model like a label on a can, perfect for cylinder-shaped objects.
* **Triplanar** - Projects the texture from three directions and blends them, great for complex surfaces without clear orientation.
## Image Layer Settings
You can either upload an image or generate a texture with AI to get started.
### Mode
Some layers, including Image Layer, can be used as masks, which you can do by selecting Mask on the layer mode. Learn more here: [Layer Masking](/materials-shading/layer-masking).
### Settings
#### Projection
Determines how the texture fits onto the model's surface, like adjusting a sticker on a curved or flat area.
* **UV** - Maps textures based on the model's UV coordinates.
* **Planar** - Projects the texture onto the model from a single direction.
* **Spherical** - Wraps the texture around the model as if it were a globe, ideal for round objects.
* **Cylindrical** - Applies the texture around the model like a label on a can, perfect for cylinder-shaped objects.
* **Triplanar** - Projects the texture from three directions and blends them, great for complex surfaces without clear orientation.
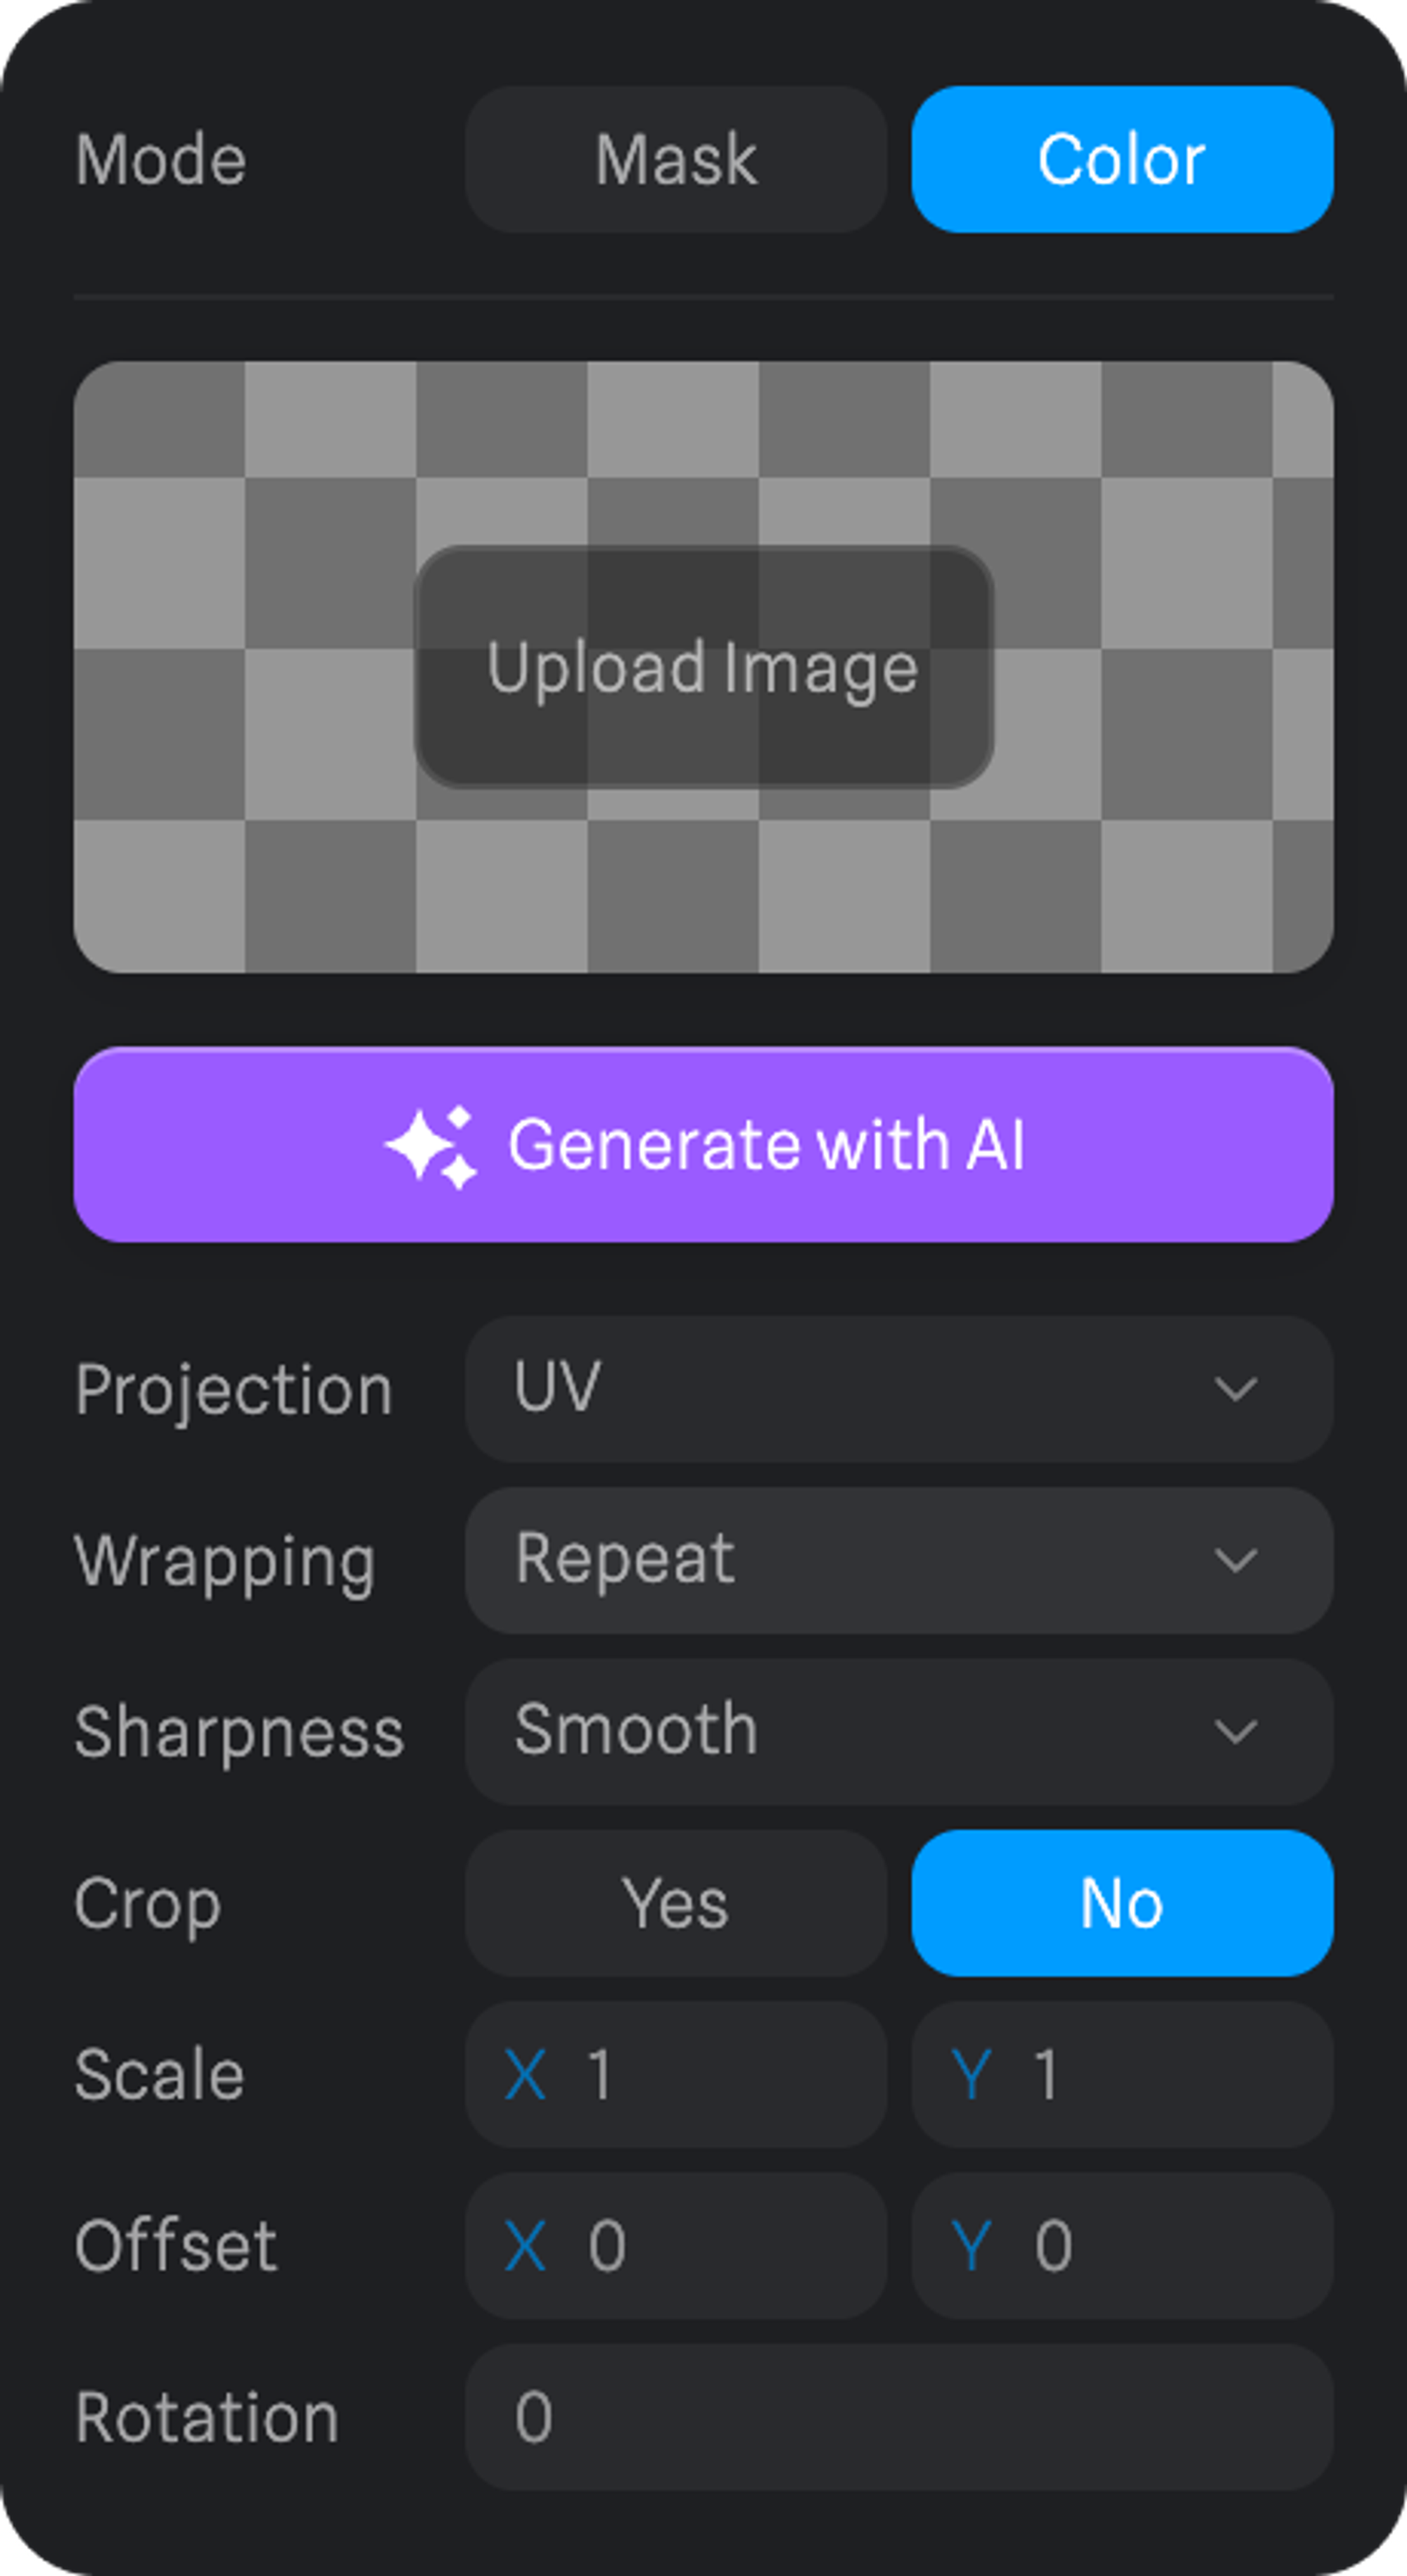 #### Wrapping
Decides how textures behave at edges, whether they repeat, stretch, or cut off.
* **Clamp** - Extends the edges of the texture to the bounds of the surface, preventing tiling but possibly stretching the edge pixels.
* **Repeat** - Tiles the texture across the surface, repeating it both horizontally and vertically.
* **Mirror** - Similar to repeat, but each tile is mirrored, creating a symmetrical tiling effect.
**Sharpness** - Adjusts texture clarity, making it crisp or smooth or pixelated.
**Crop** - Use the texture only on a part of the object without it being stretched.
**Scale** - Changes the texture's size on the model.
**Offset** - Moves the texture's position on the surface of the model.
**Rotation** - Spins the texture around a point, altering its angle on the model.
## Image Assets
You can save your images as assets to reuse on other image layers.
To save an image asset, you’ll need to:
1. Select the object using the image you want to save.
2. Open the Image Layer panel.
3. On the Image Assets panel, press the + button on the top left, and your image asset will be saved
## Bump and Roughness Maps
The image layers added to your material can be used as bump and roughness maps.
[Bump Map & Roughness Map](/materials-shading/bump-map-roughness-map)
#### Wrapping
Decides how textures behave at edges, whether they repeat, stretch, or cut off.
* **Clamp** - Extends the edges of the texture to the bounds of the surface, preventing tiling but possibly stretching the edge pixels.
* **Repeat** - Tiles the texture across the surface, repeating it both horizontally and vertically.
* **Mirror** - Similar to repeat, but each tile is mirrored, creating a symmetrical tiling effect.
**Sharpness** - Adjusts texture clarity, making it crisp or smooth or pixelated.
**Crop** - Use the texture only on a part of the object without it being stretched.
**Scale** - Changes the texture's size on the model.
**Offset** - Moves the texture's position on the surface of the model.
**Rotation** - Spins the texture around a point, altering its angle on the model.
## Image Assets
You can save your images as assets to reuse on other image layers.
To save an image asset, you’ll need to:
1. Select the object using the image you want to save.
2. Open the Image Layer panel.
3. On the Image Assets panel, press the + button on the top left, and your image asset will be saved
## Bump and Roughness Maps
The image layers added to your material can be used as bump and roughness maps.
[Bump Map & Roughness Map](/materials-shading/bump-map-roughness-map)