

Understanding Spline's UI
Below you can see an overview of Spline's UI.
Dashboard
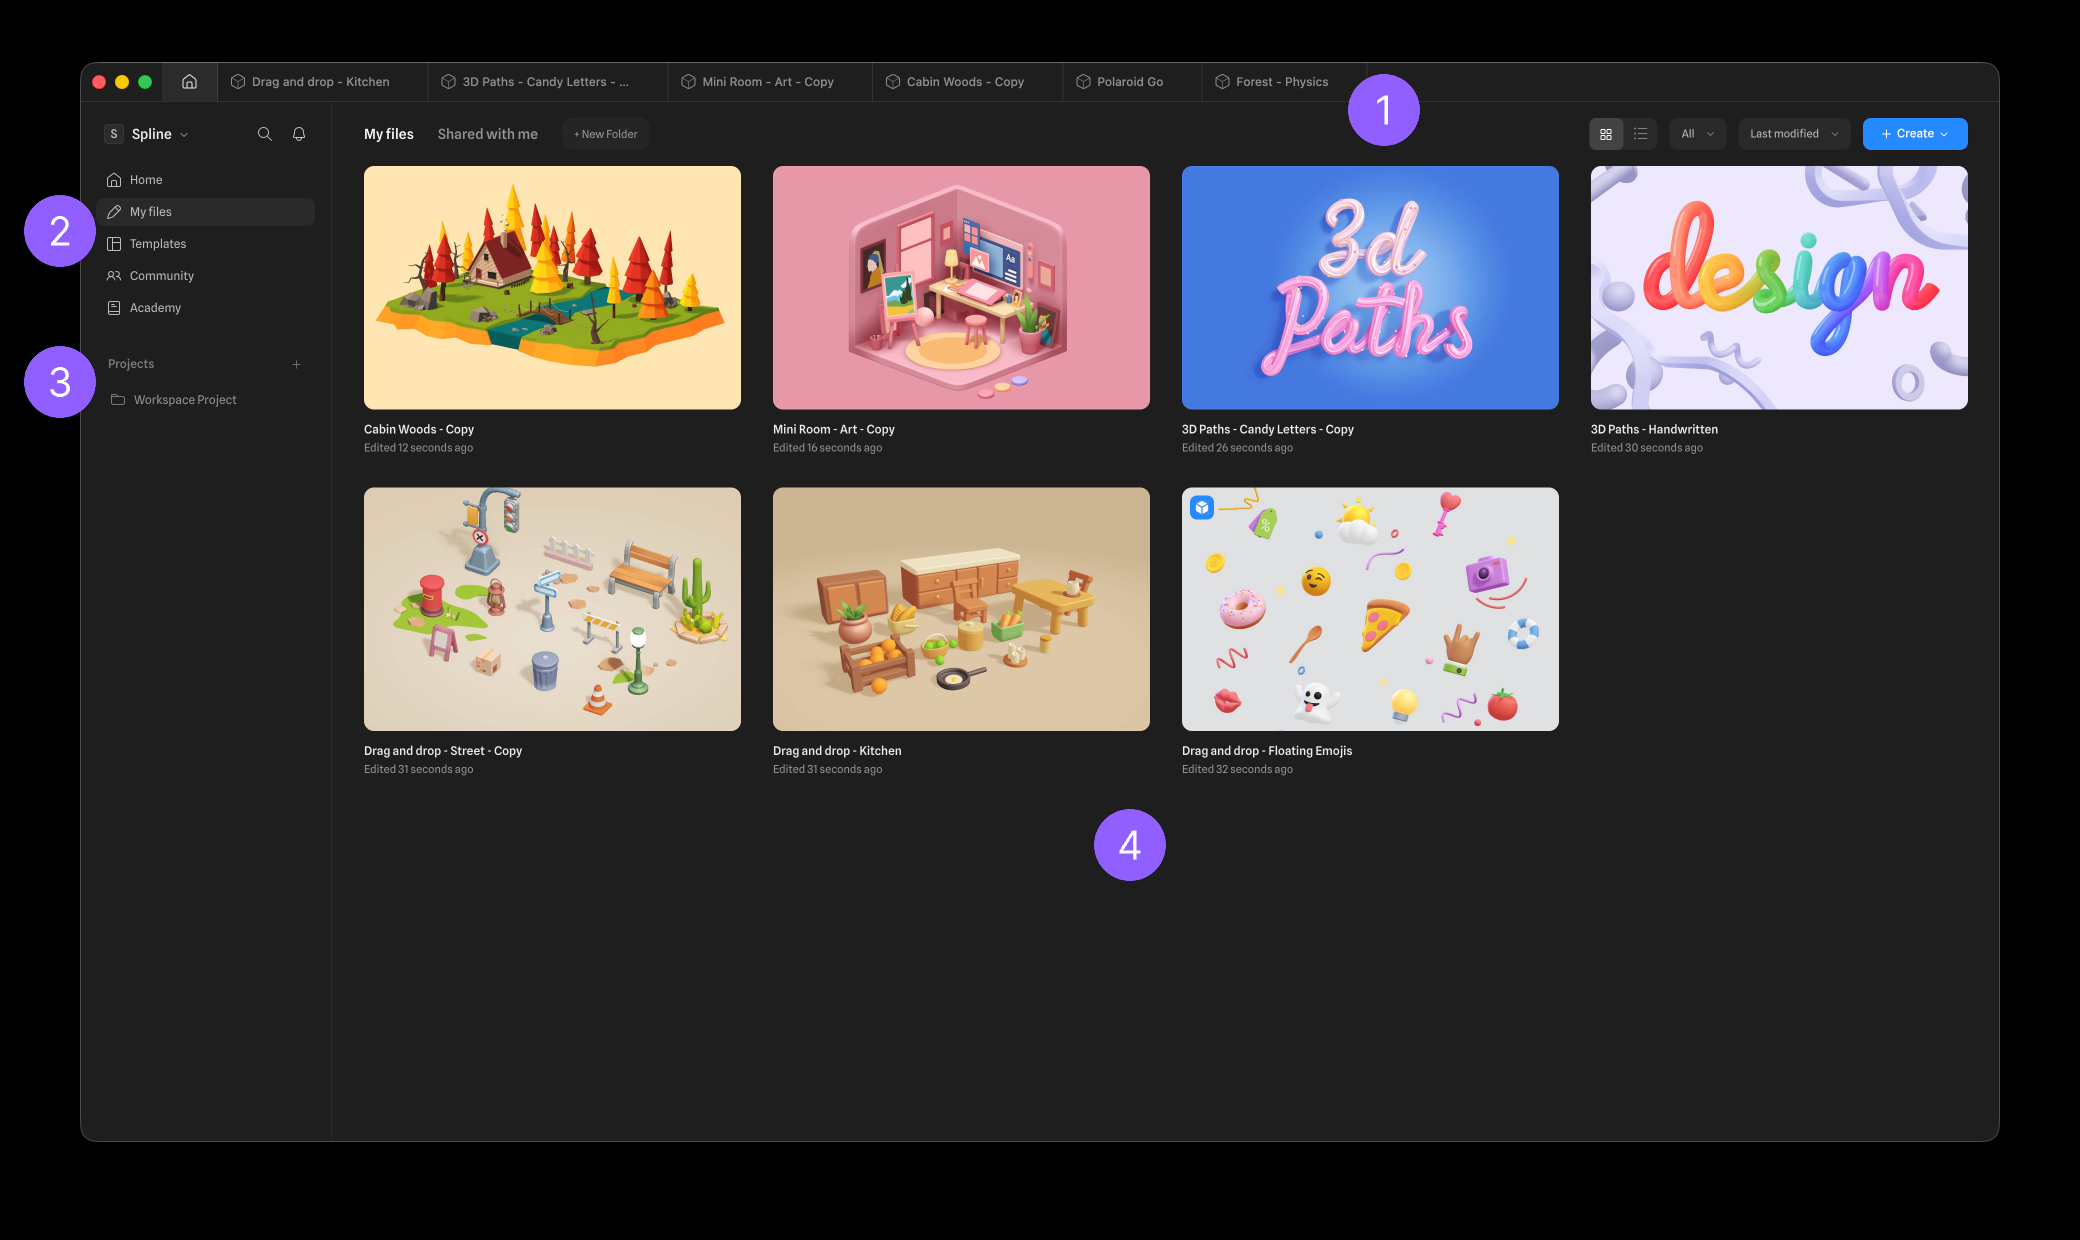
- The Tab bar keeps several files open at once. The home button on the left takes you back to your files, and the "+" opens a new tab. Tabs are a desktop app feature — in the browser each file gets its own window or tab.
- The Sidebar menu moves between Home, My files, Templates, Community and Academy. Above it, the workspace name switches workspaces, alongside search and your notifications.
- Projects are shared folders for organizing a workspace's work. Press the "+" to create one.
- The File view lists what's in the section you're in — a preview, a name and when it was last edited for each file. The controls around it switch between My files and Shared with me, add a folder, toggle grid or list, filter and sort, and start something new with + Create.
Editor
-
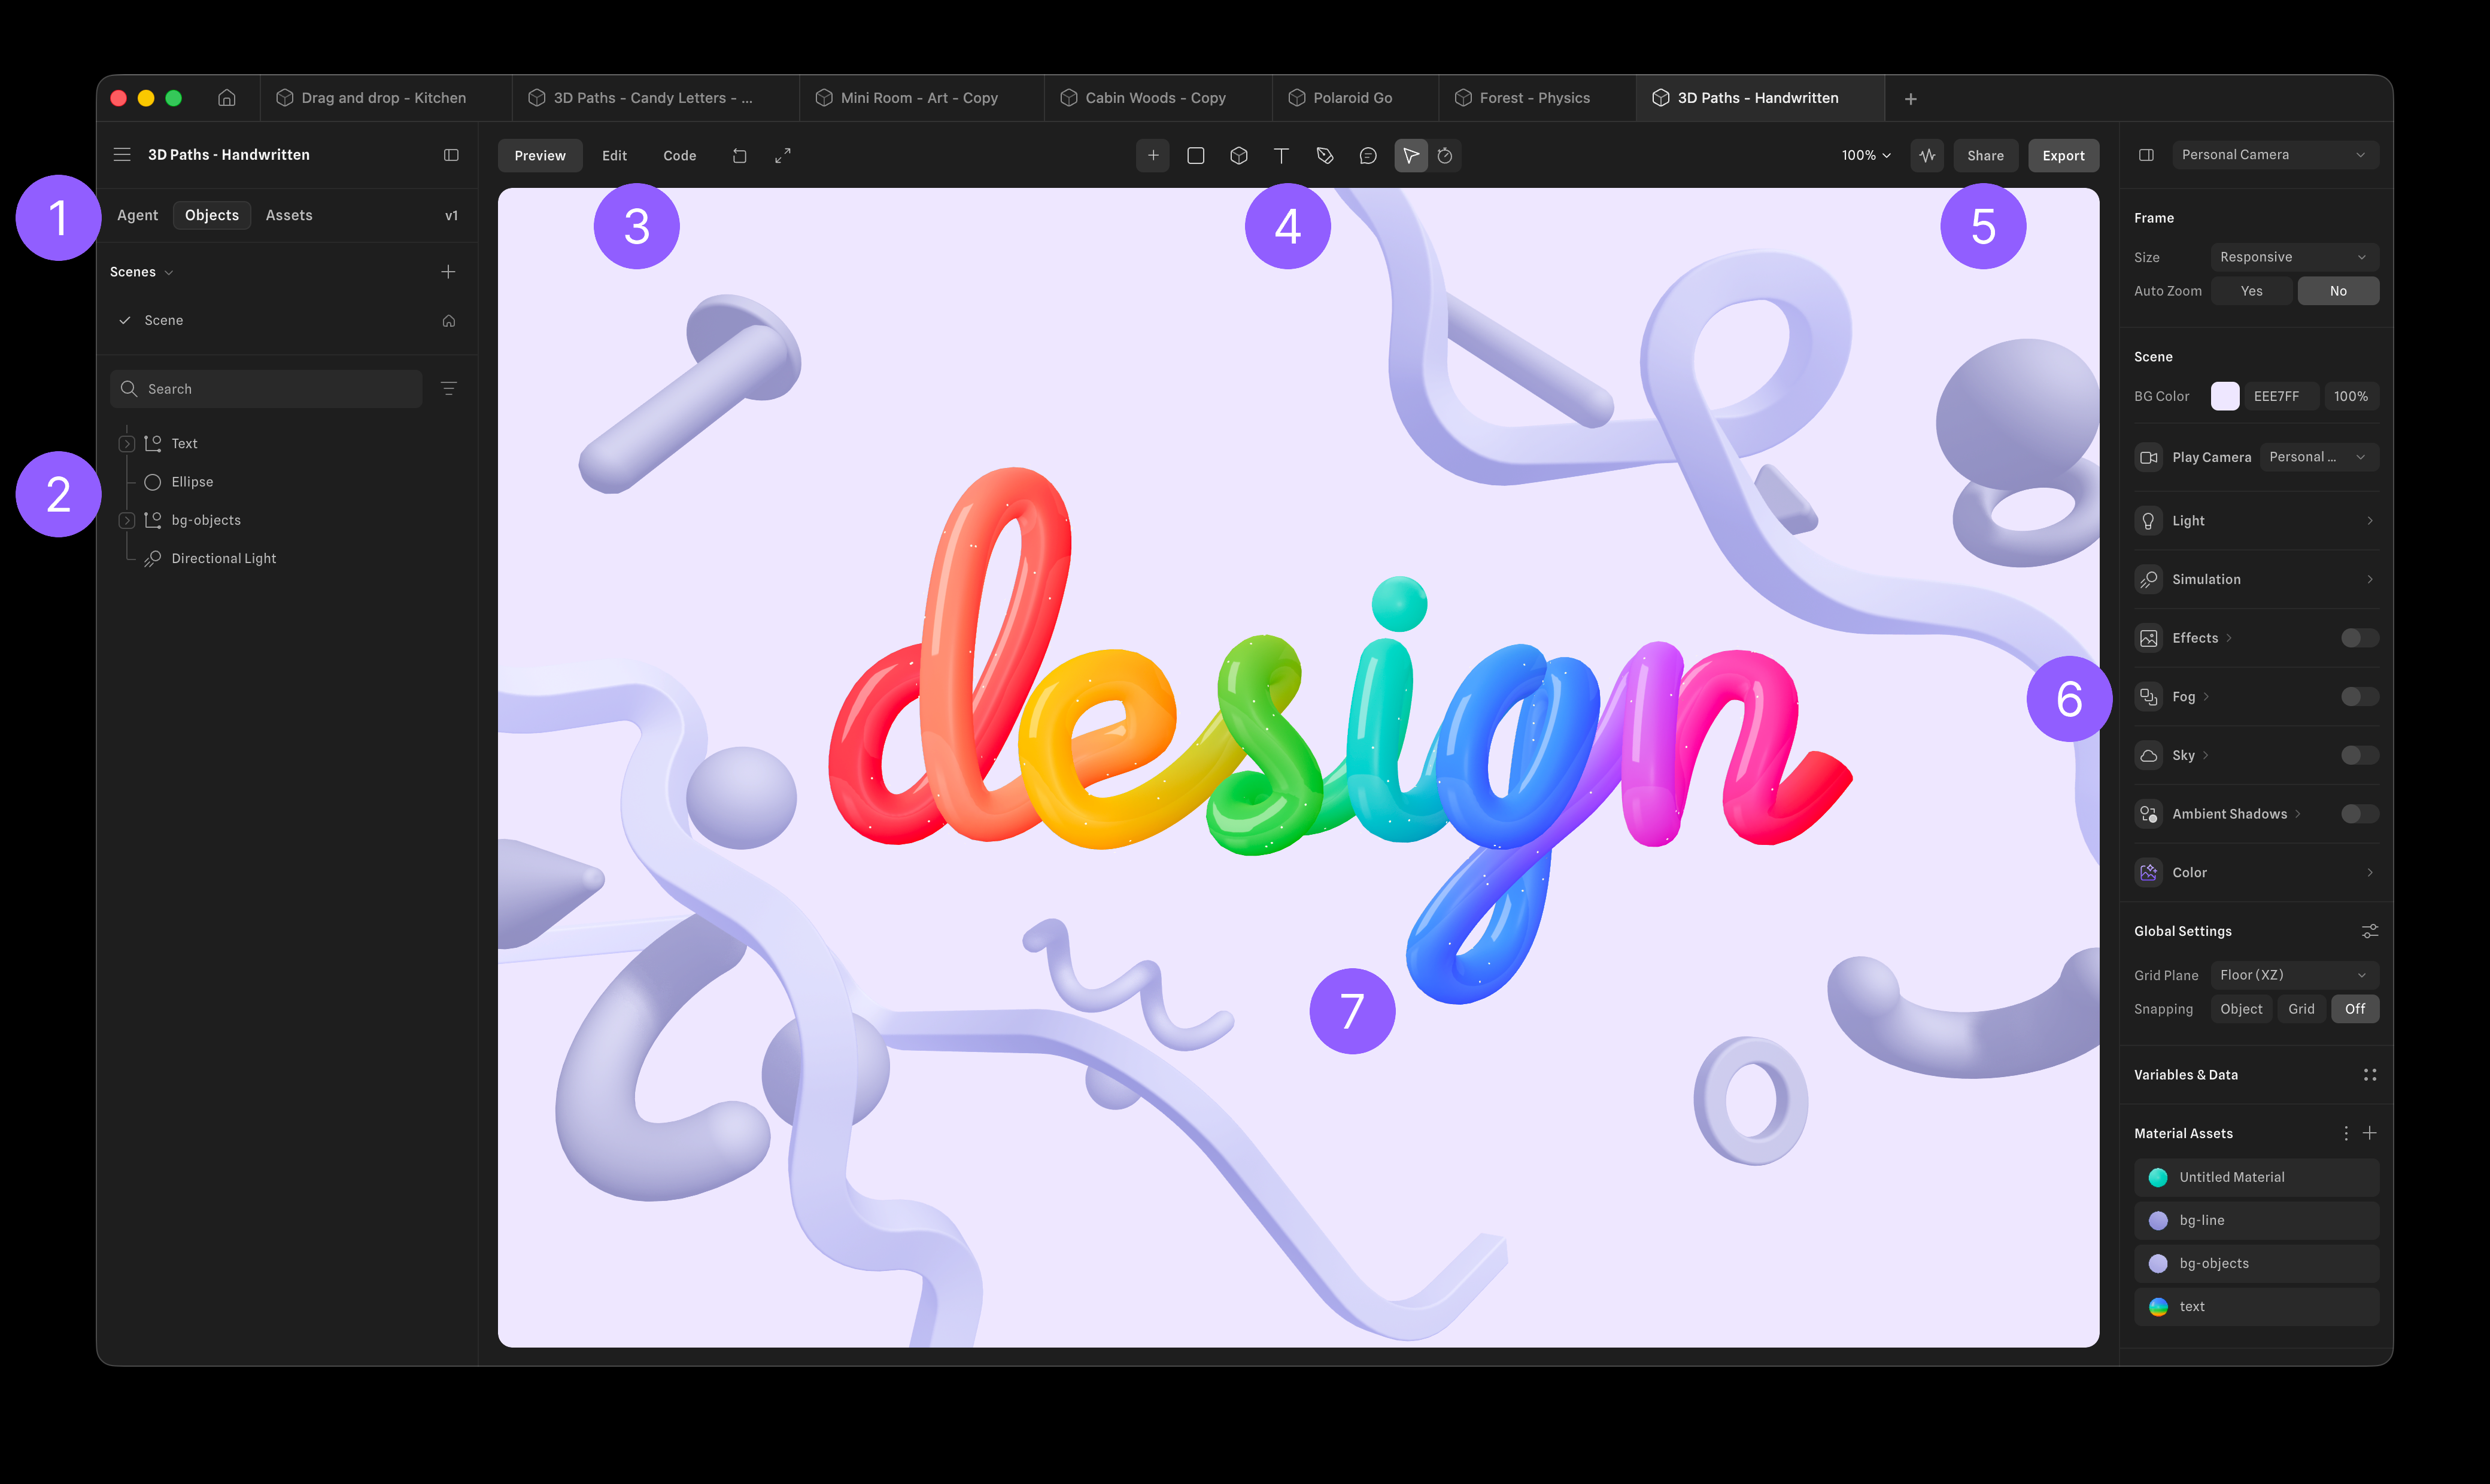
The sidebar's three tabs. Agent is the AI assistant that builds and edits the scene for you, and the tab the editor opens on. Objects is the scene tree, and Assets holds the asset browser and your team libraries.
-
The Outliner — every object in the scene, nested and searchable. The Scenes list above it switches between the scenes in the file.
-
The Preview | Edit | Code stage tabs. Edit is the scene you work in, Preview runs it the way a visitor sees it — this is Play — and Code holds the file's own HTML document. Preview adds its own restart and full-screen chips beside the tabs.
-
The tool dock, where you add and manipulate content: the "+" opens the full list of objects, and the arrow is Transform, for moving, scaling and rotating what you select.
-
Zoom, scene performance, and the Share and Export buttons — the controls for inspecting and shipping the scene rather than editing it.
-
The Property Panels. With nothing selected these are the scene's own settings — background, lights, simulation, effects, fog, sky, ambient shadows, color — and selecting an object swaps them for that object's properties.
-
The viewport — the scene itself, where you select objects and move them around. What it shows follows the stage tabs above: the editable scene on Edit, the running one on Preview. Orbit, zoom and pan it with the mouse or trackpad.
Hana
Hana, the 2D editor, sits in the same shell with panels suited to 2D work.
-
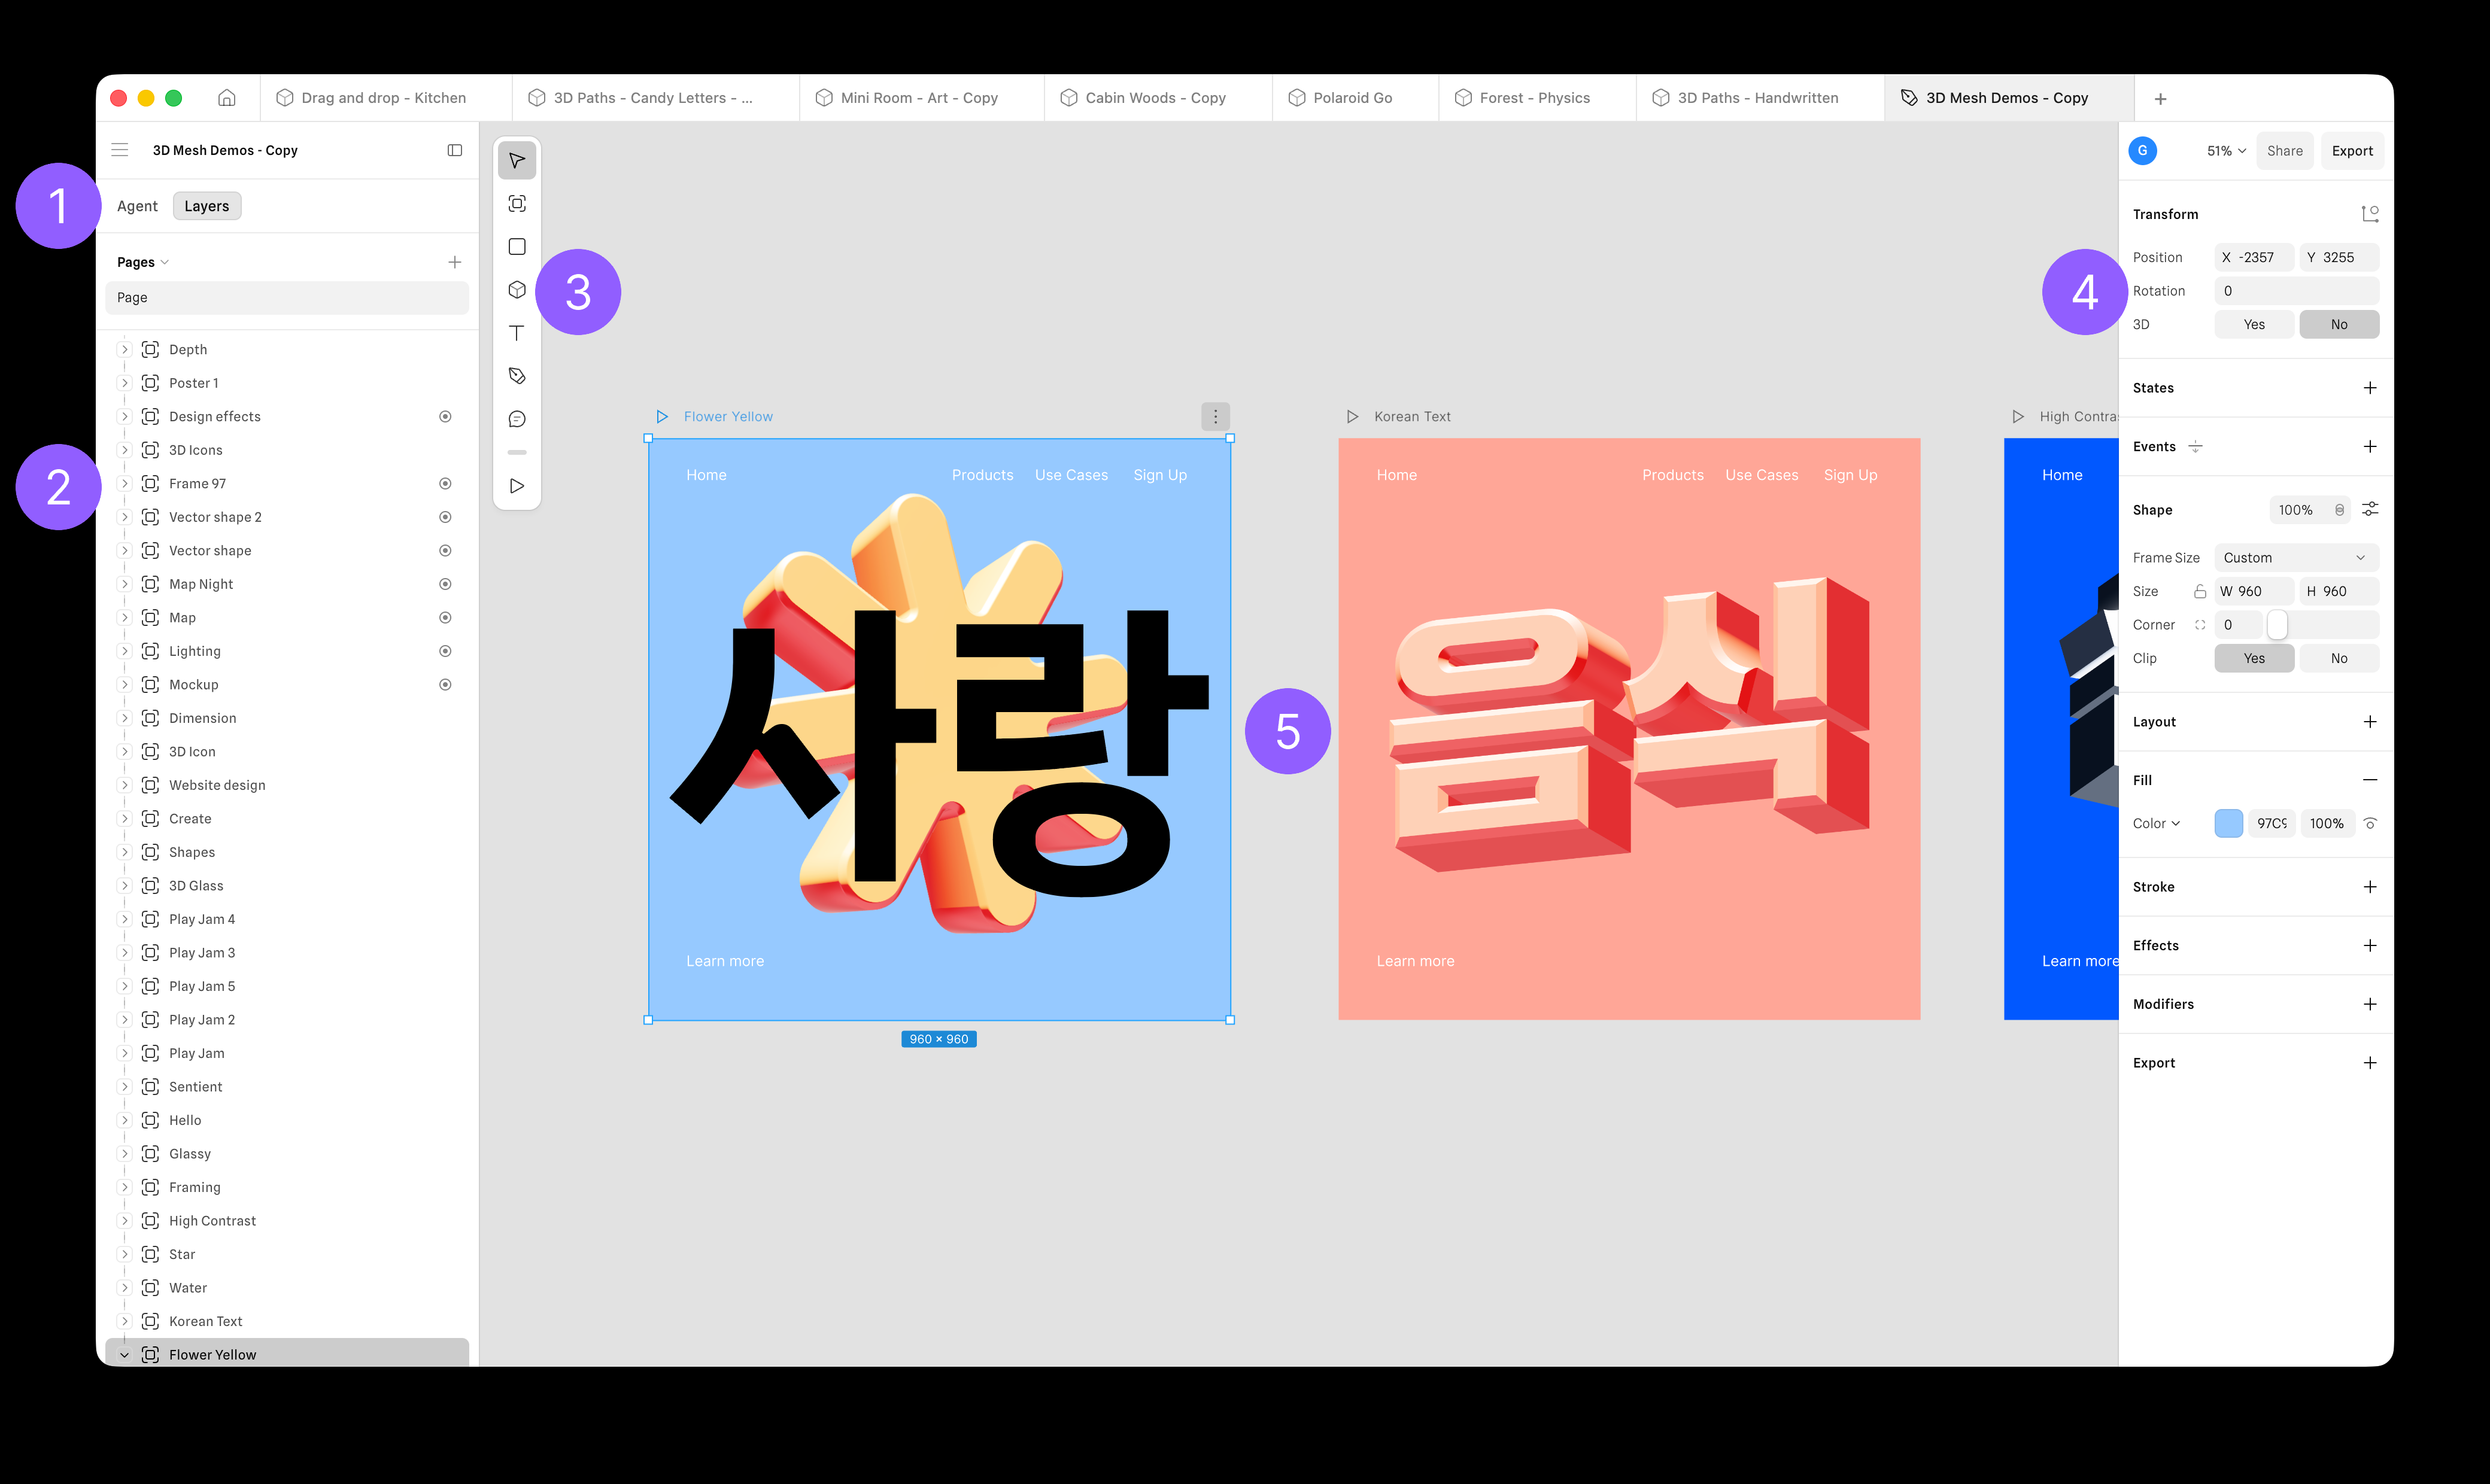
The sidebar's two tabs: Agent, Hana's AI assistant, and Layers, the document tree.
-
Pages divide a file into separate canvases — think of them as the documents inside one file. Below them, the layer tree lists every frame and shape on the current page.
-
The toolbar, running down the left of the canvas: selection, frames, shapes, 3D shapes, text, comments and the vector tools, with Play at the bottom to run the design the way a visitor sees it.
-
The properties panel. Transform and Shape cover position and size, Layout turns a frame into an auto layout, States and Events are where interactivity is authored, Fill, Stroke and Effects handle the look, and Export ships the frame. Zoom, Share and Export sit above it.
Auto Layout & Constraints, Interactivity in Hana, Effects in Hana
-
The canvas, holding as many frames as you like side by side. A frame is a screen or an artboard, and it's also the unit you publish — each one exports on its own.