Adding the 3D Shape Effect
- Select any shape on the canvas.
- On the Inspector panel on the right, scroll to Effects.
- Press + to add an effect and change it to 3D Shape.
- The effect appears in your Effects list, where it can be enabled/disabled or reordered.
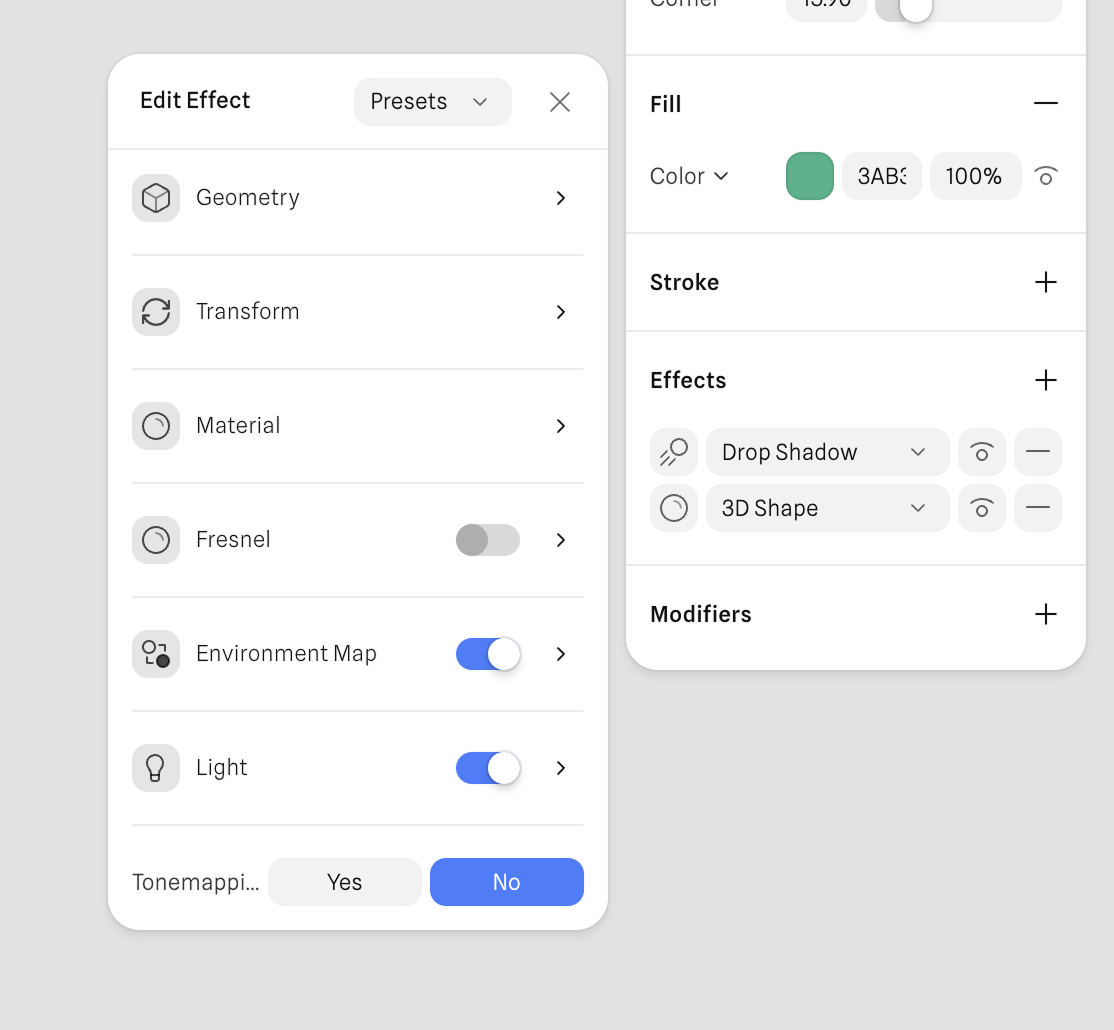
3D Shape Settings
After enabling the 3D Shape effect, you’ll see properties you can adjust:Geometry
The Geometry controls define the underlying 3D shape created by the 3D Shape effect. These settings determine the object’s extrusion, smoothness, beveling, and how the final mesh is constructed.- Geometry – Selects the base mesh type (e.g., Custom). This defines how the shape is generated. It can be Custom, which uses your 2D vector shapes, or you can pick set 3D objects like a Sphere or a Torus.
- Scale – Adjusts the overall size of the extruded 3D geometry.
- Depth – Controls how far the original 2D shape extrudes into 3D space.
-
Center – Determines whether the extrusion expands outward from the center.
- Yes - keeps the shape centered
- No - extrudes in one direction
- Bevel Size – Sets the thickness of the beveled edge. Higher values create softer, rounder edges.
- Bevel Type – Controls the bevel profile (e.g., Round, Flat, etc.).
- Bevel Sides – Sets the number of segments used to smooth the bevel. More sides produce smoother curves but can also have performance impact.
- Smooth Angle – Determines how shading transitions across angled surfaces. Higher values reduce visible hard edges.
- Subdivision – Increases mesh resolution for smoother results. Higher values improve quality at the cost of performance.
Transform
Transform controls modify the rotation and perspective of the 3D Shape.- Rotation (X, Y, Z) – Rotates the extruded object around each axis.
- Perspective – Adds perspective skew, enhancing the sense of depth or camera tilt.
Material
These settings define how the surface reacts to lighting, reflection, transparency, and refraction.-
Roughness – Controls surface glossiness.
- Lower values = shiny
- Higher values = matte
- Metalness – Adds metallic reflectivity, making the material behave like metal.
- Reflectivity – Adjusts how strongly the object reflects the environment and light sources.
- Glass – Introduces transparency and subtle refraction effects for glass-like materials.
- Aberration – Adds chromatic aberration, creating color fringing along edges.
- Thickness – Sets the internal thickness of transparent materials, affecting refraction intensity.
- Refraction – Controls how much light bends through glass-like surfaces.
- Blur – Softens reflections for frosted or diffused surfaces.
Fresnel
The Fresnel effect adds a highlight around the edges of the object based on its viewing angle. When turned on, additional Fresnel parameters become available (intensity, scale, color, etc).Environment Map
Environment Maps provide image-based lighting and reflections using an HDRI texture.- Image – Selects the HDRI environment used for lighting and reflections. You can upload your own or pick one from the presets.
- Rotation (X, Y, Z) – Rotates the environment image to control how reflections and lighting appear on the object.
Light
Light controls define how the object responds to directional and ambient lighting.- Intensity – Sets the brightness of the main light source.
- Color – Defines the color of the main light.
-
Shadow Color – Determines shadow tint.
- Auto - generates a color automatically
- Custom - allows manual selection
- Ambient Intensity – Controls the amount of ambient light in the scene.
- Ambient Color – Sets the color of the ambient light.
- Height – Moves the light source up or down in the scene.
- Direction – Rotates the light direction, affecting where highlights and shadows fall.
Tonemapping
Enables or disables Tonemapping for the selected object or effect.Tonemapping adjusts how exposure, brightness, and contrast are rendered, and can help achieve more balanced or stylized visuals.
Interactivity
All 3D Shape parameters are fully interactive and can be controlled through Hana’s events and actions system. This means properties like Depth, Bevel Size, Smoothness, Rotation, Material settings, and more can respond to user input in real time. With interactivity enabled, you can:- Animate 3D Shapes with state transitions
- Adjust 3D Shape properties on hover (e.g., increase depth or bevel for a pressed-in effect)
- Trigger changes on click (e.g., animate rotation or material highlights)
Performance Notes
3D Shape is optimized for real-time rendering.However, using many high-detail shapes with large bevels or high smoothness may increase GPU load, especially on mobile and lower end devices.
Summary
The 3D Shape effect brings easy, intuitive depth to your designs in Hana.Whether you’re building UIs, interactive experiences, or stylized graphics, 3D Shape gives you accessible control over dimensional appearance without requiring complex modeling.