Requirements
Follow the steps below to get set up to use the Spline Android Runtime.1. Download and Install Android Studio
We recommend that you use the latest stable version of Android Studio.
- Download the latest versions of Android Studio from the Android Developer website.
Getting Started
Follow the steps below to get started using native 3D embeds on your Kotlin or Java projects with Spline Android Runtime.Platform Support
We recommend Android 10.0+
Language and Libraries Support
The Spline Android Runtime can be used with Kotlin and Java.Android Studio Simulator
The performance on the Android Studio simulator is not representative of the performance of the 3D scene on the final app running on physical devices. Depending on your development hardware, the Android simulator sometimes uses only the CPU (lower) or GPU (faster) for rendering graphics. However, the 3D scenes on your device will always use the GPU.1. Adding the Spline Android Runtime
Open your project’sbuild.gradle.kts file, and add this line of code under dependencies.
Copy
build.gradle.kts file, make sure to press the Sync Now button to apply the changes.
 You can find Spline’s Android runtime hosted on Maven: https://central.sonatype.com/artifact/design.spline/spline-runtime/overview
For more information, refer to Android’s documentation on Adding dependencies to your app.
You can find Spline’s Android runtime hosted on Maven: https://central.sonatype.com/artifact/design.spline/spline-runtime/overview
For more information, refer to Android’s documentation on Adding dependencies to your app.
2. Importing the Spline Android Runtime
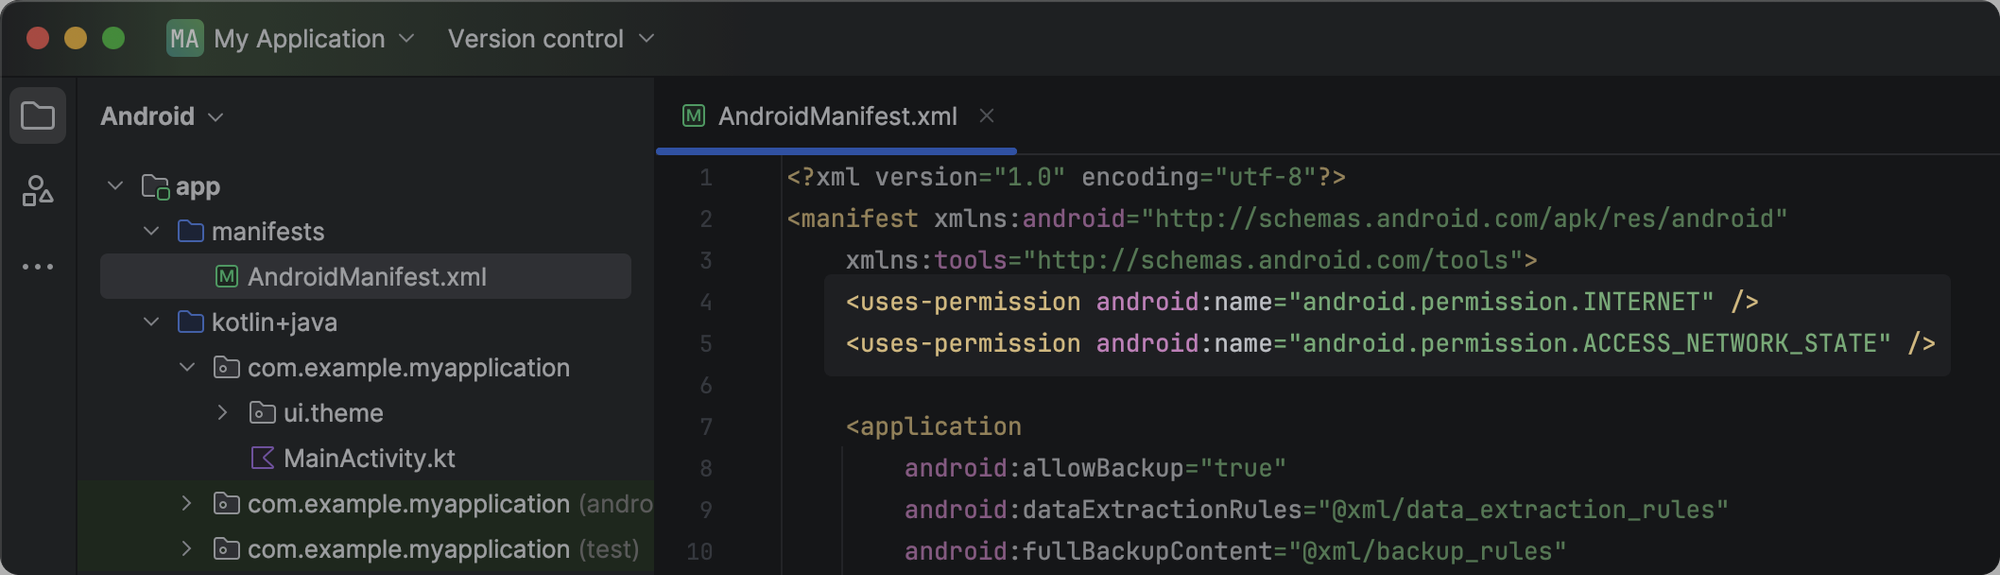
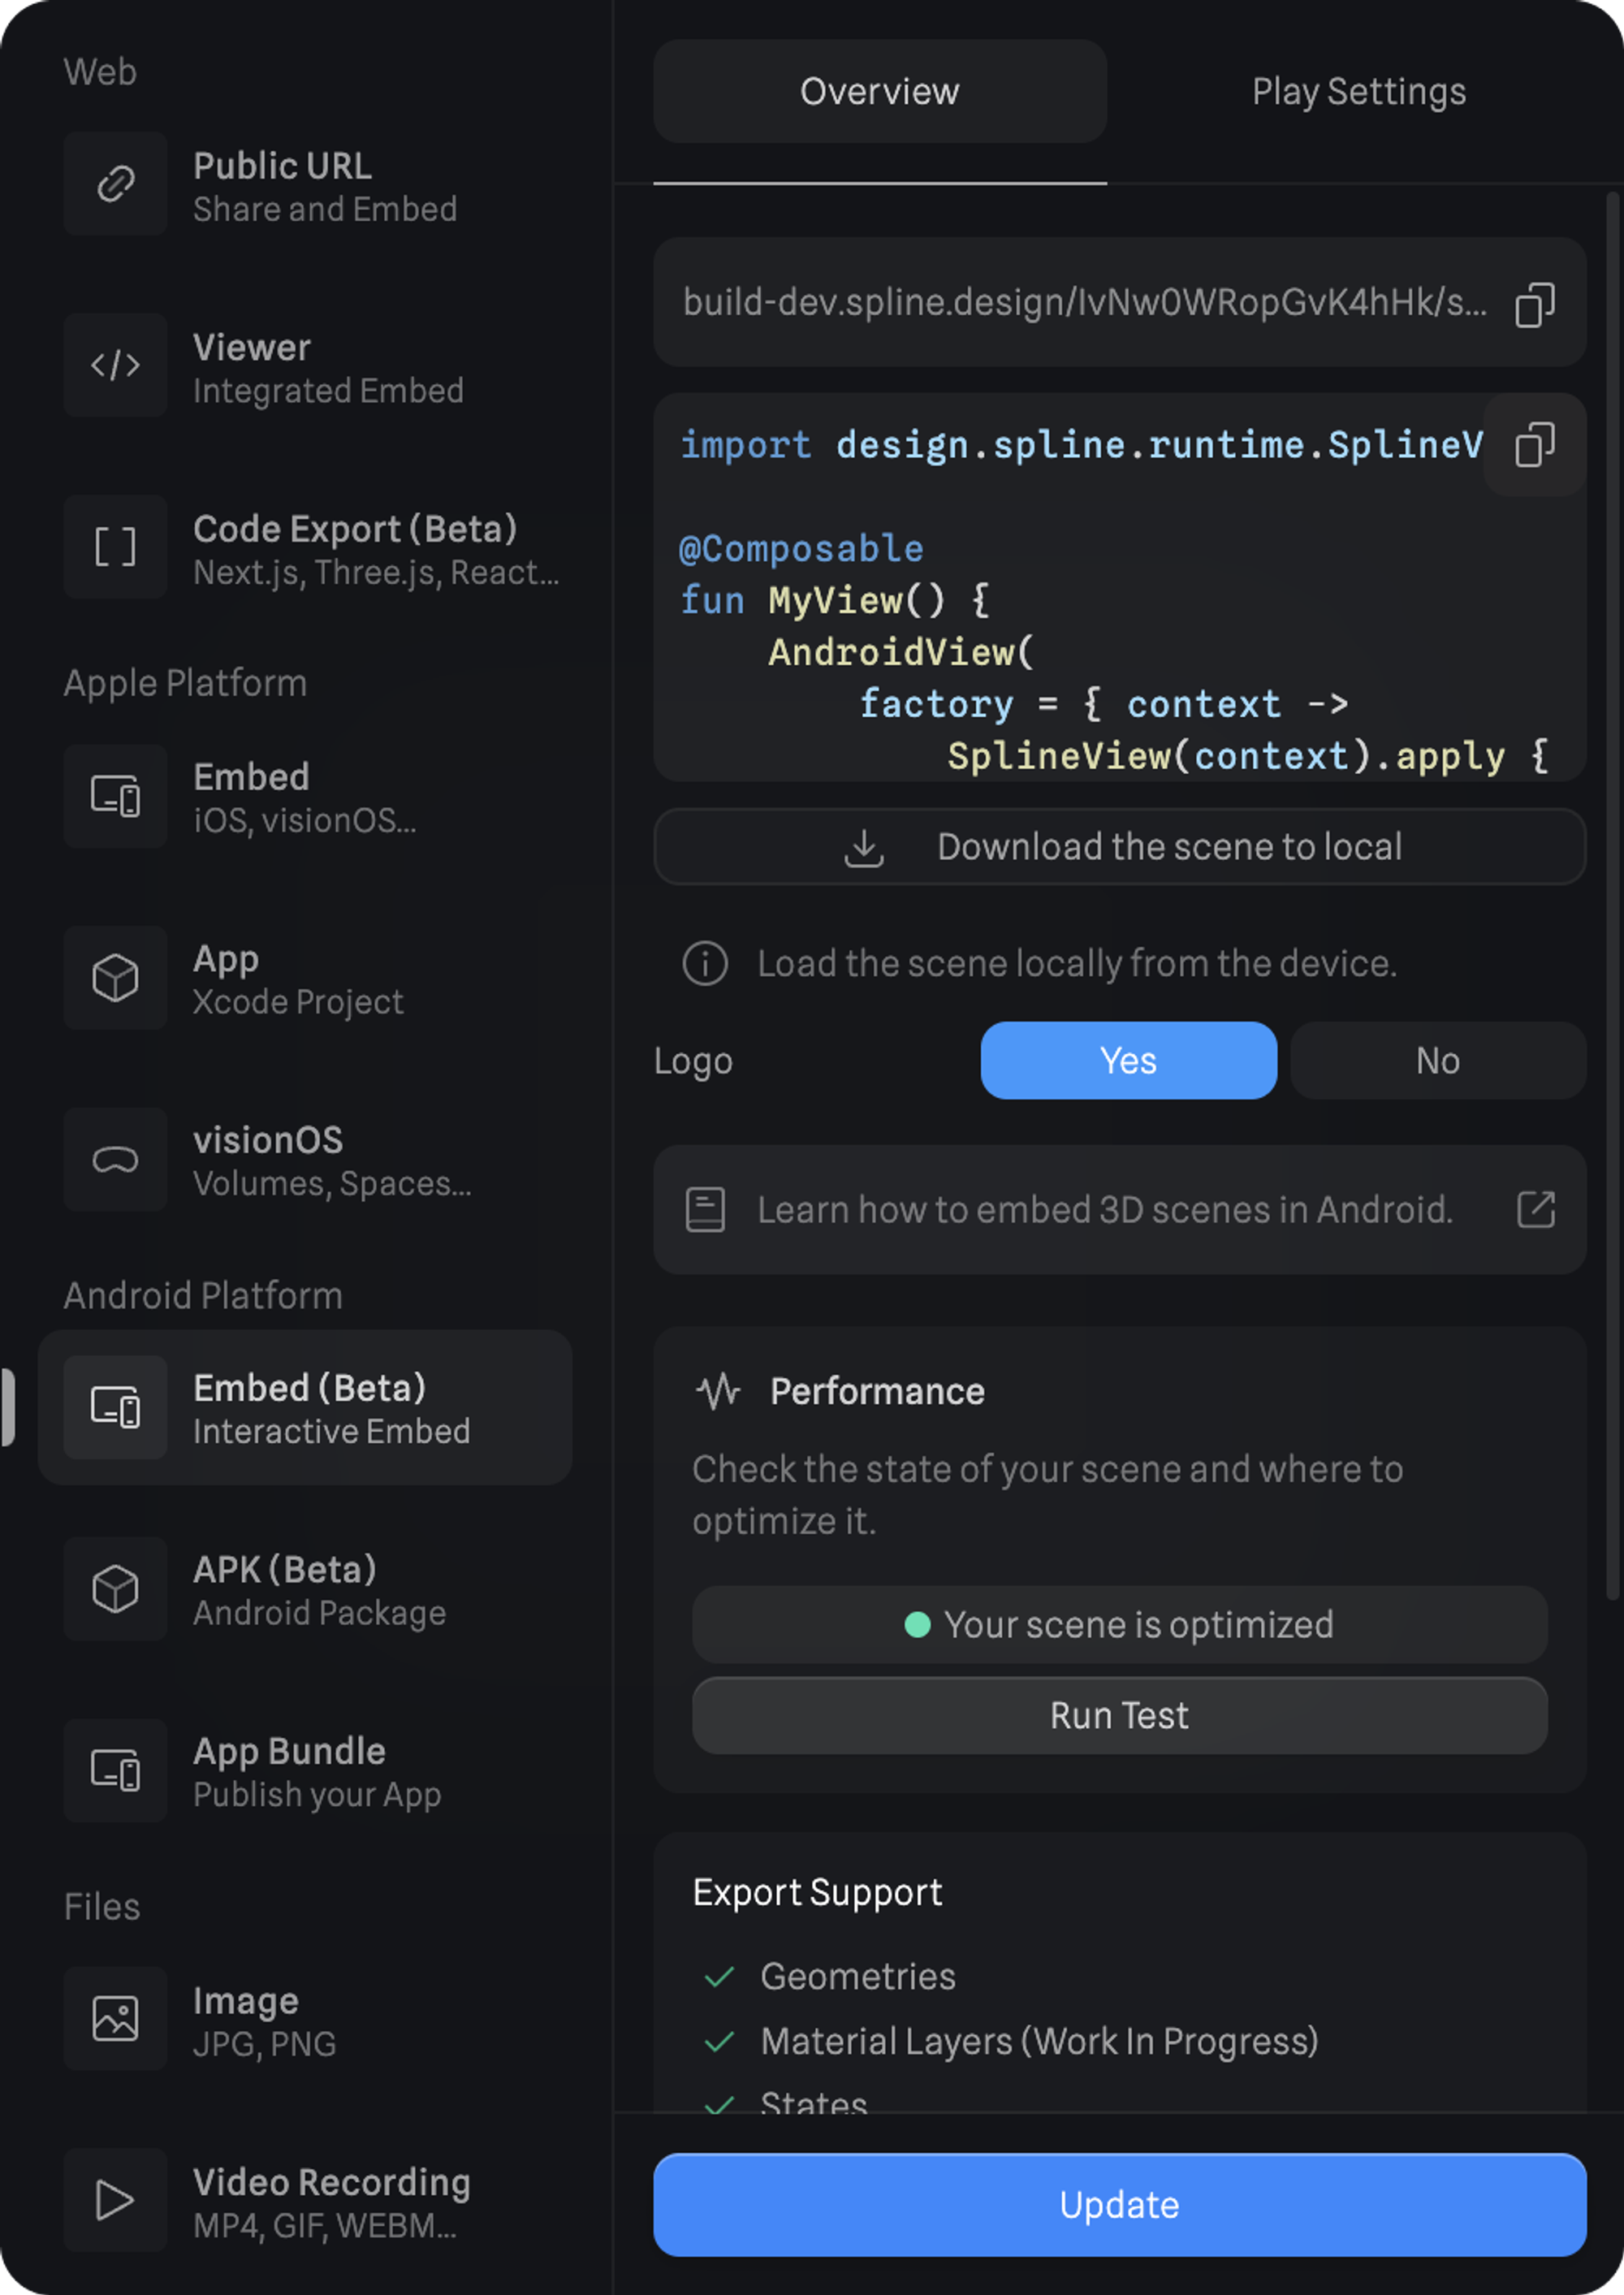
To import the Spline Android Runtime, make sure to always add the following code to the top of the file where the Spline Runtime is used.AndroidManifest.xml file inside your-app-name/manifests.
3. Using the Spline Android Runtime
3.1 Exporting from Spline
- From the top toolbar, press the
Exportbutton to open the export panel; - Under Android Platform, select the
Embedoption.
Update button to see all the updates made to the scene in your app.
To load your Spline scene locally, you can use the Download the scene to local button below the code snippet.
3.2 Integrating with your Android Studio Project
Since the embedded code snippet utilizes AndroidView, ensure you include the following line in the file where you are embedding your Spline scene.From the Cloud
- Copy the code snippet and paste it on the
MainActivity.ktfile or wherever you’d like to embed the Spline scene.
- If not using local files, you can either keep the
fetching from localcode commented or remove it completely.
Locally
- Use the Download button below the code snippet to get a local copy of your Spline Scene as a
.splinecontentfile; - Import the
.splinecontentfile into your Android Studio project’syour-app-name/res/rawfolder; - Copy the code snippet and paste it on the
MainActivity.ktfile or wherever you’d like to embed the Spline scene.; - Comment out the
fetching from cloudcode and uncomment thefetching from localcode.
- When working with multiple local files, you can change the file name in
R.raw.[file-name]. If the file name isdemo.splinecontentthe code should look like:R.raw.demo - For more information on adding resources to your project, refer to Android’s documentation on App Resources.