Test the gameplay 🎮👇
Before moving on with the documentation, why not give the game controls a quick test below? UseW S A D keys to move the character, SPACE to jump, and ↑↓←→ keys to move the camera.
Click the embed to focus. Open the experience in a new tab HERE.
Game Controls Video Tutorial
If you prefer to follow along with a video, we’ve made this tutorial where we go through all the details of a Game Controls event.Adding a Game Controls Event
Here’s how to add a Game Controls event to an object in your scene:- Select the object that you want to control.
- On the Events panel, add a new event and select
Game Controlsfrom the dropdown menu. - Open the Game Controls event and tweak the settings to your liking.
Adjusting Character Orientation
If your character is composed of grouped objects and you notice it is moving backwards, you’ll need to make sure it is facing towards the -Z direction.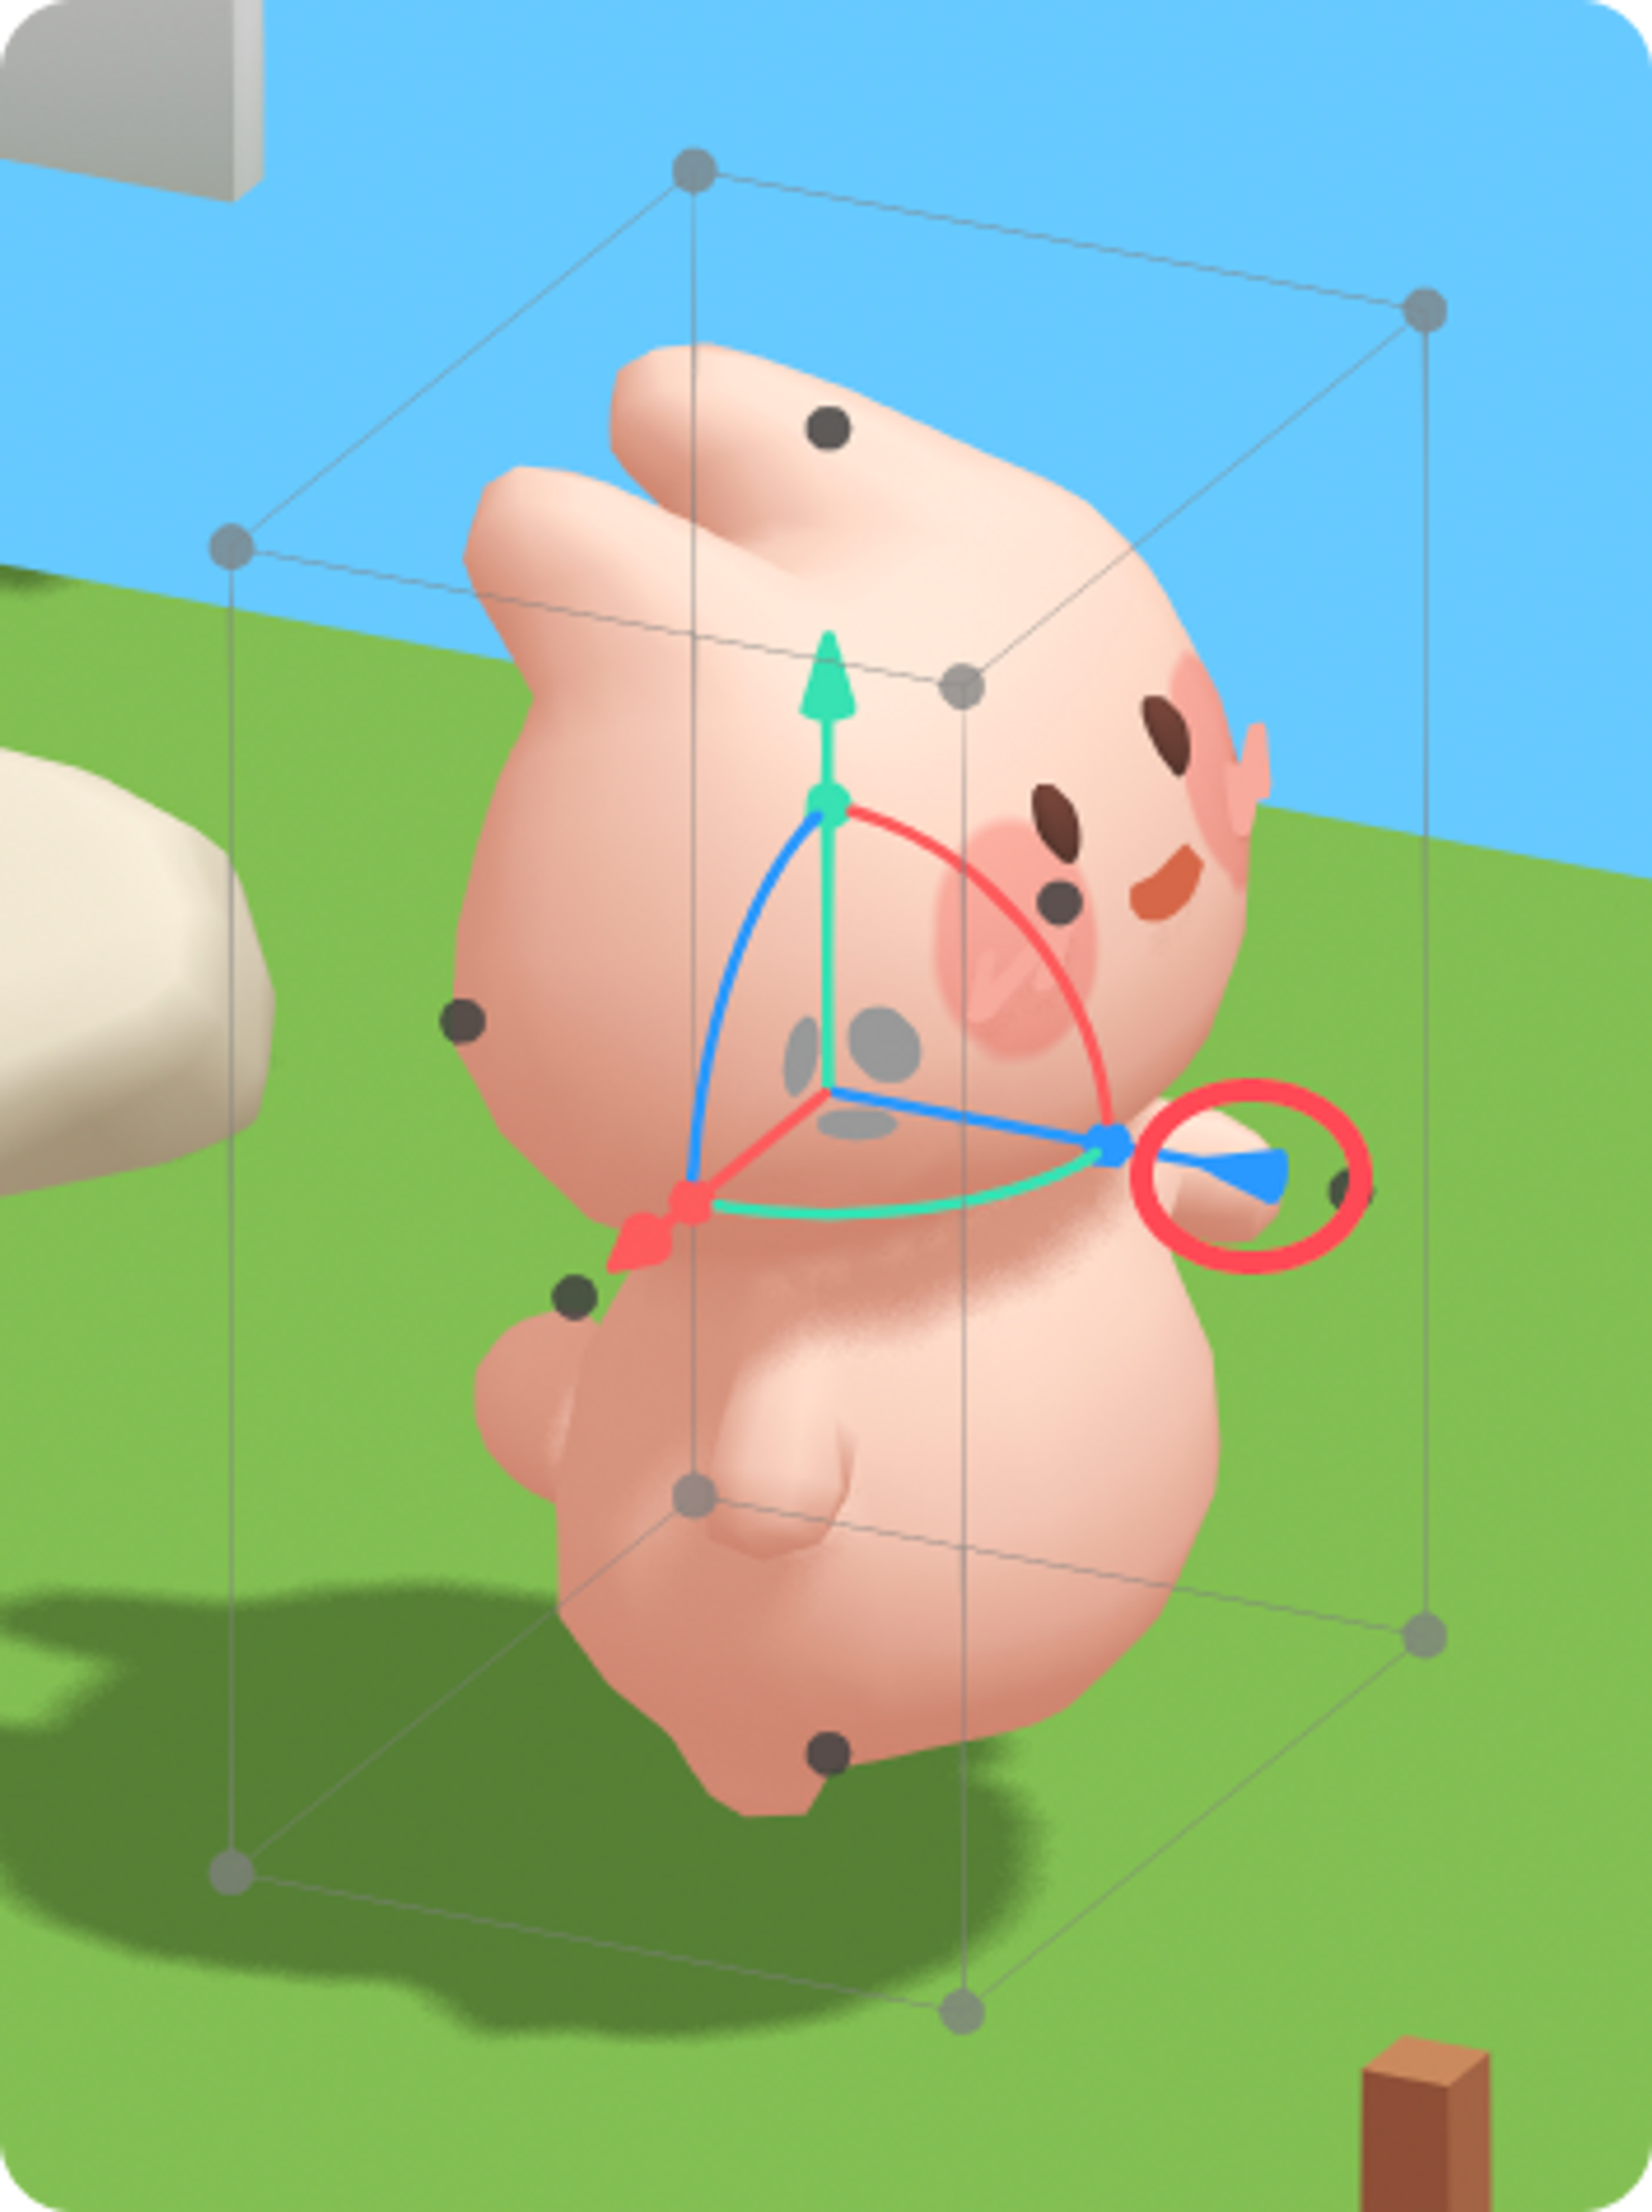 To fix this you’ll need to select all the objects inside your main group and rotate them to face the -Z direction.
This usually means rotating all the objects inside your character group by 180º degrees.
Adjusting the orientation of a character so it faces the -Z direction.
To fix this you’ll need to select all the objects inside your main group and rotate them to face the -Z direction.
This usually means rotating all the objects inside your character group by 180º degrees.
Adjusting the orientation of a character so it faces the -Z direction.
Understanding the Game Controls Settings
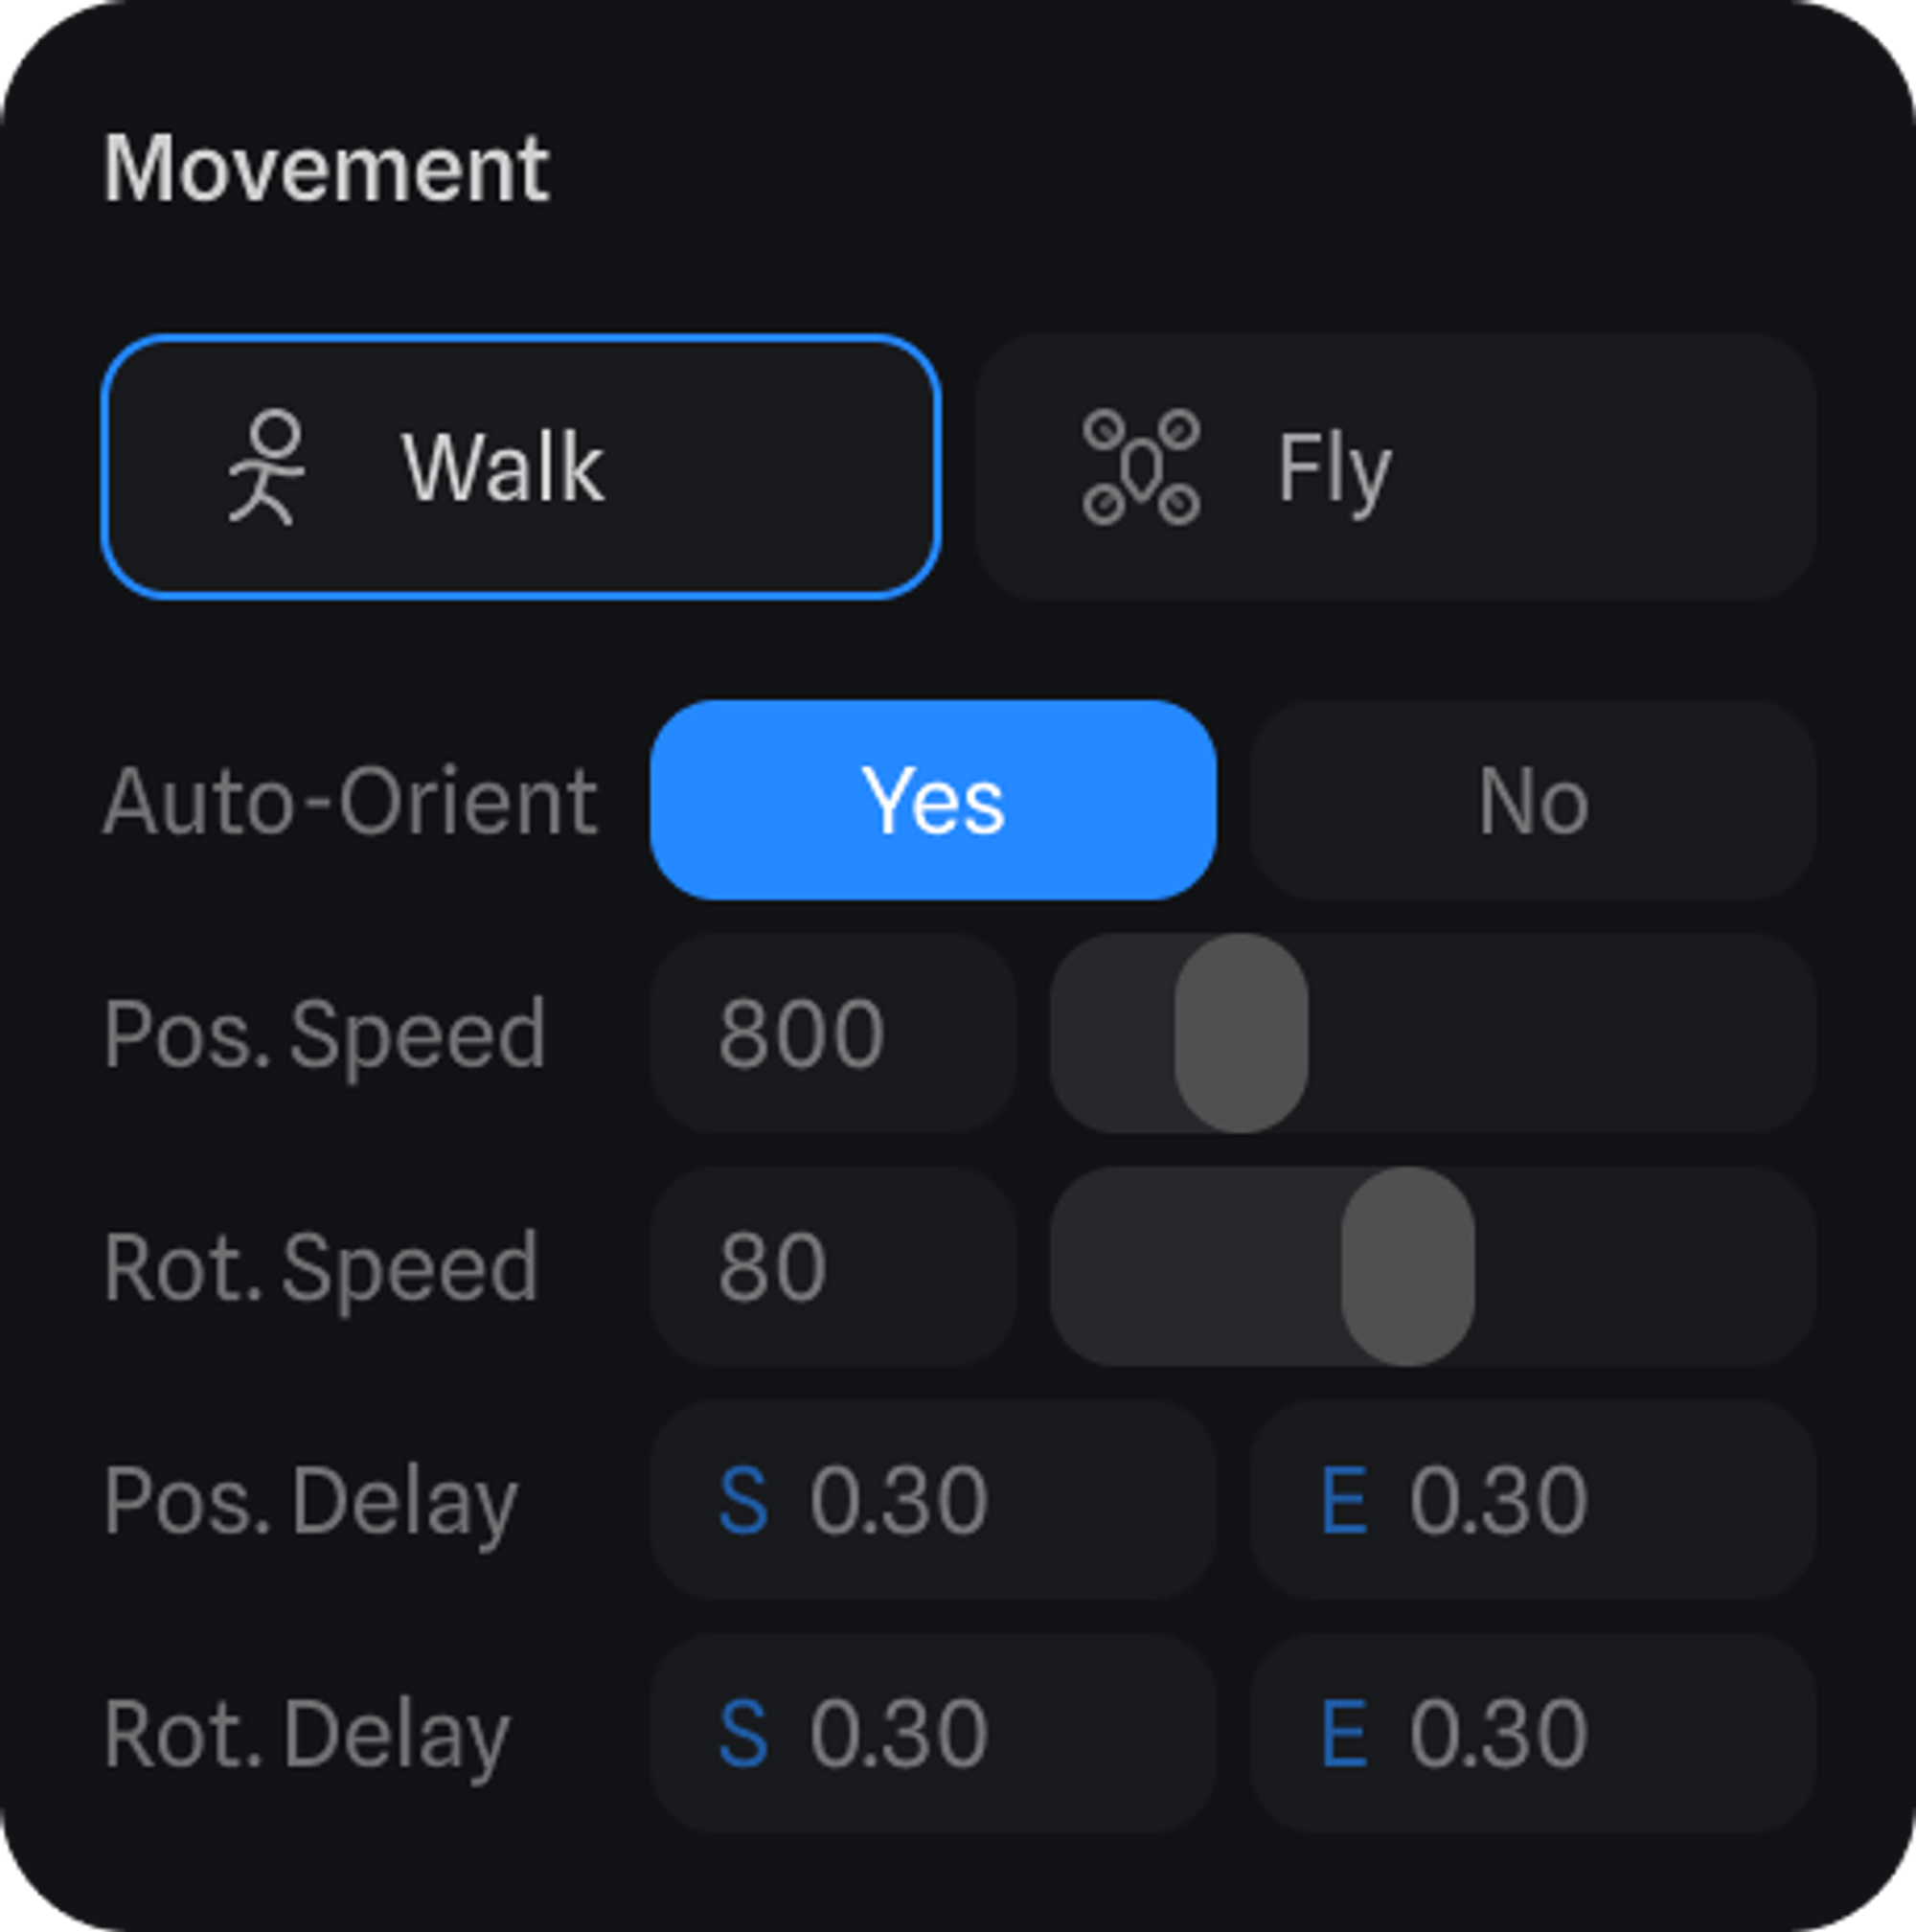
Let’s now dive deep into all the settings that can be found inside the Game Controls event, so you can adjust them to properly match the experience you’re building.Movement
In Movement, you can define how your character will be moving around your scene. Walk or Fly are the two movement modes of a Game Controls event. Movement Mode- Walk - is used for experiences where you move on surfaces.
- Fly - is used for experiences where you fly around your scene.
Controls
To create unique game mechanics controls can be adjusted. Desktop Controls is where we can define what keys are going to be used to control our character and what each of them does. Remapping a key and changing its action. Rotate By Define how you can rotate the camera. Either by using the Mouse, the Arrow keys, or both. Keyboard Keys Once you select a key, you can either press another key to assign it or change the action of that key on the dropdown below. If you’ve made too many changes, the reset button (on the top right) will let you reset to the default keys. Here’s a list of all the behaviors and their default keys:Multiple Game Controls Events
If you have multiple Game Controls events in your scene, only one of them will be the one where you can define the desktop and mobile controls. So on every new Game Controls event, you create, you’ll see this warning, letting you know that the event you’re editing is not the main Game Controls event. But you can always press the button below to make it the main one and edit the controls from there.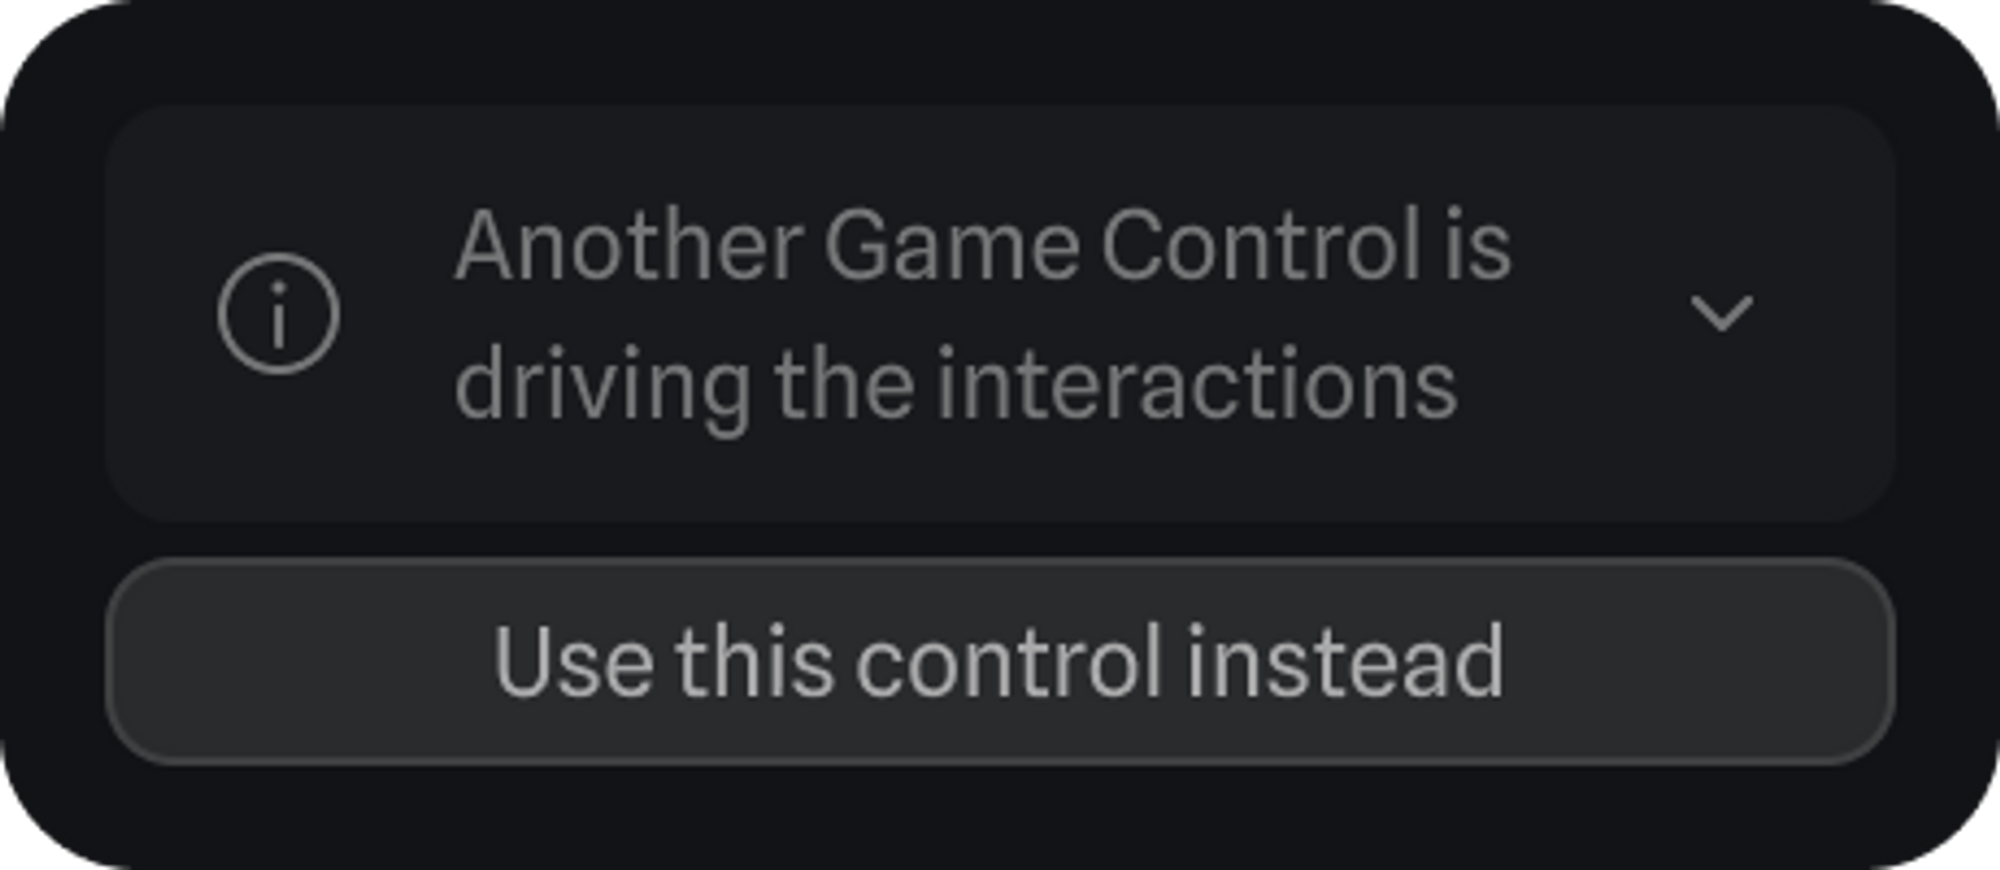
Touch Controls
Touch Controls lets you define the controls of your experience on touch-based devices like phones and tablets. How touch controls look on a touch-based device. Rotate By Define how you can rotate the camera. Either by dragging on the screen or by using a joystick. Joysticks and Buttons Position Choose where to position the joysticks and buttons for Move, Rotate (only visible if Rotate By is set to Joystick), and Jump. The representation you see is how they will be positioned on the device’s screen. Offset - The space the control has from the screen edge. Button Size - The size of each control. Visibility - Defines if the selected control is always visible or becomes visible when interacted with.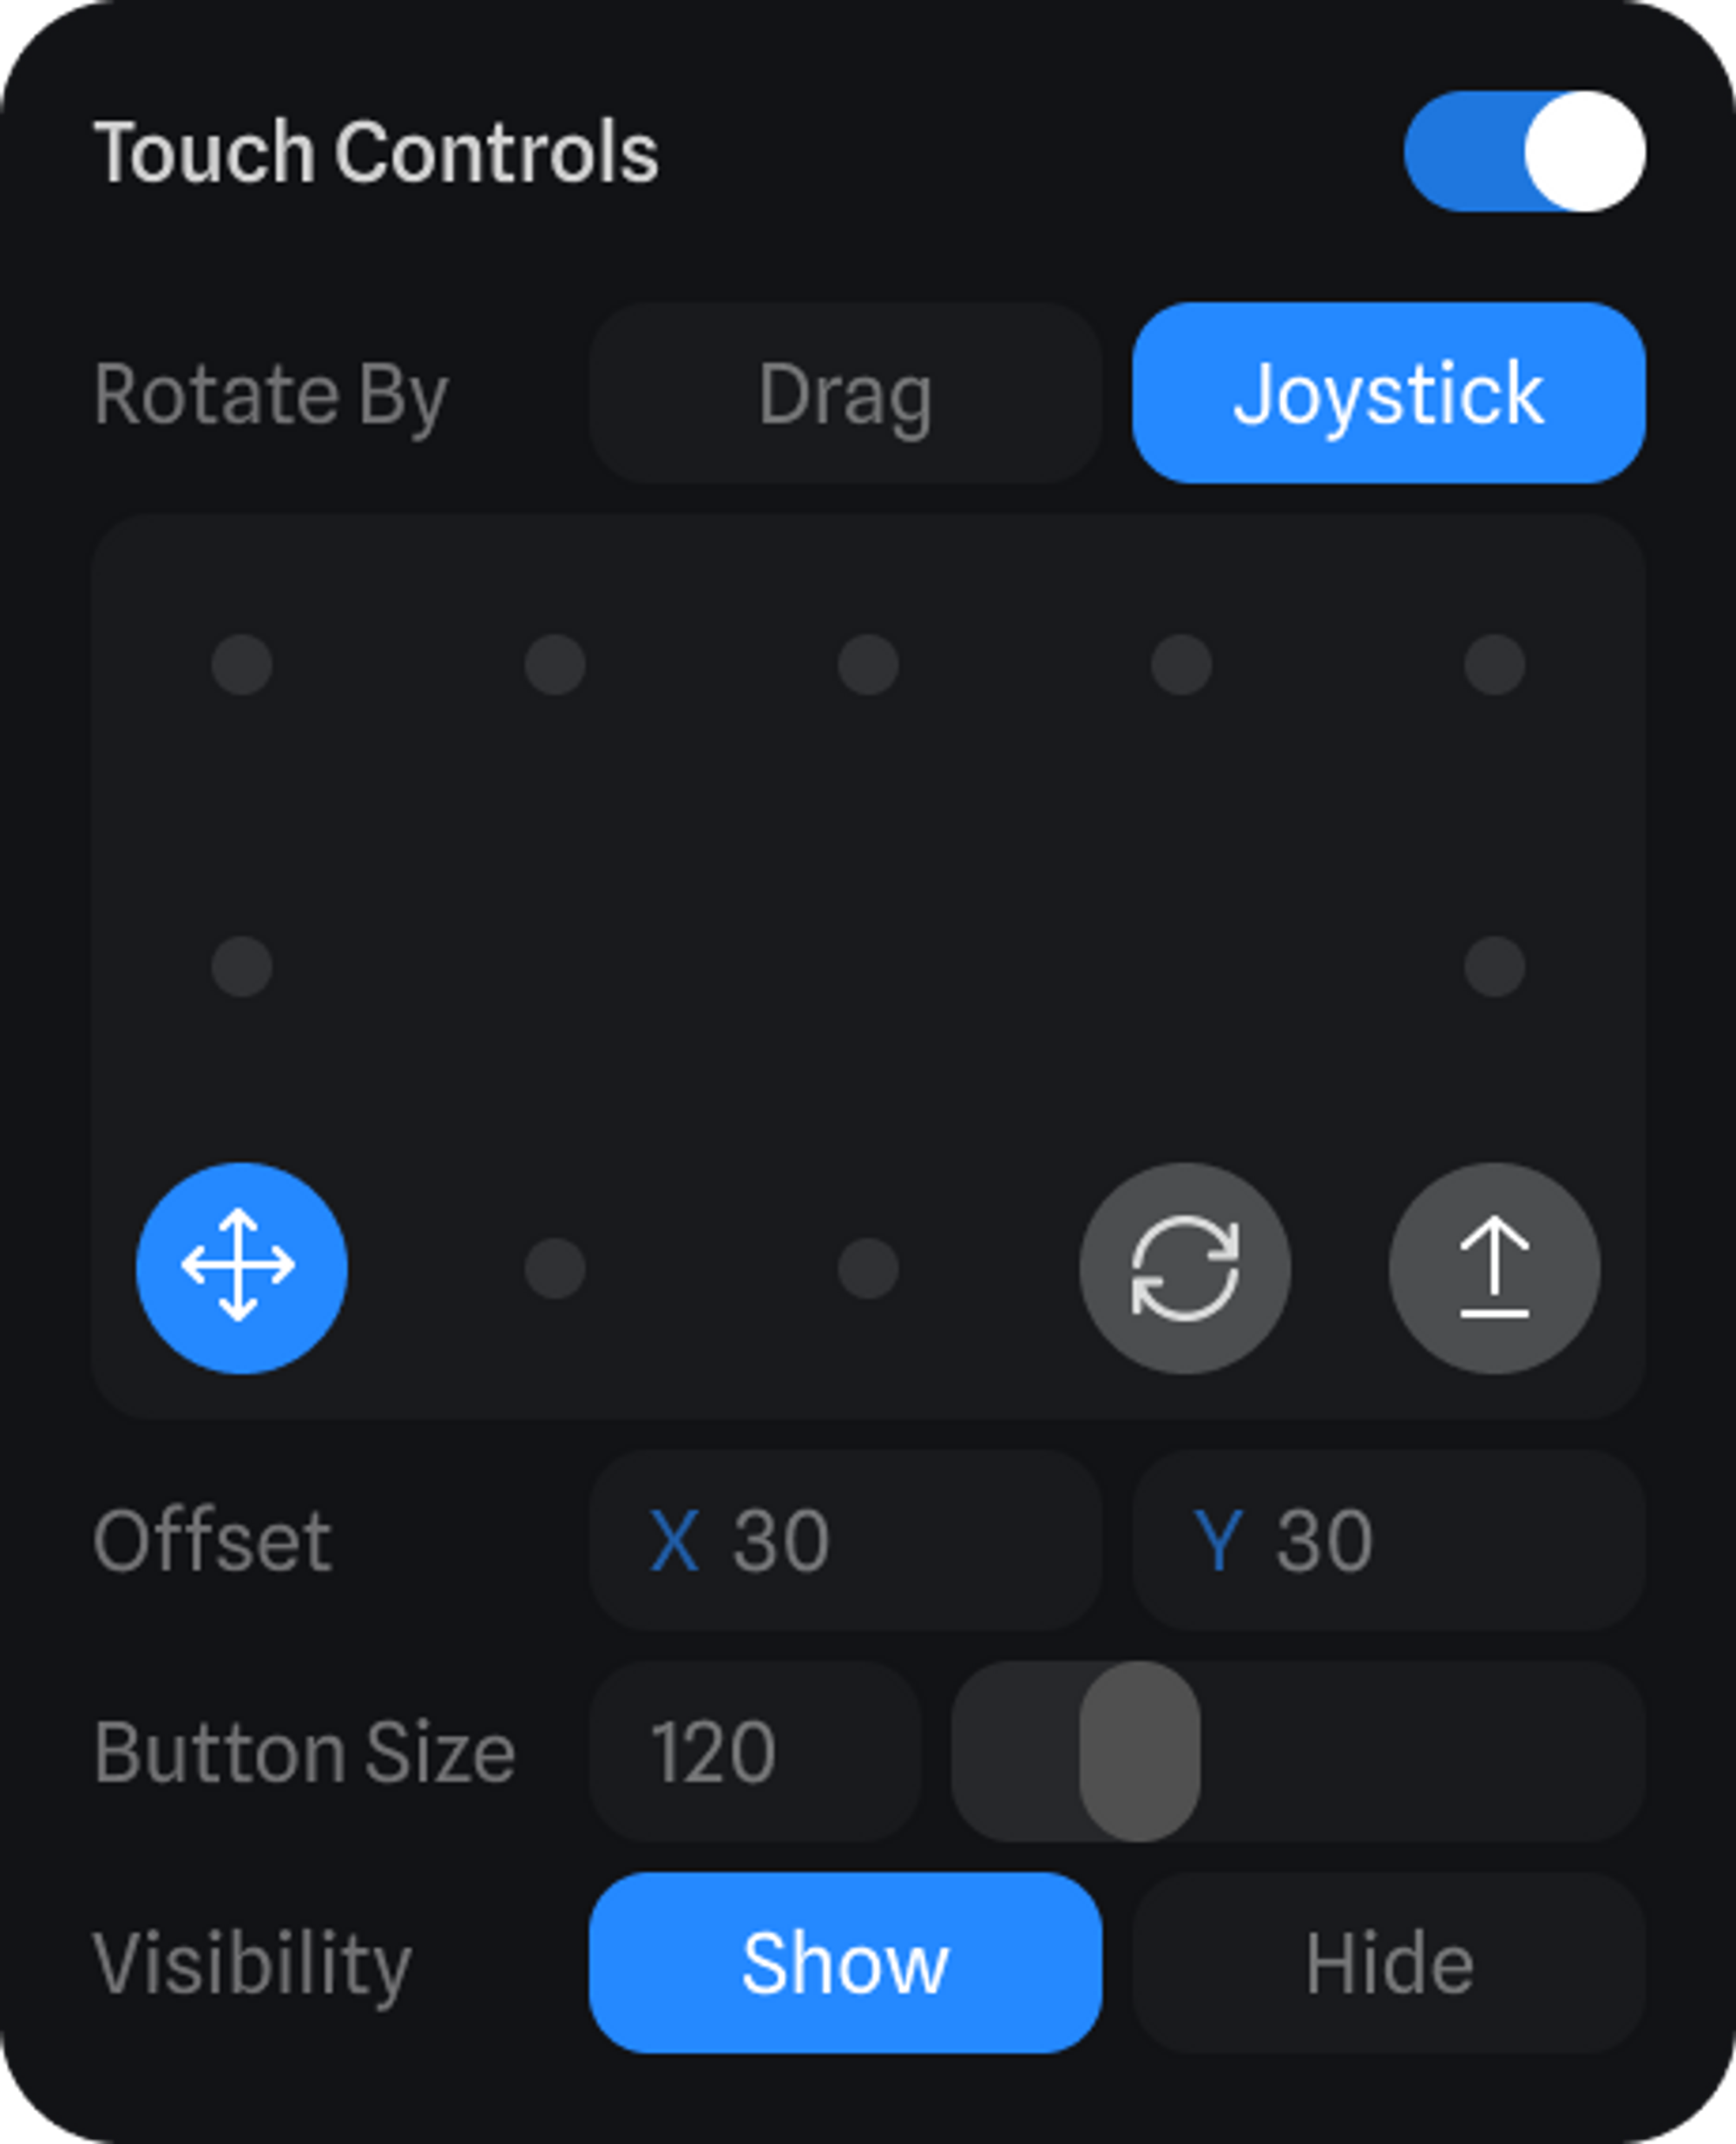
Collision
With collision, we can define how our character will collide with everything in our scene. Make changes to the collider on your character and tweak settings like Gravity, Jump Power, and the Reset Position. Resizing a capsule collider and testing it in Play Mode. Collider Define the boundaries of your character by choosing a collider like a Capsule or a Sphere, and match it perfectly by changing its size, position and rotation. Jump Define how high your character will jump. Reset Y Position Define the value on the Y axis where if the character reaches it, the scene will reset. This is useful for scenes with platforms which the character can fall from.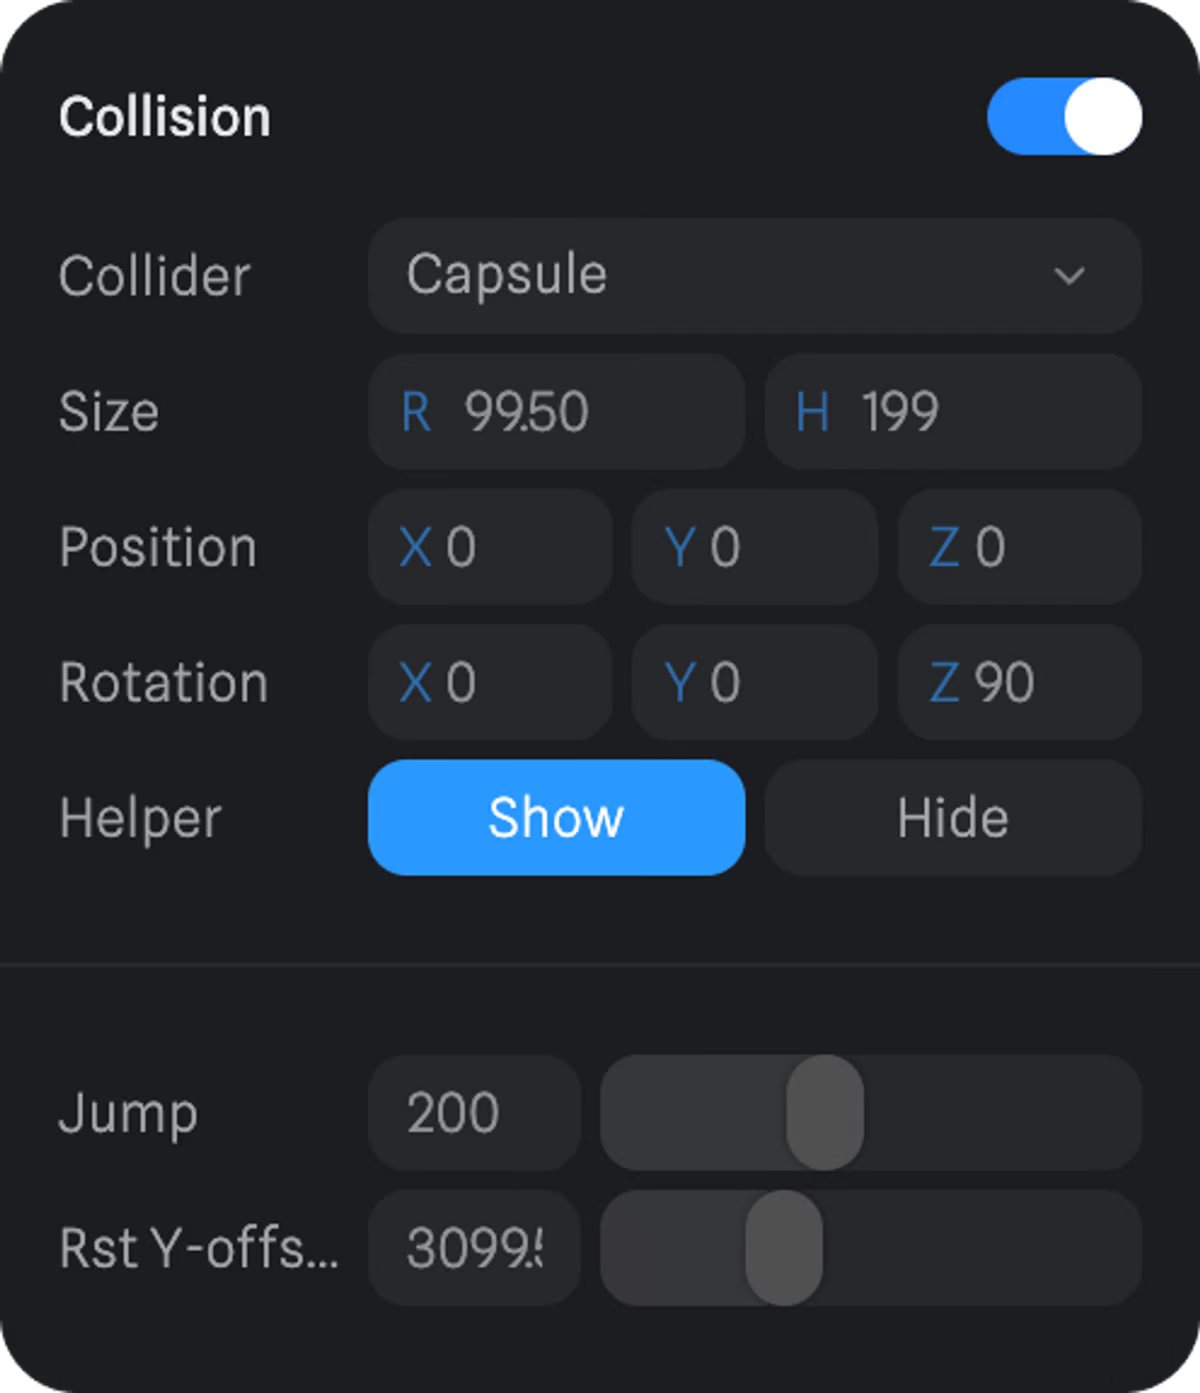 To control the Gravity of your scene
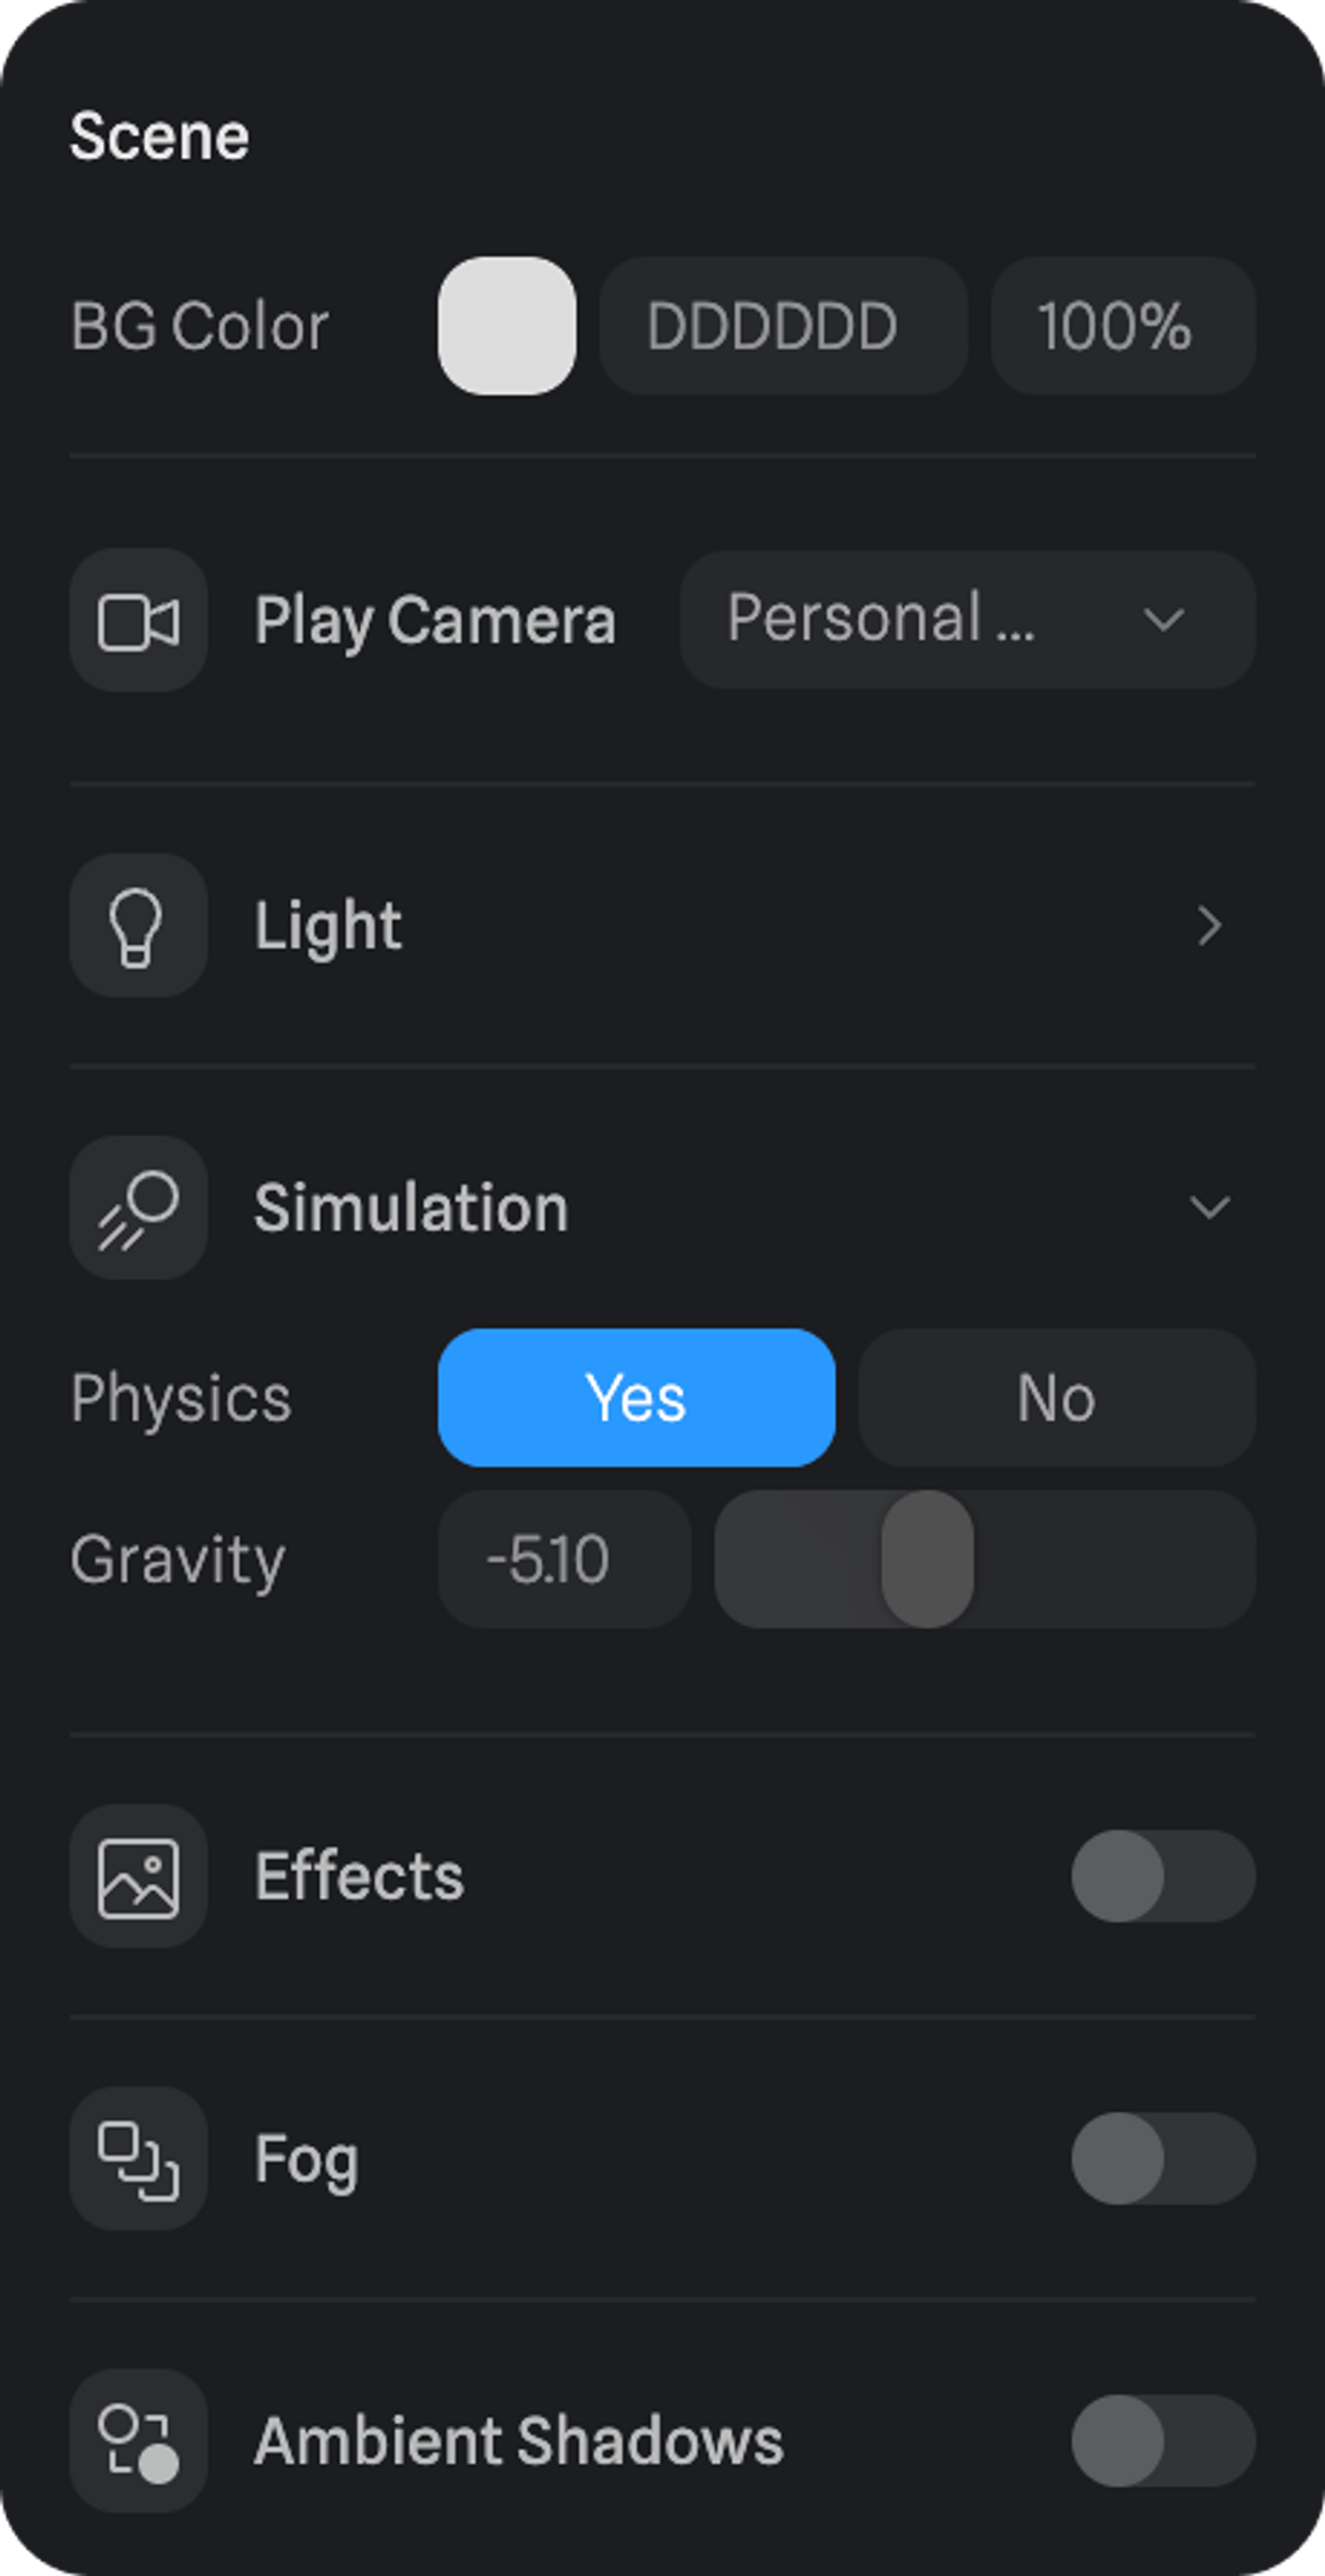
Unselect all objects and find the scene settings on the right sidebar.
On Simulation, you’ll find the Gravity property.
This affects how your character jumps and falls. As you make the value closer to 0, the character will float more.
To control the Gravity of your scene
Unselect all objects and find the scene settings on the right sidebar.
On Simulation, you’ll find the Gravity property.
This affects how your character jumps and falls. As you make the value closer to 0, the character will float more.
Click To Move - Navigation Mesh
A navigation mesh is like a map that helps characters or objects move around in a 3D environment. It’s made up of connected polygons that represent walkable areas. These polygons are like puzzle pieces that fit together, creating a navigation mesh to show where characters can go without getting stuck. When instructed to move, Characters use the navigation mesh to find the best path, avoid obstacles and move smoothly in the 3D environment. With this feature turned on, you can now press around your scene to tell your character where to move to. Click To Move is a component of the Game Controls event and you can toggle it ON from the event settings. Grid Size → How big the polygons that make up the navigation mesh are. This allows you to fine-tune your navigation mesh. Offset → Adds spacing along edges or walls so the character doesn’t walk up to them. Helper → Visibility of the wireframe of your navigation mesh. Radius → Radius of the click circle. Color → Color of the click circle.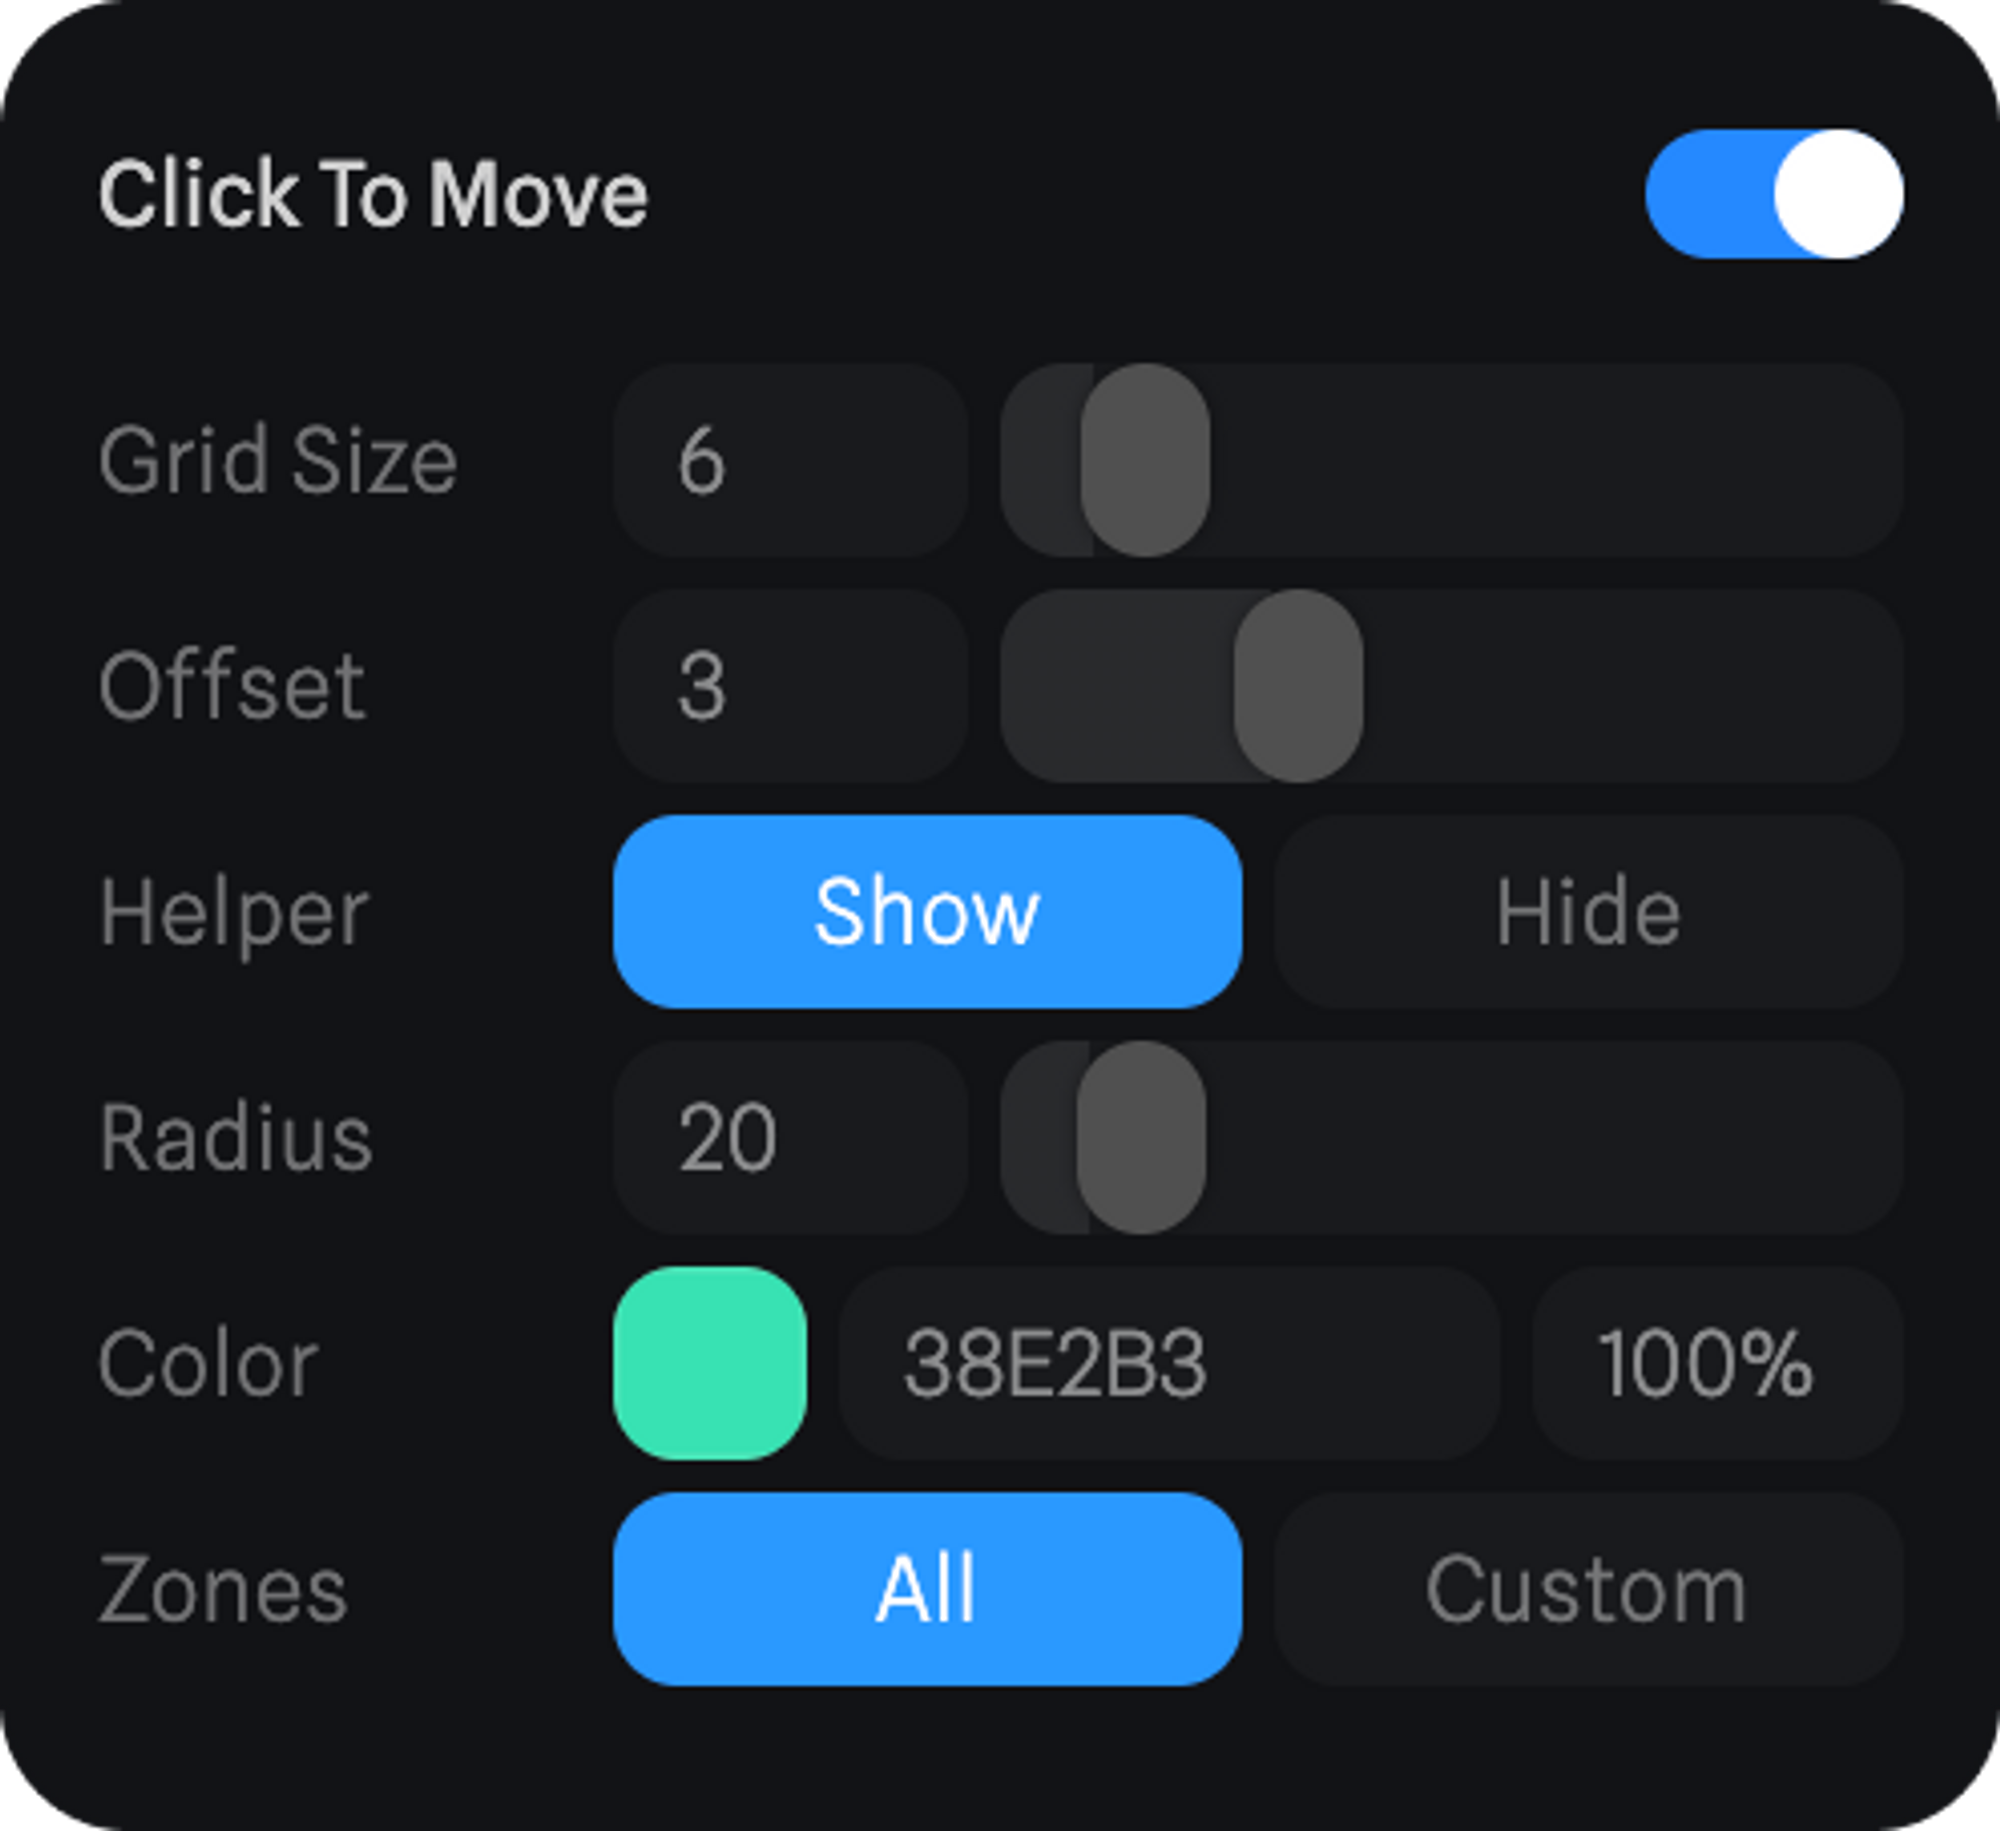
Zones
All → Will use all objects from the scene to generate the navigation mesh. Custom → Gives you control over what objects to use when generating the navigation mesh.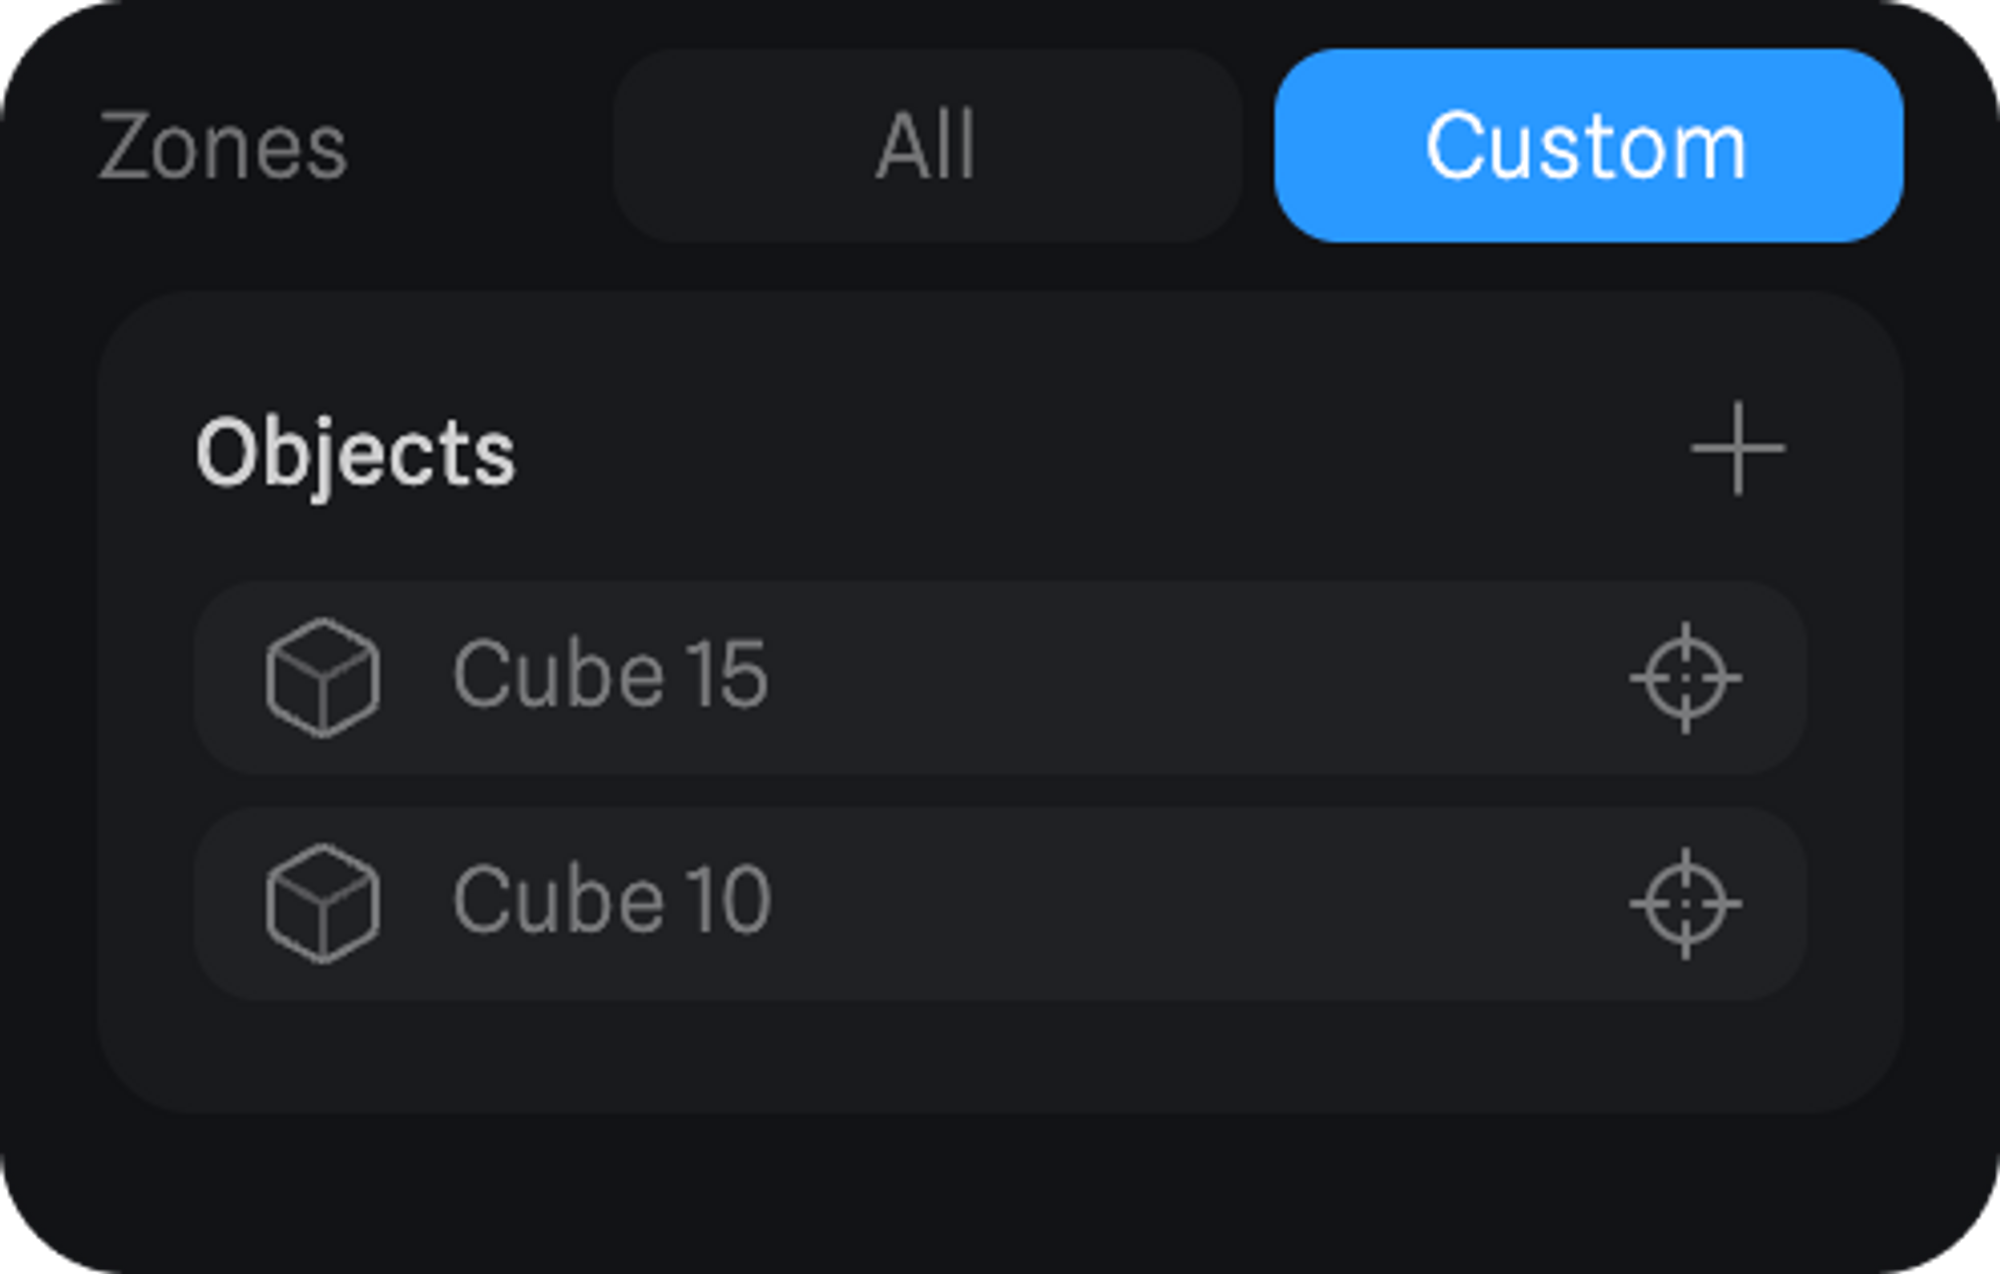
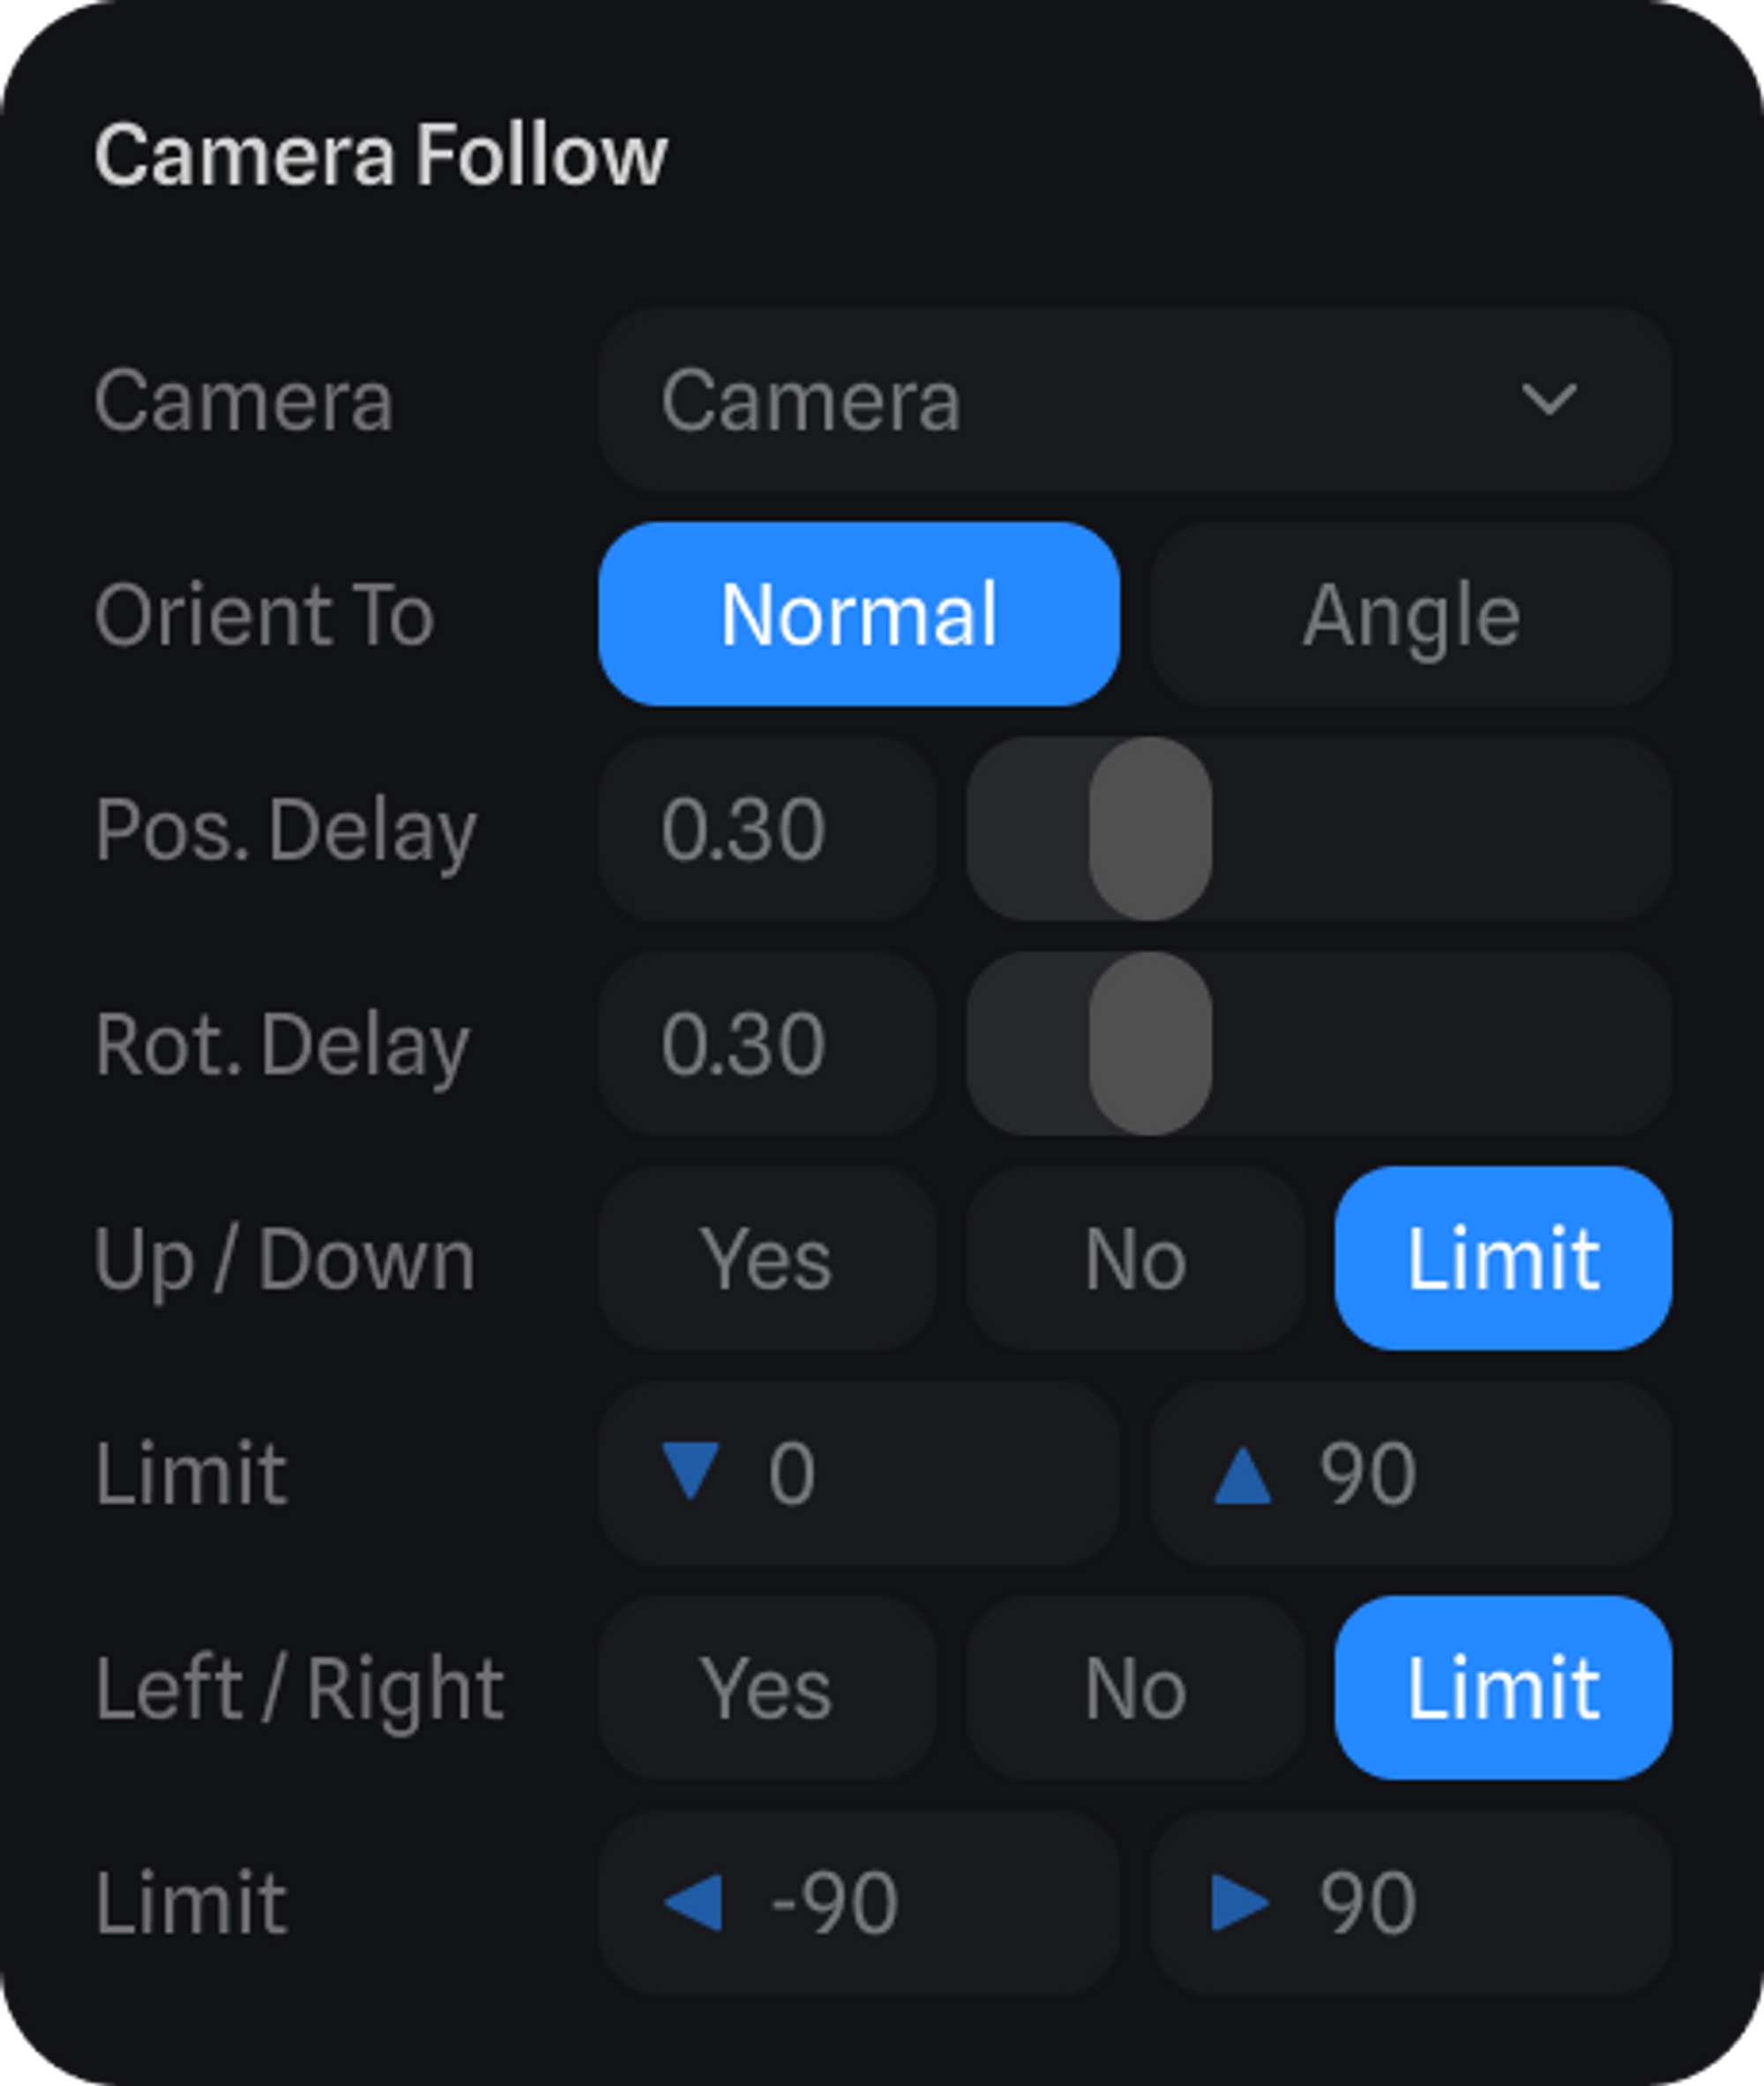
Camera Follow
If you need a camera to be following your character, this is where you can define which one will be used for it.So you stay organized, better collaborate with others and avoid accidental changes, we recommend that you create a new camera for this purpose and use your Personal Camera to move around in the editor.
 Matching Cameras
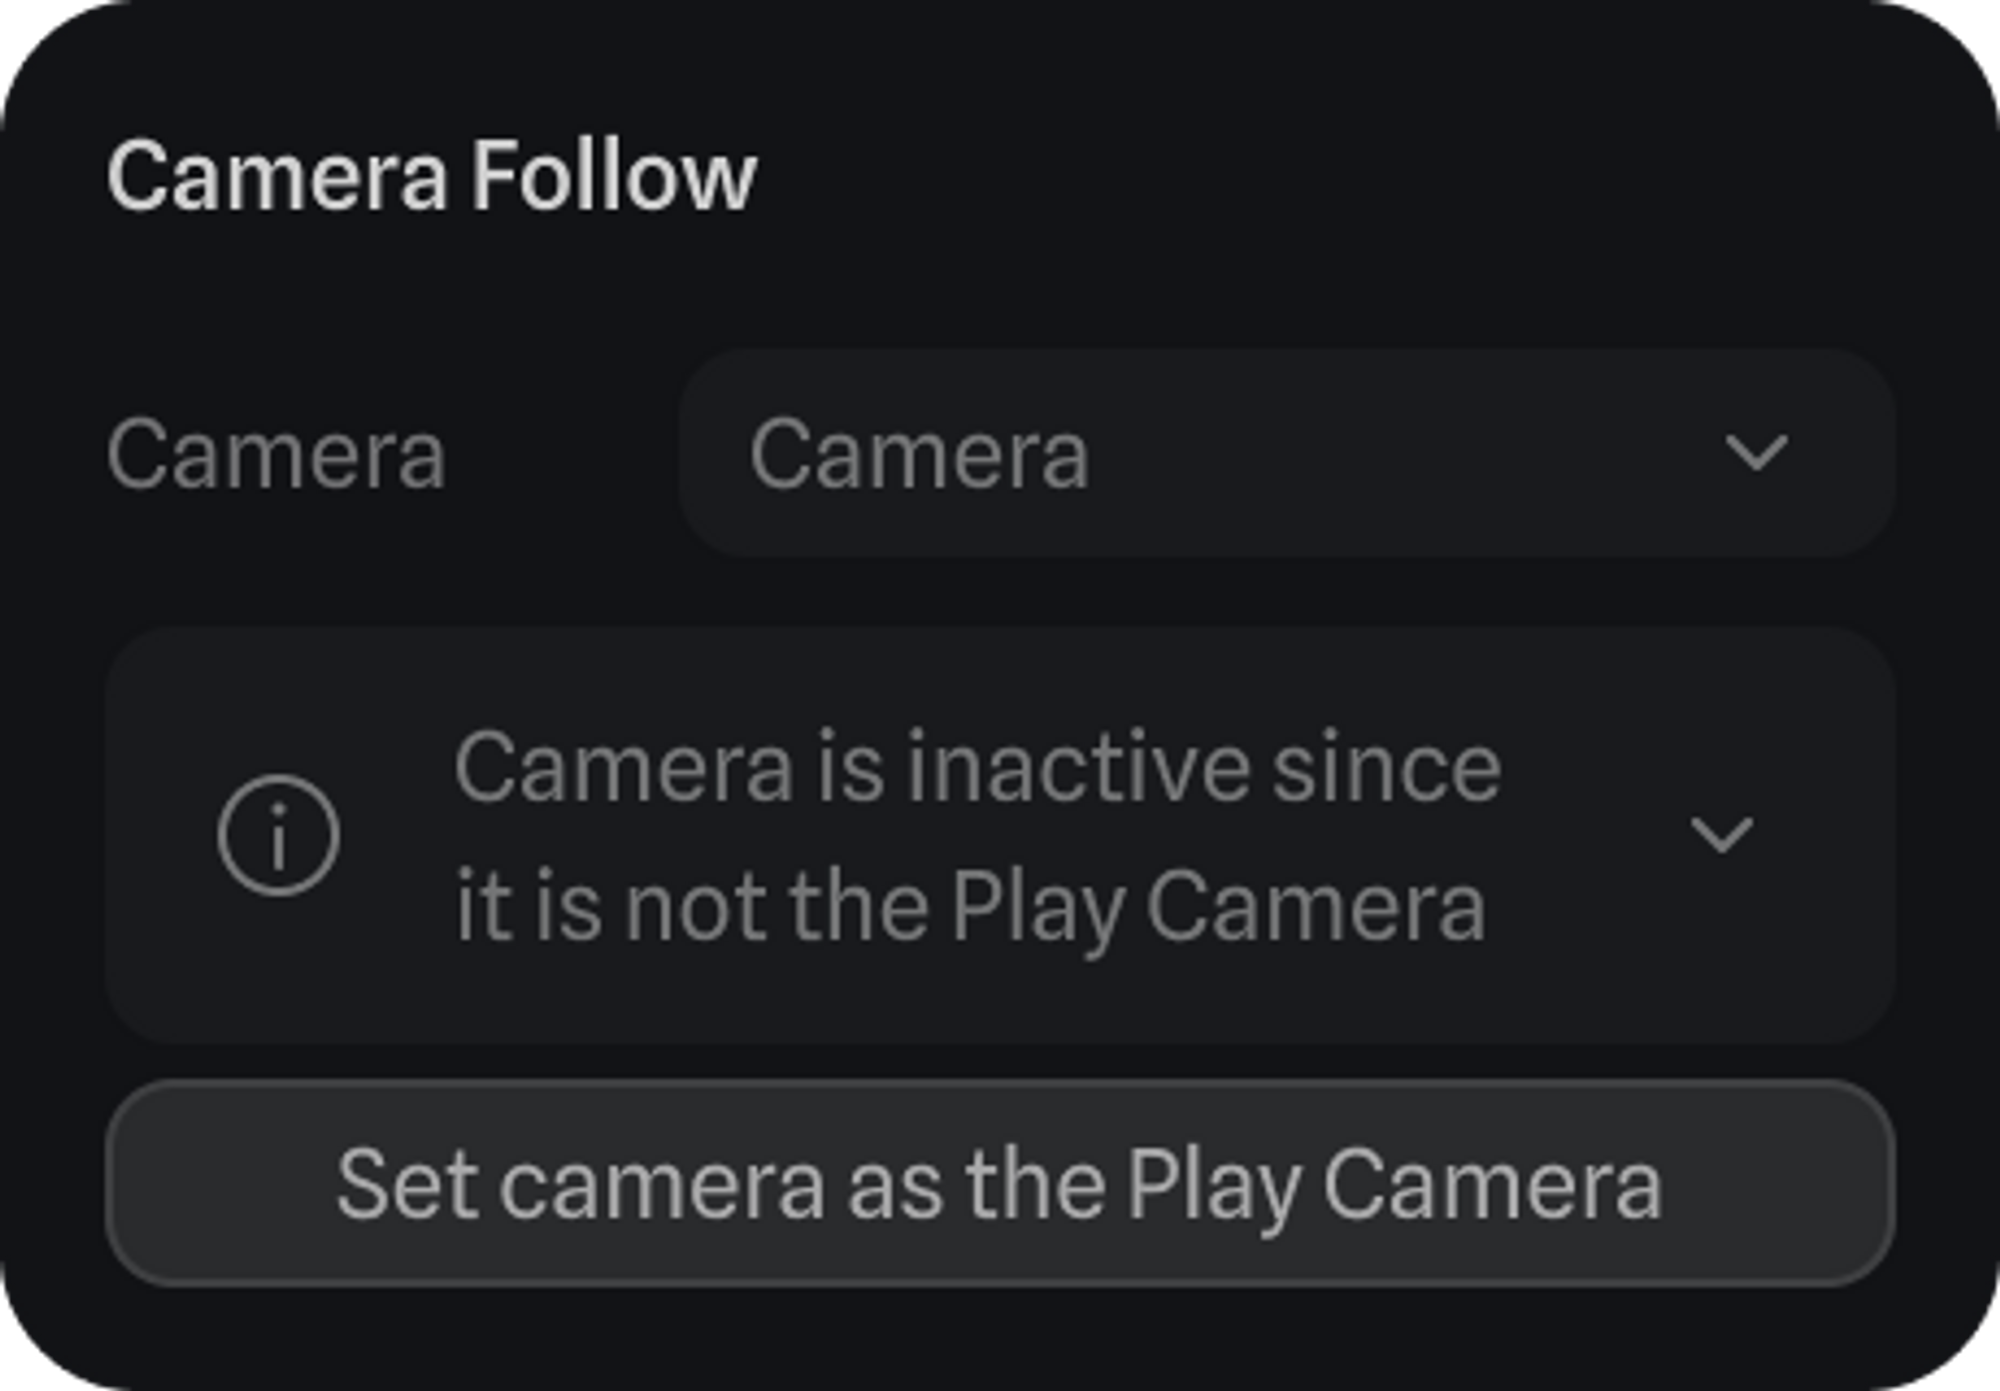
Remember that the camera used to follow the character should also be the camera defined as the Play Camera in the export settings.
If they’re not, you’ll see this warning, where pressing the button will match the two.
Matching Cameras
Remember that the camera used to follow the character should also be the camera defined as the Play Camera in the export settings.
If they’re not, you’ll see this warning, where pressing the button will match the two.
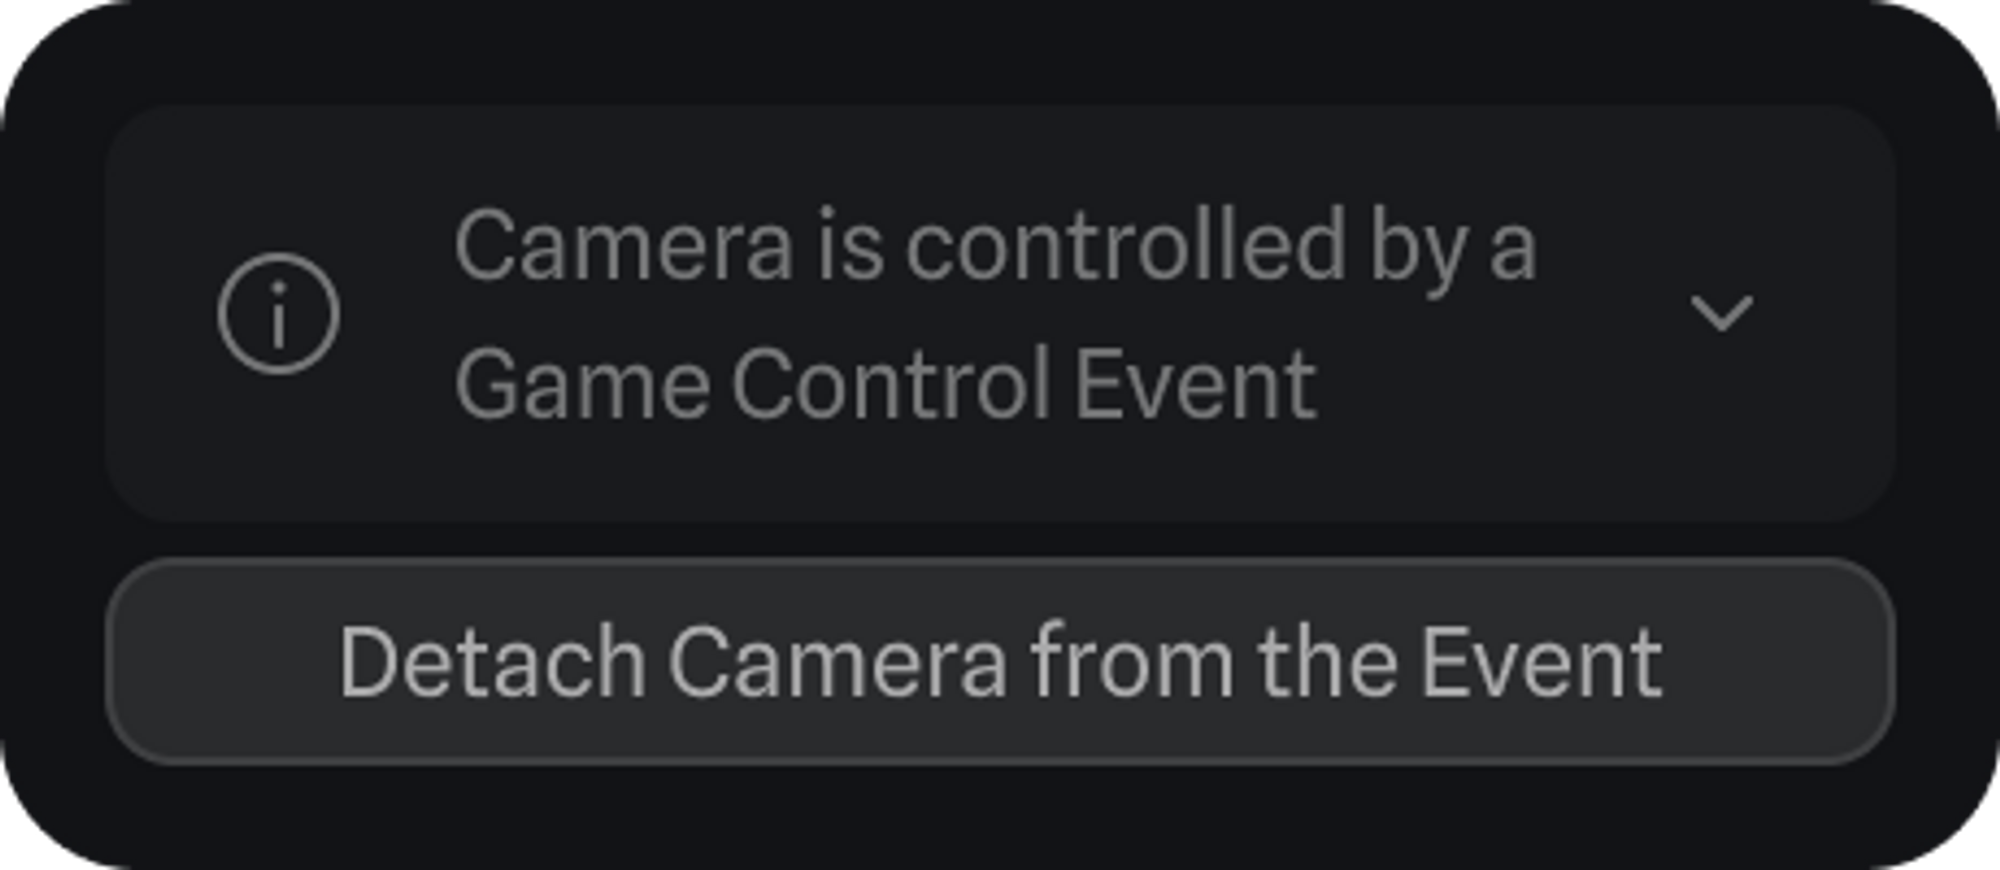
 If the cameras are all correctly set up, you’ll see this in the export panel, letting you know that the camera is being controlled by a Game Controls event.
Meaning that the camera defined as the Play Camera is currently used to follow a character.
If the cameras are all correctly set up, you’ll see this in the export panel, letting you know that the camera is being controlled by a Game Controls event.
Meaning that the camera defined as the Play Camera is currently used to follow a character.
Behaviors
With Behaviors, it is possible to add actions to the character when on Idle, when moving, and when jumping, that way creating more interactive reactions to it.Adding Behaviors
To add behaviors to your character do the following:-
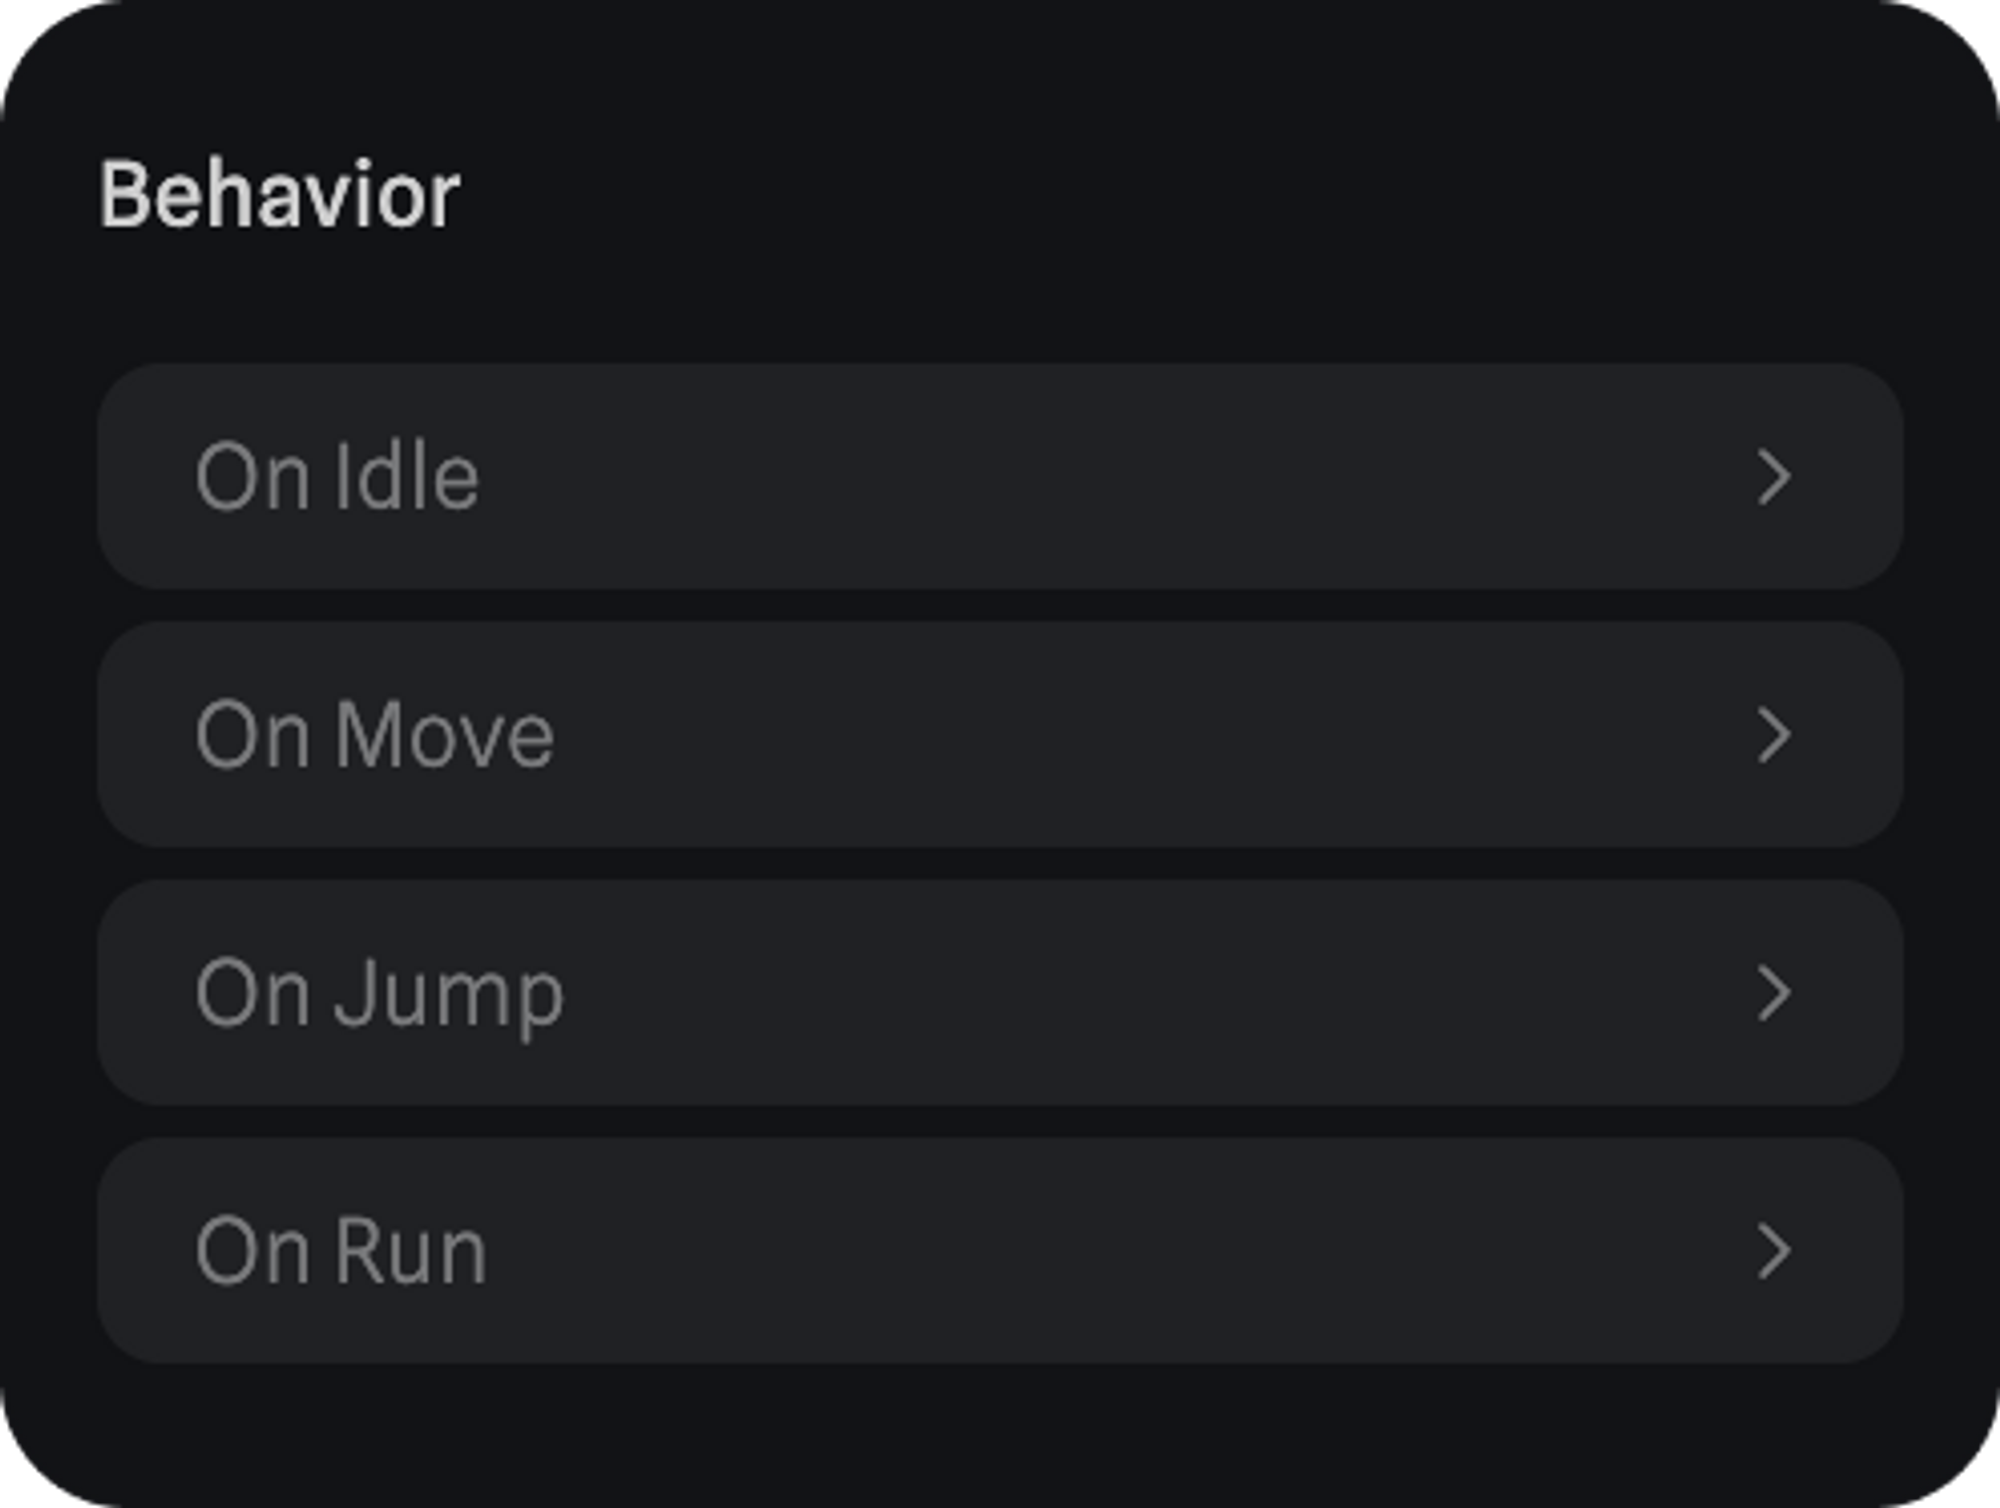
Open the Game Controls event of your character(s), scroll down to the Behavior section, and open the behavior to which you want to add an action to. The current behaviors are the following:
- Idle - Actions for when the character is in a resting state.
- On Move - Actions for when the character is moving.
- On Jump - Actions for when the character is jumping.
- On Run - Actions for when the character is running
- Following actions are supported:
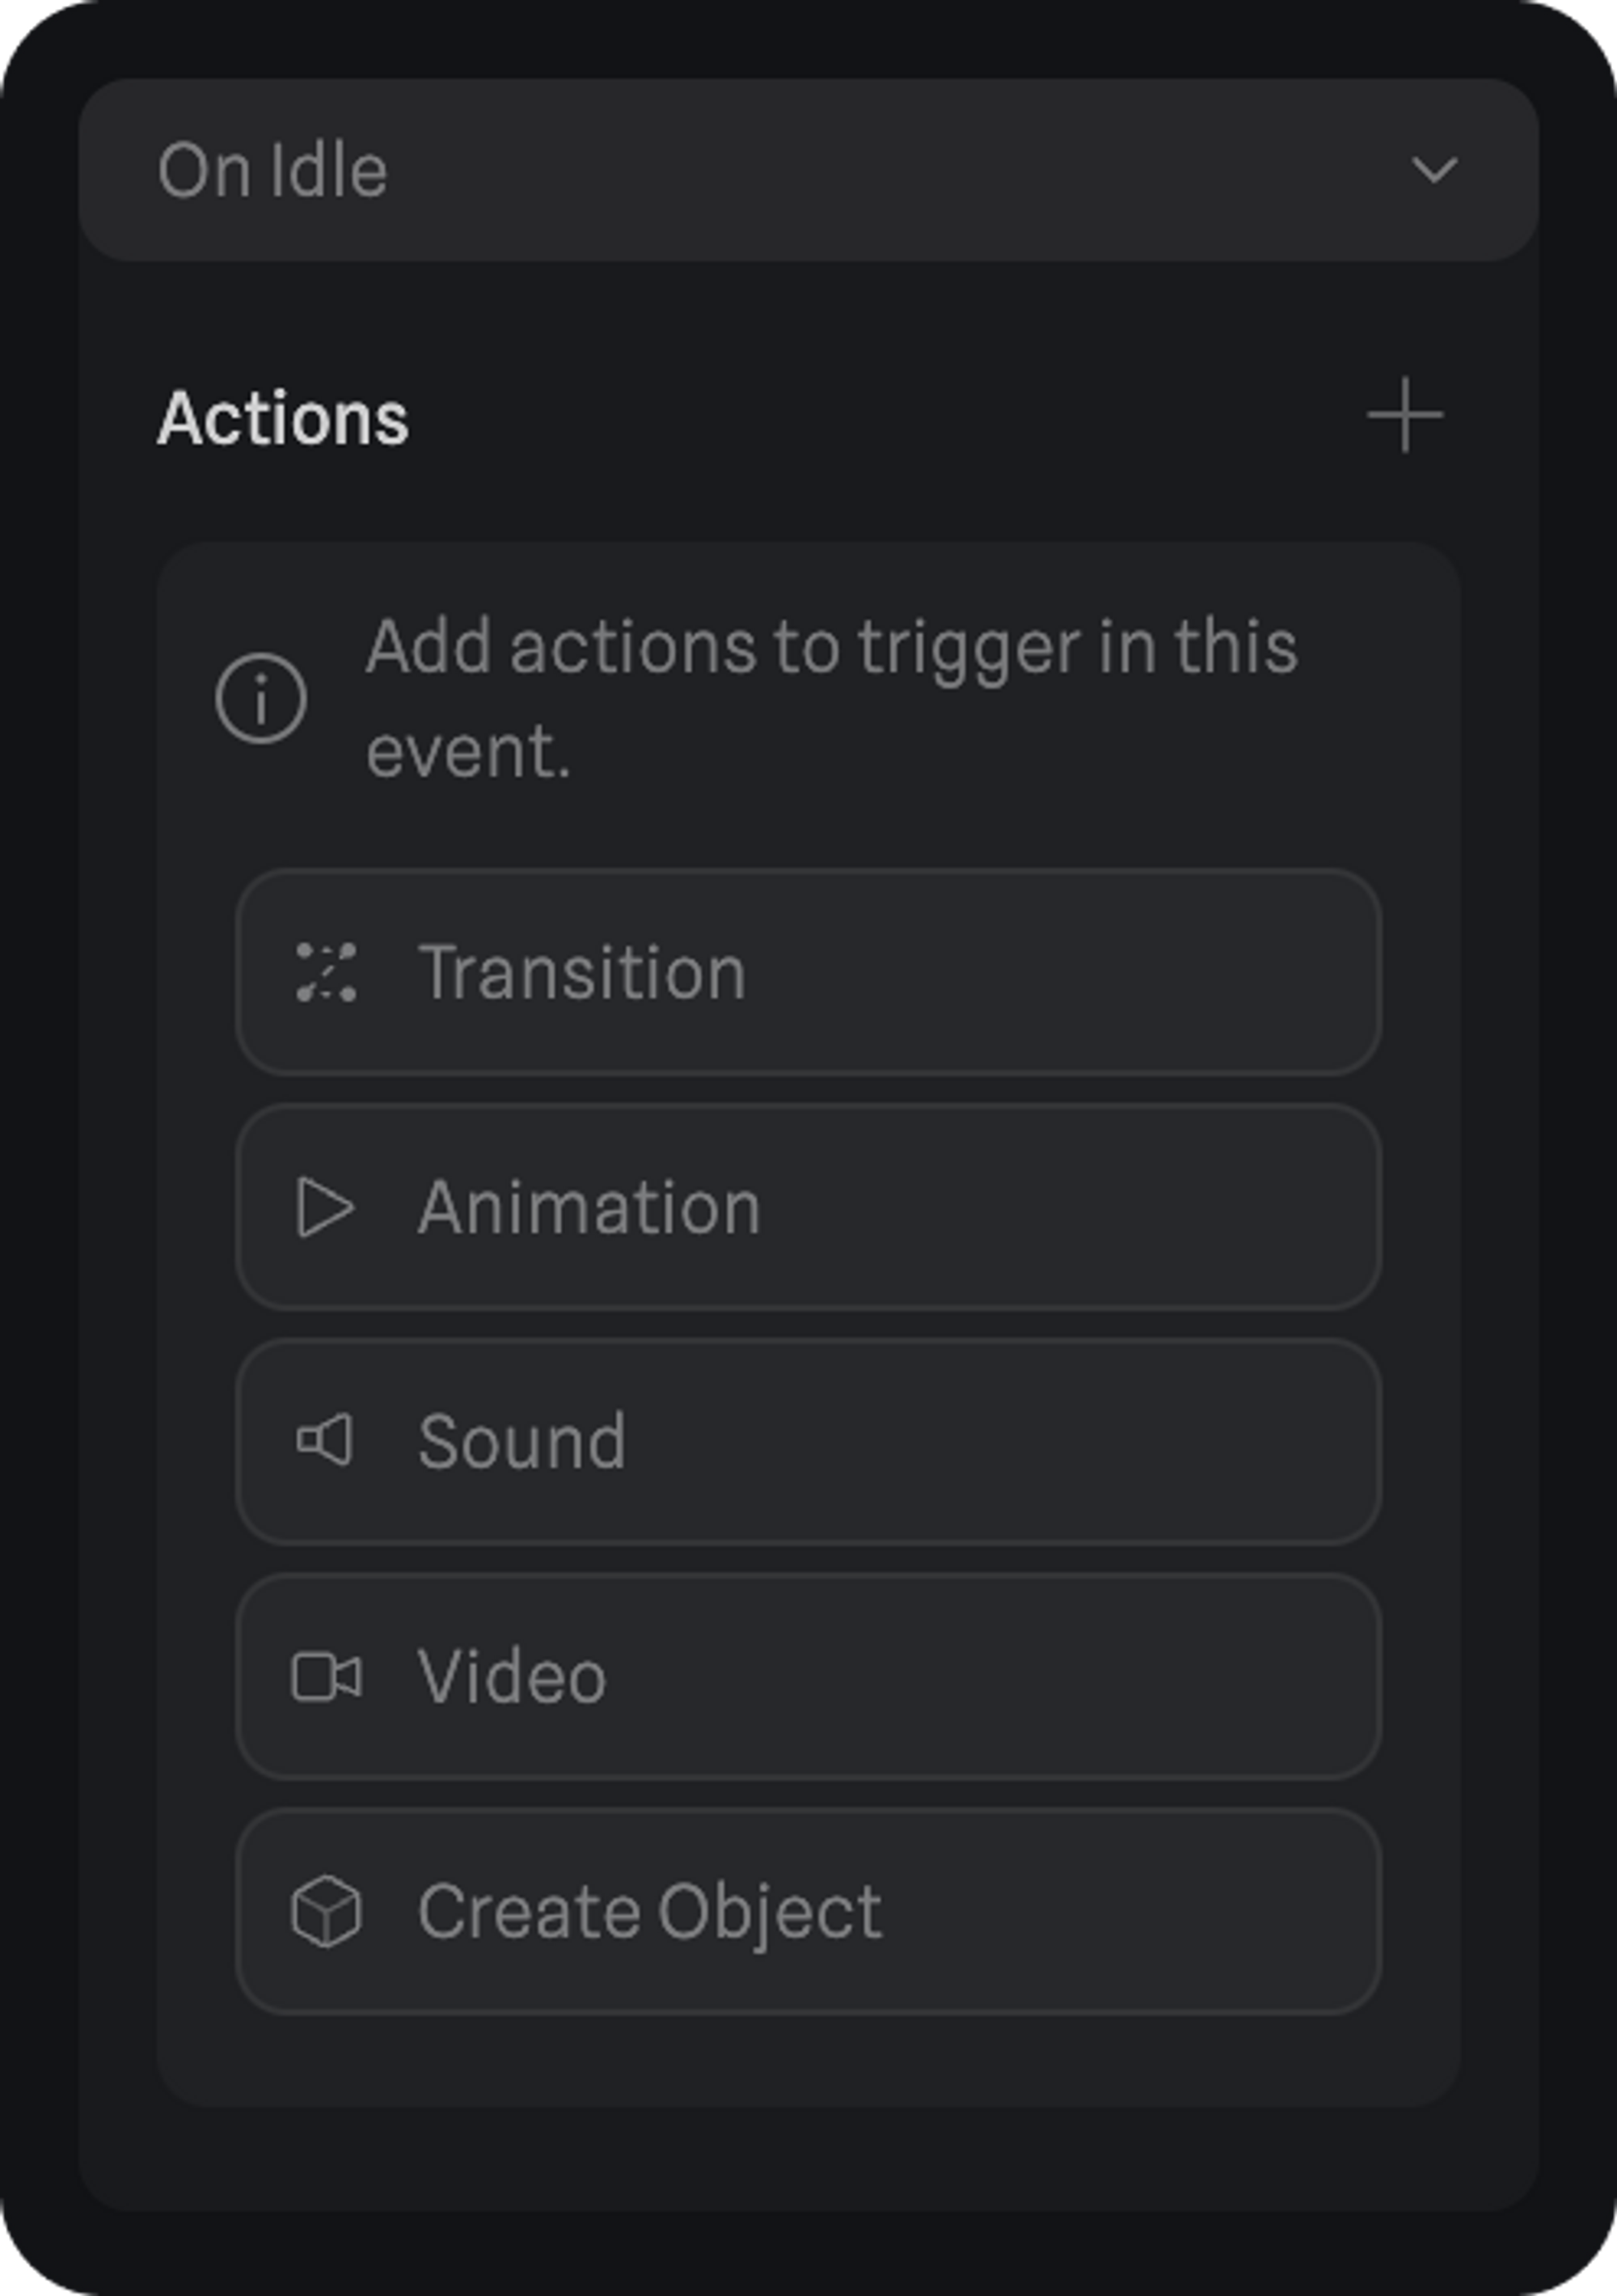
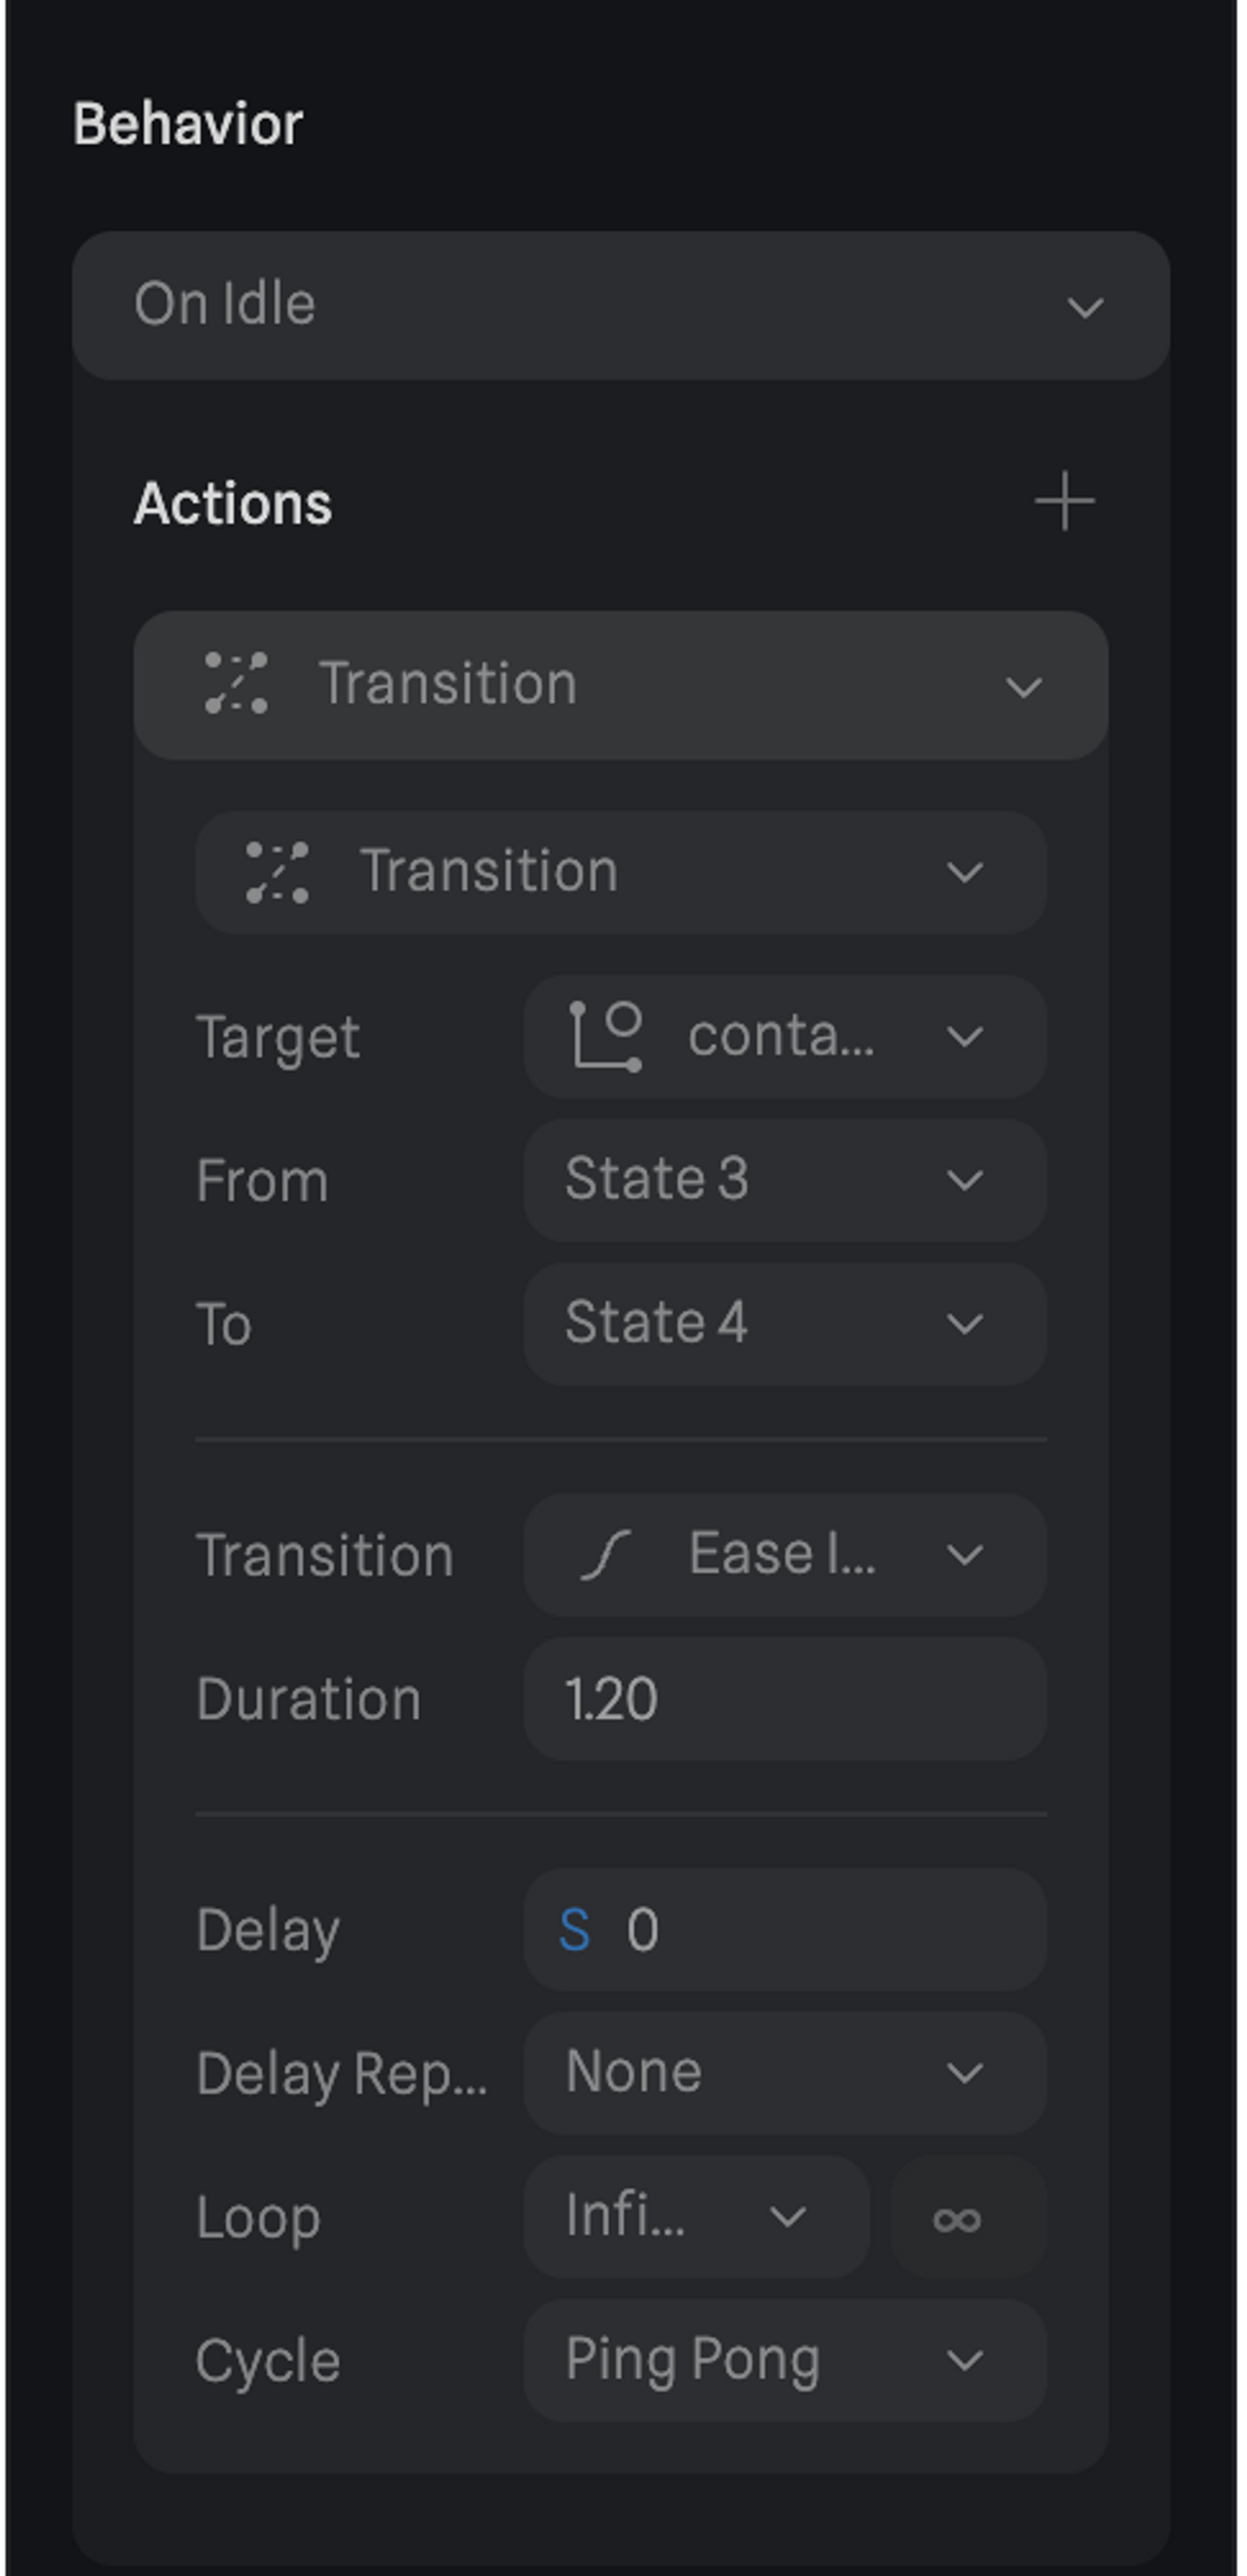
- Create an action on the behavior that you want to adjust and select the object and the state target. Similar to other events, Behaviors can trigger transitions that target objects and trigger a state change with transitions, delay, cycle, and loop properties. Sound actions can play, pause, and stop sounds from Spline’s Original Sounds Library or your own custom sounds.
We recommend adding the behavior states in new groups of your character to have better control over them.