Creating a new file in Hana
- Log in or create a new Spline account (app.spline.design).
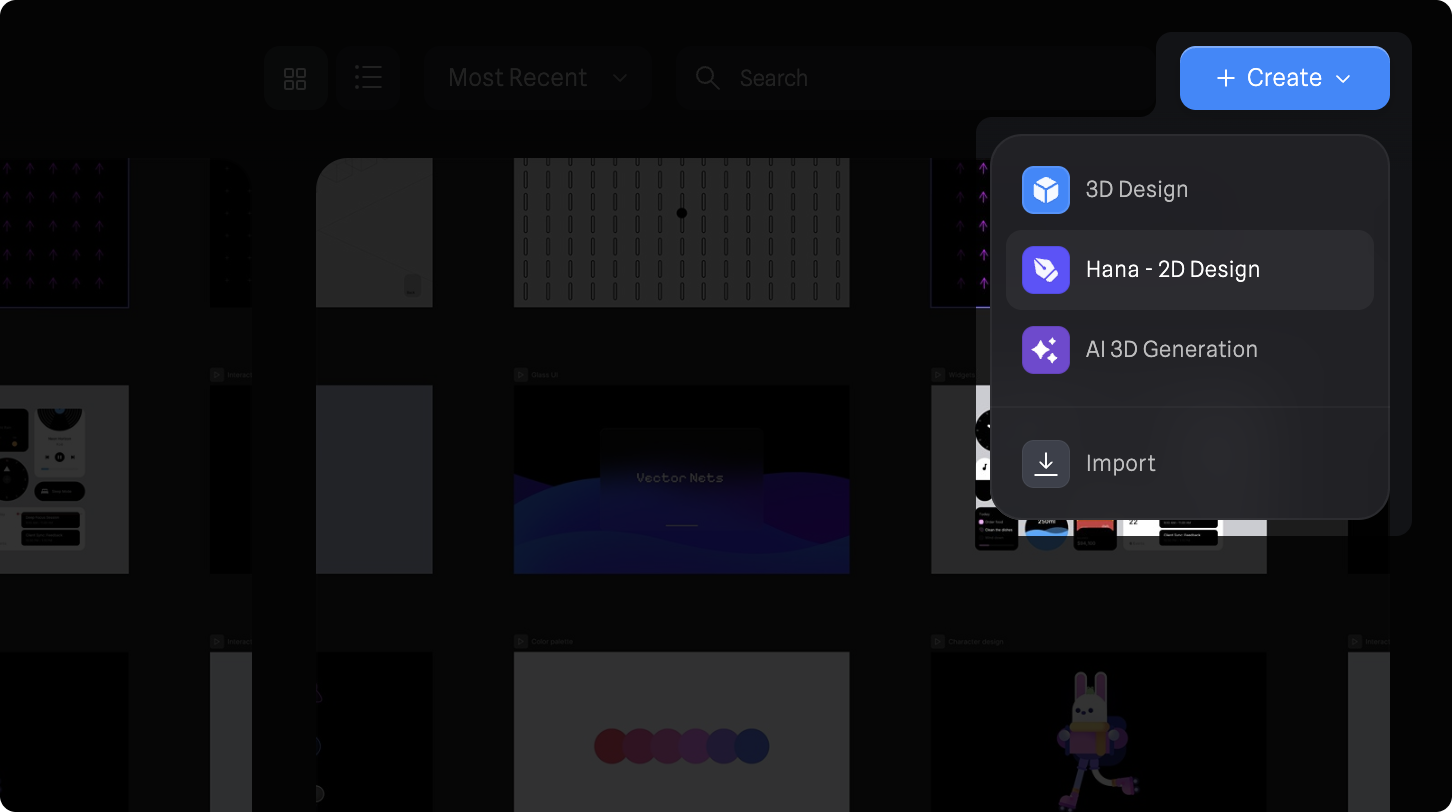
- On the Home or My Files tab, locate the + Create button on the top right and press it.
- On the dropdown menu, select Hana - 2D Design.
Features Overview
💠 Working with 2D Shapes
Hana offers tools to create basic 2D shapes like Rectangle, Ellipse, Star and Polygon. These shapes are perfect for building UI components, layouts, and backgrounds. With the Transform Panel, you can adjust their position, rotation, size, and corner radius, while the Fill & Stroke panel allows you to customize their color, border, and opacity.🖼️ Working with Frames
Frames are containers that define specific regions on the canvas. Use them to organize content, structure layouts, and build interactivity. Frames are the foundation of your design. They help keep everything in order as your project grows. You can also nest frames inside other frames for more sophisticated cases. Once a design is complete, frames can be exported or published as embeddable assets, making them ideal for integration into websites, web apps, and other digital environments.📚 Auto Layout
Auto Layout makes it easy to create flexible, responsive designs. It allows elements to automatically adjust their size and position based on content, spacing, and alignment rules. Whether you’re building buttons, lists, or entire interfaces, Auto Layout helps maintain consistency and reduces the need for manual adjustments, especially as designs scale or change. Auto Layout can be applied to any frame via the properties sidebar on the Layout panel.- Align: Controls the alignment of items within the layout container. You can choose how child elements are positioned horizontally and vertically relative to the container. Left, center, or right horizontally, and top, center, or bottom vertically.
- Direction: Defines the flow of child elements: horizontal, vertical, or horizontal wrap. The wrap mode intelligently adjusts items to flow onto new lines or columns as needed, and includes a masonry layout option for a staggered, Pinterest-like arrangement.
- Gap: Sets the space between items in the layout, both horizontally and vertically. Including the option of negative values.
- Padding: Defines the internal spacing between the edges of the layout container and its content — customizable independently for horizontal and vertical padding.
🧊 3D Transform
3D Transform allows you to position and orient 2D elements within a three-dimensional space. By adjusting parameters like rotation, depth, and perspective, you can control how elements appear in relation to the viewer and to each other. This enables the creation of layered scenes, immersive interfaces, and spatial animations that go beyond flat layouts.- Flatten 3D: When enabled, this flattens all child elements into a single 2D plane before applying 3D transformations, essentially treating them as one layer. This is useful when you want to rotate or transform a group without preserving depth between individual children.
- Backface: Controls whether the back side of an element is visible when it’s rotated in 3D space. If Yes, the back of the element remains visible when flipped; if No, the element becomes invisible when viewed from behind (like single-sided geometry).
📐 Constraints & Alignment
Constraints control how shapes behave when the frame is resized, ensuring your design adapts fluidly to different screen sizes or layouts. Alignment tools help position elements evenly, making it easier to arrange objects in relation to each other, ensuring a clean and organized layout.➕ Boolean Modifiers
Boolean modifiers allow you to combine, subtract, or intersect shapes to create more complex designs. Use Union, Subtract, and Intersect to manipulate basic 2D shapes, or apply these modifiers to nested shapes for advanced customization, making your designs more dynamic and intricate.🔠 Text
You can create and style text by adjusting font size, weight, alignment, and more. The Text Panel provides control over the content, spacing, and styling, allowing you to fully integrate typography into your designs.🖋️ Vector Tool
The Vector Tool lets you create custom shapes by plotting points directly on the canvas, making it ideal for detailed graphics like icons or complex illustrations. With Vector Networks, you can connect multiple paths together, creating intricate designs by branching paths from existing edges. This gives you the flexibility to build complex and detailed shapes with ease.✏️ Pencil Tool
The Pencil Tool lets you draw custom shapes freely by clicking and dragging directly on the canvas, instead of placing individual vector points. It’s ideal for sketching organic forms, quick explorations, or hand-drawn details. Once a shape is created, its vector points can be edited just like with the Vector Tool, giving you full control to refine and adjust your drawing.🎭 Vector Masking
Masks let you hide or reveal content using a vector shape. Instead of permanently erasing parts of an image or layer, a mask defines which areas remain visible. Everything inside the mask shape is shown, while anything outside is hidden. In the outliner, the Mask object affects all the shapes placed above it. Masks can also be animated with states or shape morphing to create dynamic reveals and transitions. Follow these steps to create a mask shape:- Draw or select a vector shape.
- On the outliner, press the Mask button. (Every shape above the mask shape will be masked, for more control you can group the mask shape and the shapes you want to be masked).
- Select a vector shape and the shapes you want to be masked
- Right-click to open context menu and select Use as Mask. (A group will be created with the mask shape and the masked shapes).
🎨 Fill & Stroke
The Fill and Stroke panels let you style shapes, text, and frames by applying background colors and outlines. You can adjust color, opacity, stroke thickness, and edge appearance with just a few clicks.- Fill: Apply a color, a gradient, an image, or a video with adjustable opacity to create background effects.
- Stroke: Customize the outline with color, thickness, and corner styles (sharp, round, or beveled), and enhance it further with gradients or images applied directly to the stroke.