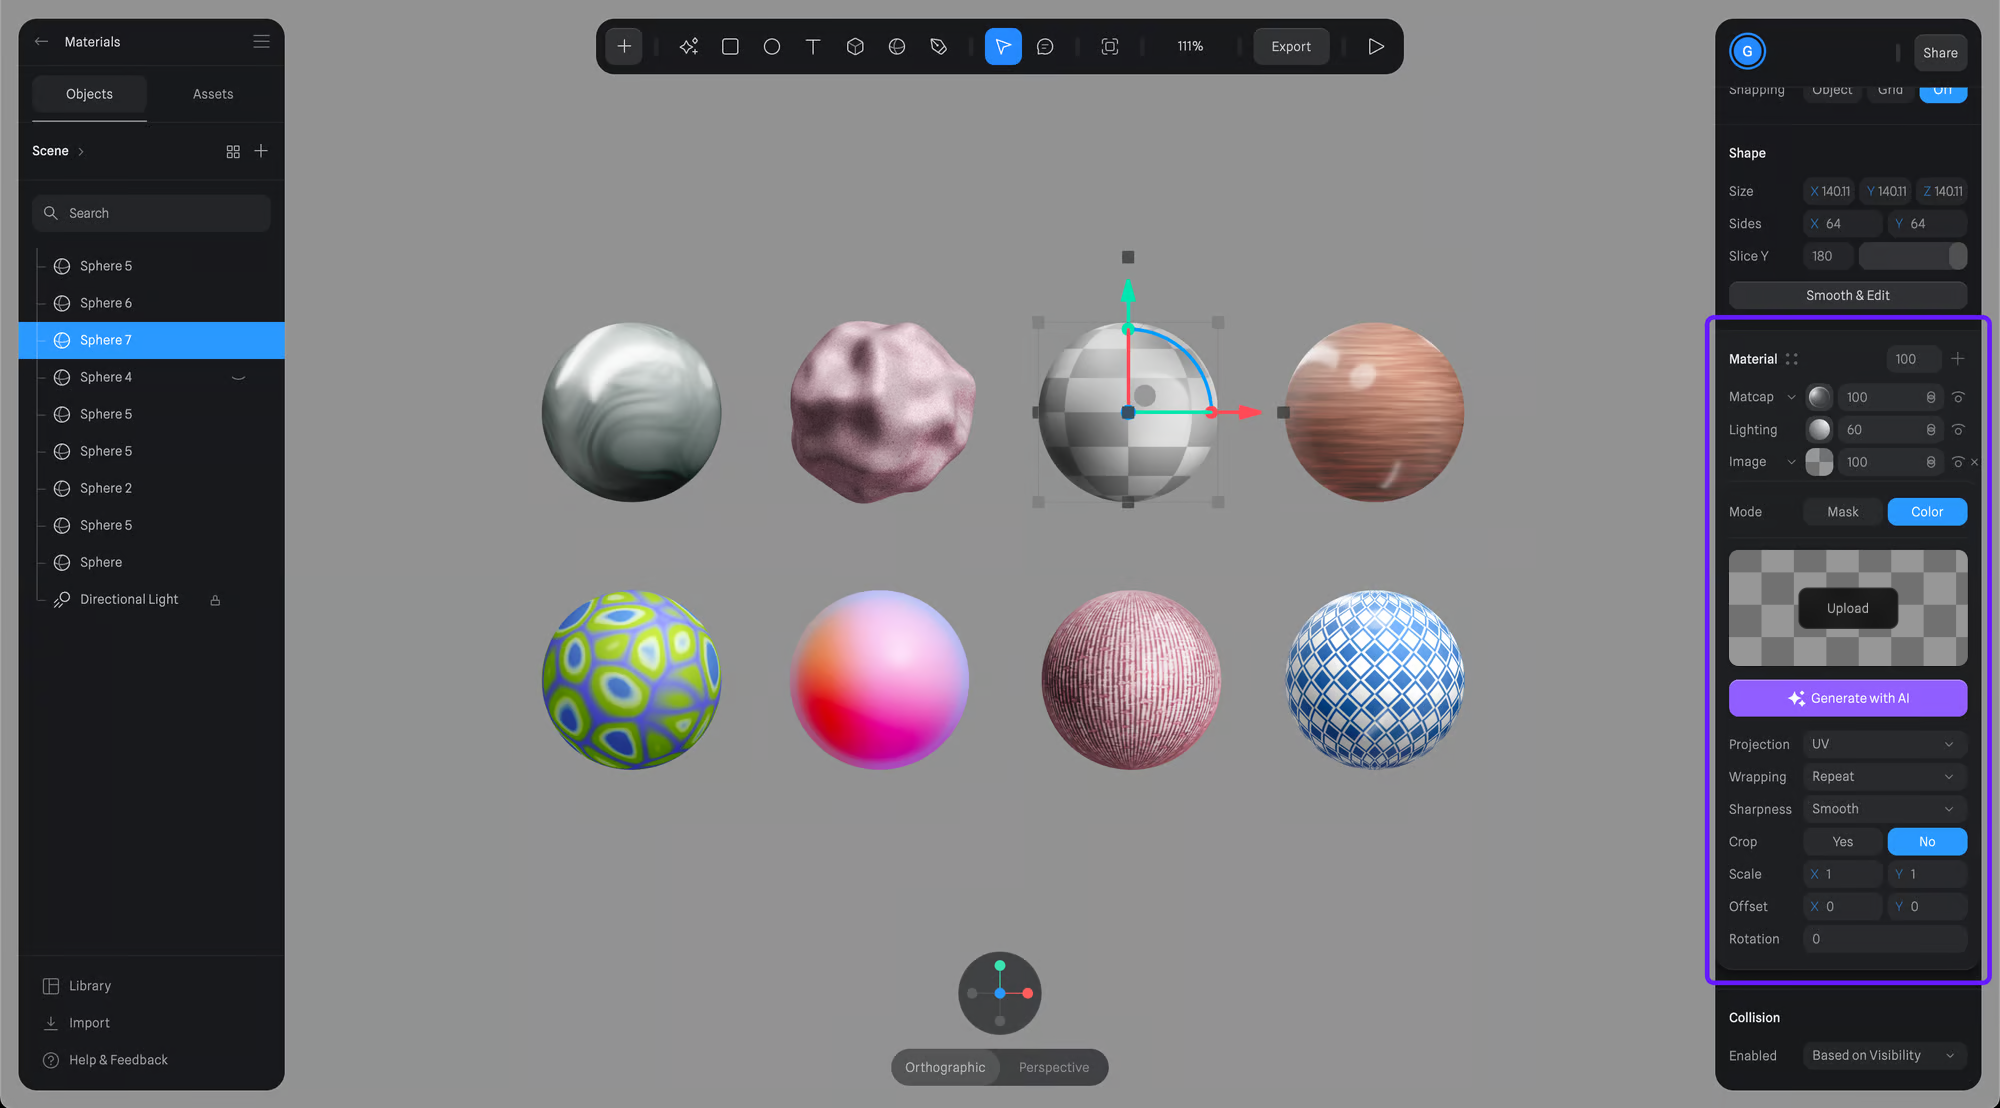
Skip to main contentThe Image layer allows you to upload, or generate with AI, an image to texture your 3D objects.
How to create an Image Layer
To add an image layer, you’ll need to:
- Select an object and add a new layer on the Material Panel.
- Change the layer to “Image” by clicking on the dropdown on the newly created layer.
- Open the Image Layer settings by clicking on the layer thumbnail.

Image Layer Settings
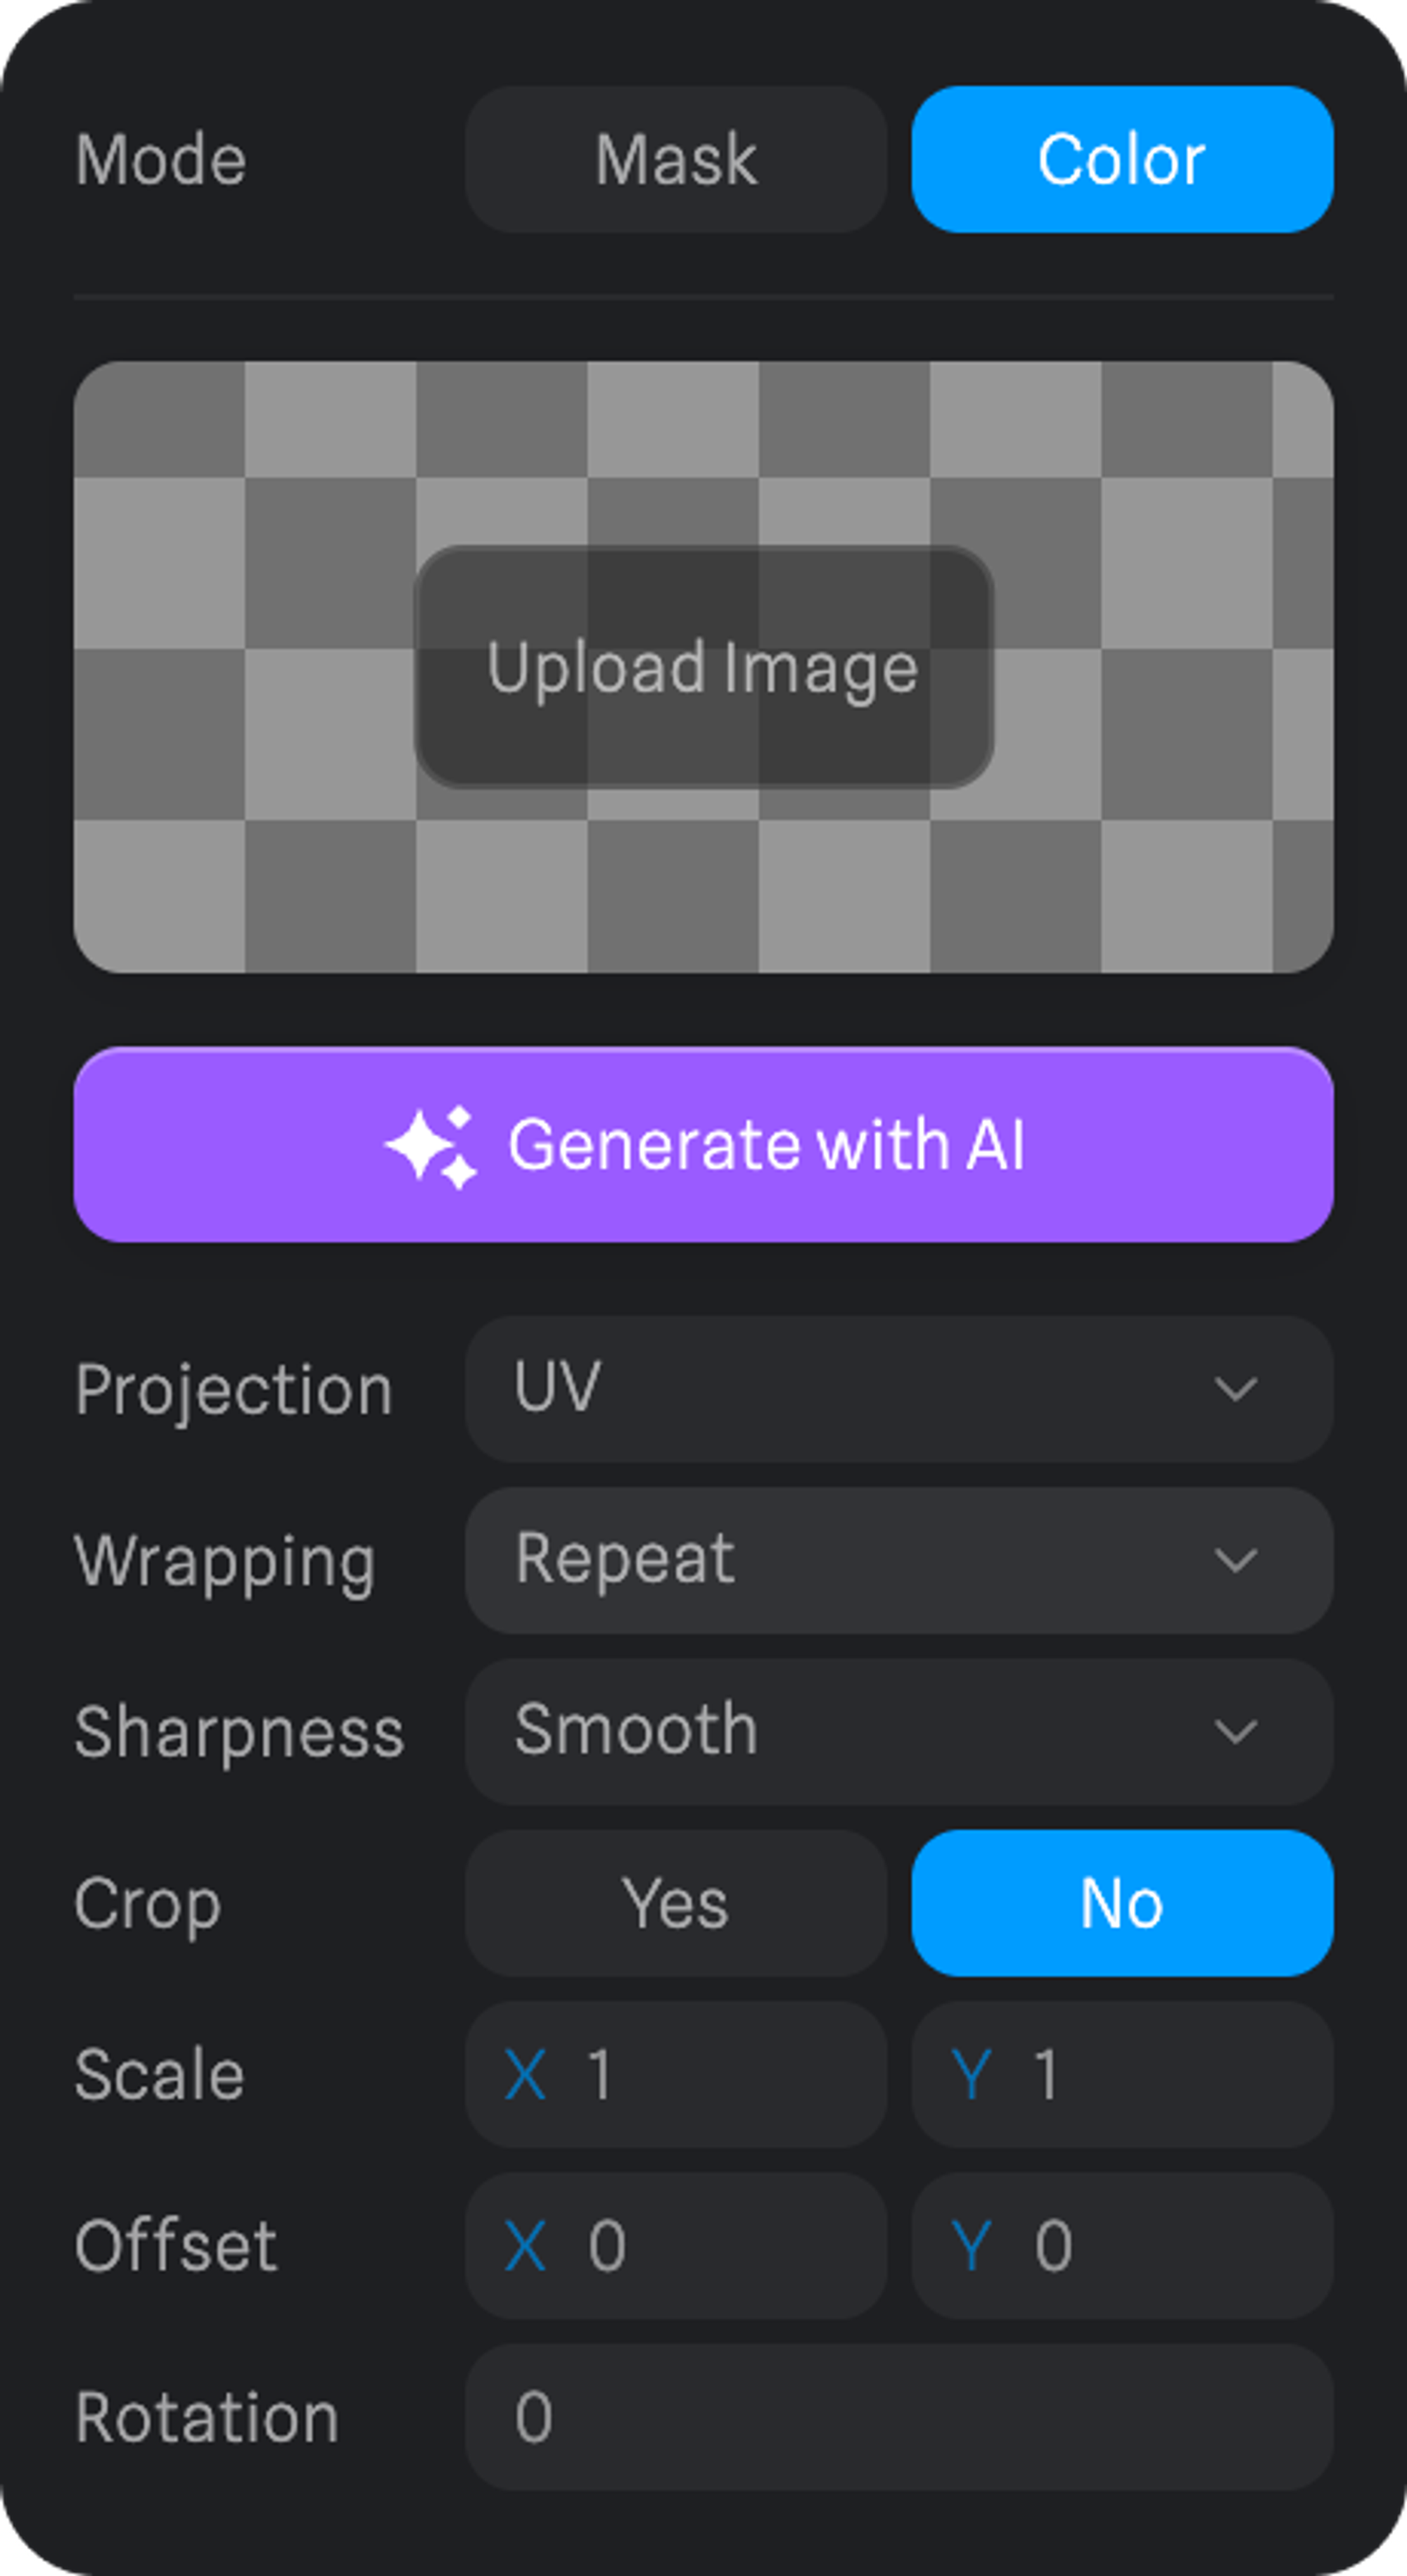
You can either upload an image or generate a texture with AI to get started.
Mode
Some layers, including Image Layer, can be used as masks, which you can do by selecting Mask on the layer mode. Learn more here: Layer Masking.
Settings
Projection
Determines how the texture fits onto the model’s surface, like adjusting a sticker on a curved or flat area.
- UV - Maps textures based on the model’s UV coordinates.
- Planar - Projects the texture onto the model from a single direction.
- Spherical - Wraps the texture around the model as if it were a globe, ideal for round objects.
- Cylindrical - Applies the texture around the model like a label on a can, perfect for cylinder-shaped objects.
- Triplanar - Projects the texture from three directions and blends them, great for complex surfaces without clear orientation.

Wrapping
Decides how textures behave at edges, whether they repeat, stretch, or cut off.
- Clamp - Extends the edges of the texture to the bounds of the surface, preventing tiling but possibly stretching the edge pixels.
- Repeat - Tiles the texture across the surface, repeating it both horizontally and vertically.
- Mirror - Similar to repeat, but each tile is mirrored, creating a symmetrical tiling effect.
Sharpness - Adjusts texture clarity, making it crisp or smooth or pixelated.
Crop - Use the texture only on a part of the object without it being stretched.
Scale - Changes the texture’s size on the model.
Offset - Moves the texture’s position on the surface of the model.
Rotation - Spins the texture around a point, altering its angle on the model.
Image Assets
You can save your images as assets to reuse on other image layers.
To save an image asset, you’ll need to:
- Select the object using the image you want to save.
- Open the Image Layer panel.
- On the Image Assets panel, press the + button on the top left, and your image asset will be saved
Bump and Roughness Maps
The image layers added to your material can be used as bump and roughness maps.
Bump Map & Roughness Map 


