Tutorial: How to use variables to create interactive 3d content in Spline
Variables allow you to create reusable values/parameters. They can be applied to many object properties (like Position, Scale, Rotation, etc.) and can be combined with events and actions. This enables you to create highly customized interactions that understand logic.
Some high-level concepts for variables are:
- Create variables such as Numbers, Strings, and Booleans
- Use Dynamic variables: Time, Counter, Random
- Attach variables to object properties and text fields.
- Trigger events from variables
- Capture object and mouse property changes
Variables
Variables are data containers with values that can change. The following variable types are available: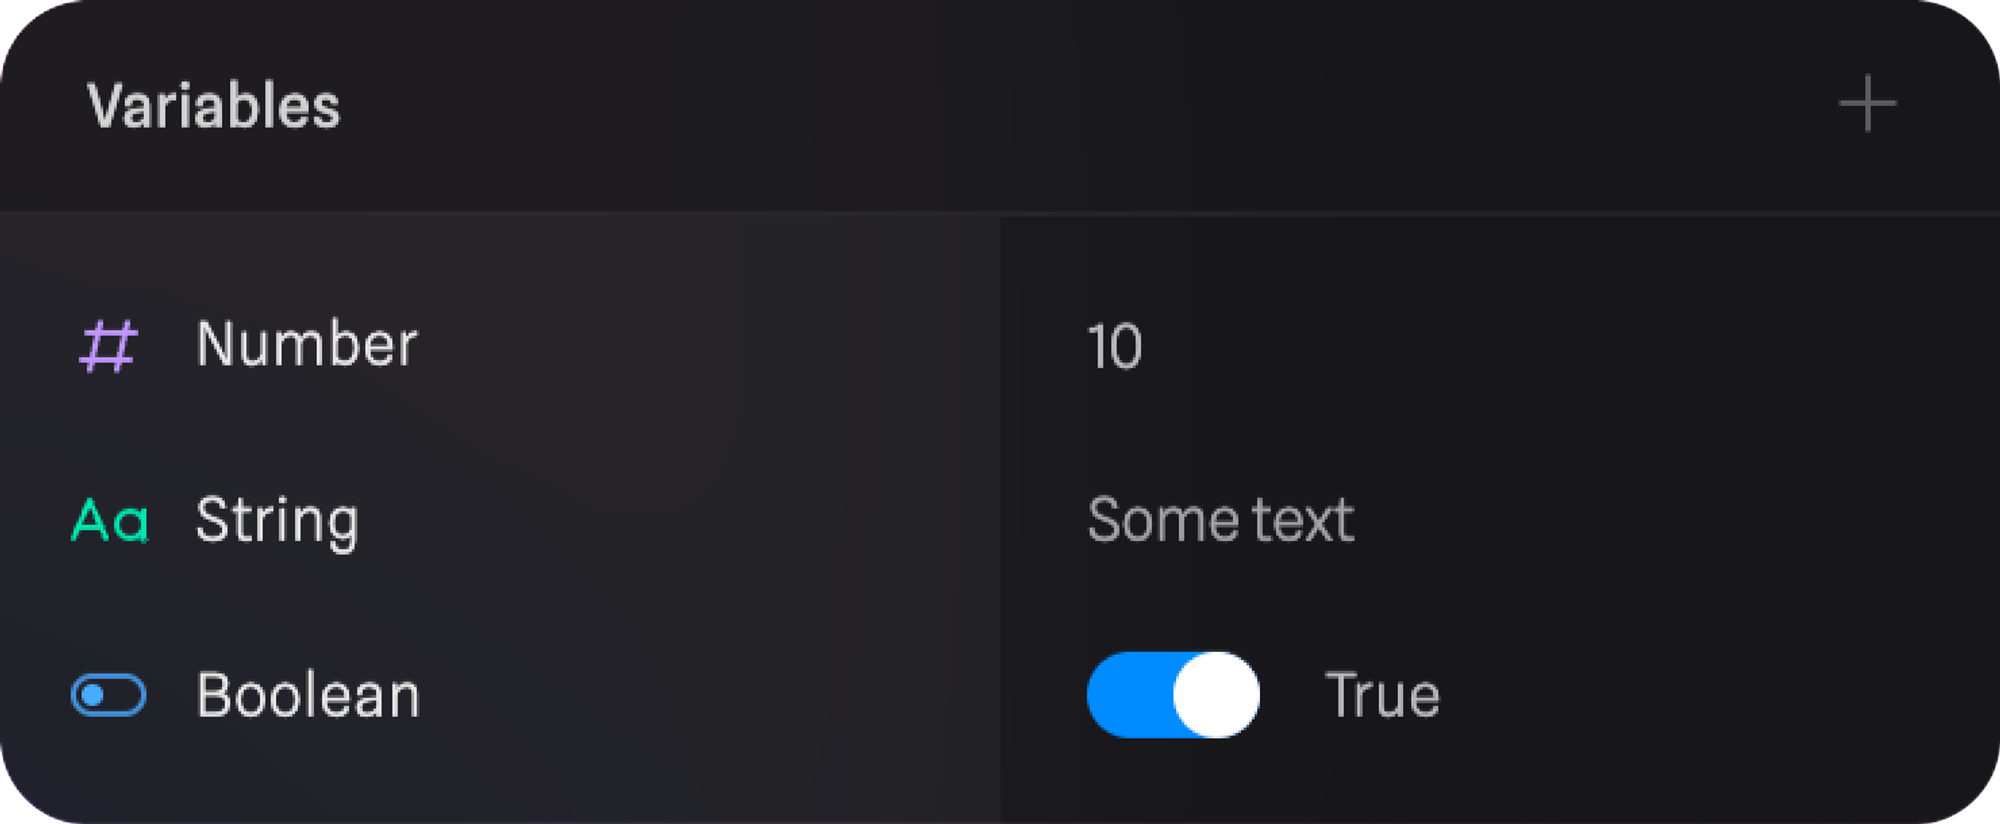
🔢 Number
- Easily manage numerical data to control and animate objects.
- Can be a decimal or a round number, e.g.:
9or67,123 - Usage: alter or adjust any property on your object that uses a number (e.g.: position, rotation, scale, material layer opacity, etc.)
🔤 String
- Can be any text value, e.g.:
some text - Incorporate text-based variables for labels, messaging or updating the status of your experience.
🔘 Boolean
- Toggle between
trueandfalsestates for interactive behavior. - With the help of booleans, you can build sophisticated logic into your experience, especially if you combine it with Conditional Action and Set Variable Action.
Dynamic variables
Dynamic variables are changing over time based on specific conditions. These unlock the creation of interactive experiences driven by variables. The following dynamic variable types are available: Time, Counter, Random.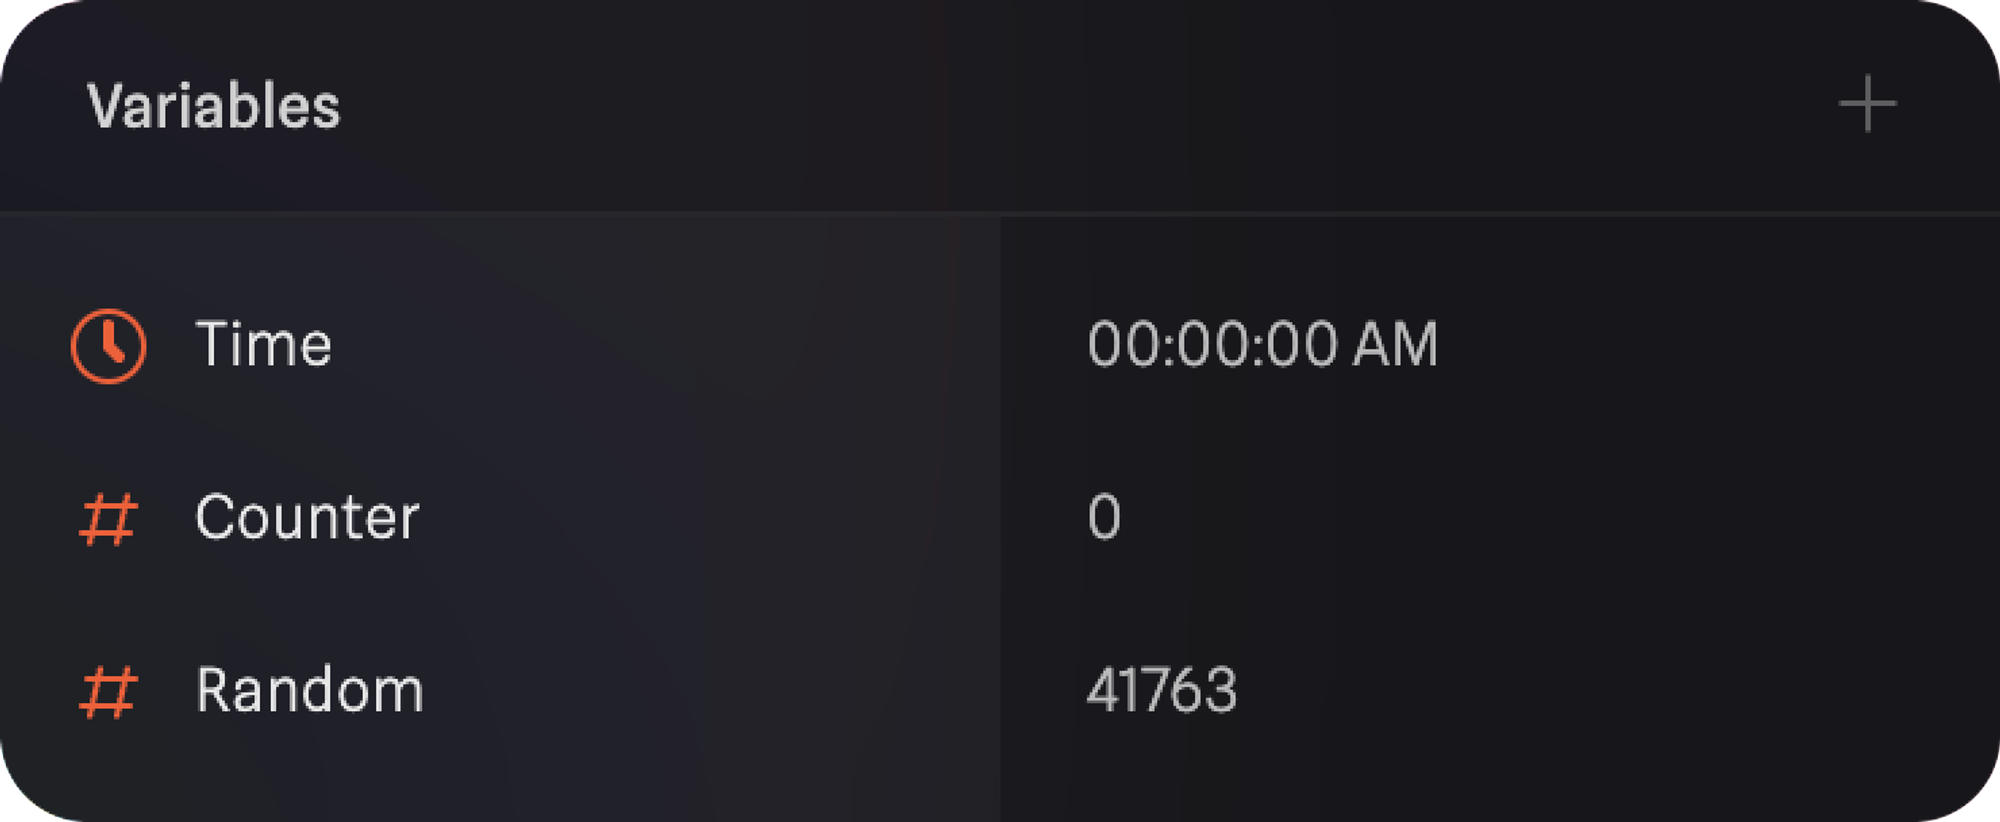
🕓 Time
- Harness the flow of time to create dynamic animations and transitions
- It’s defined by a string that can be applied as the content of a Text object.
- It has following types: Clock, Timer, Stopwatch
- All types have unique property options, listed below
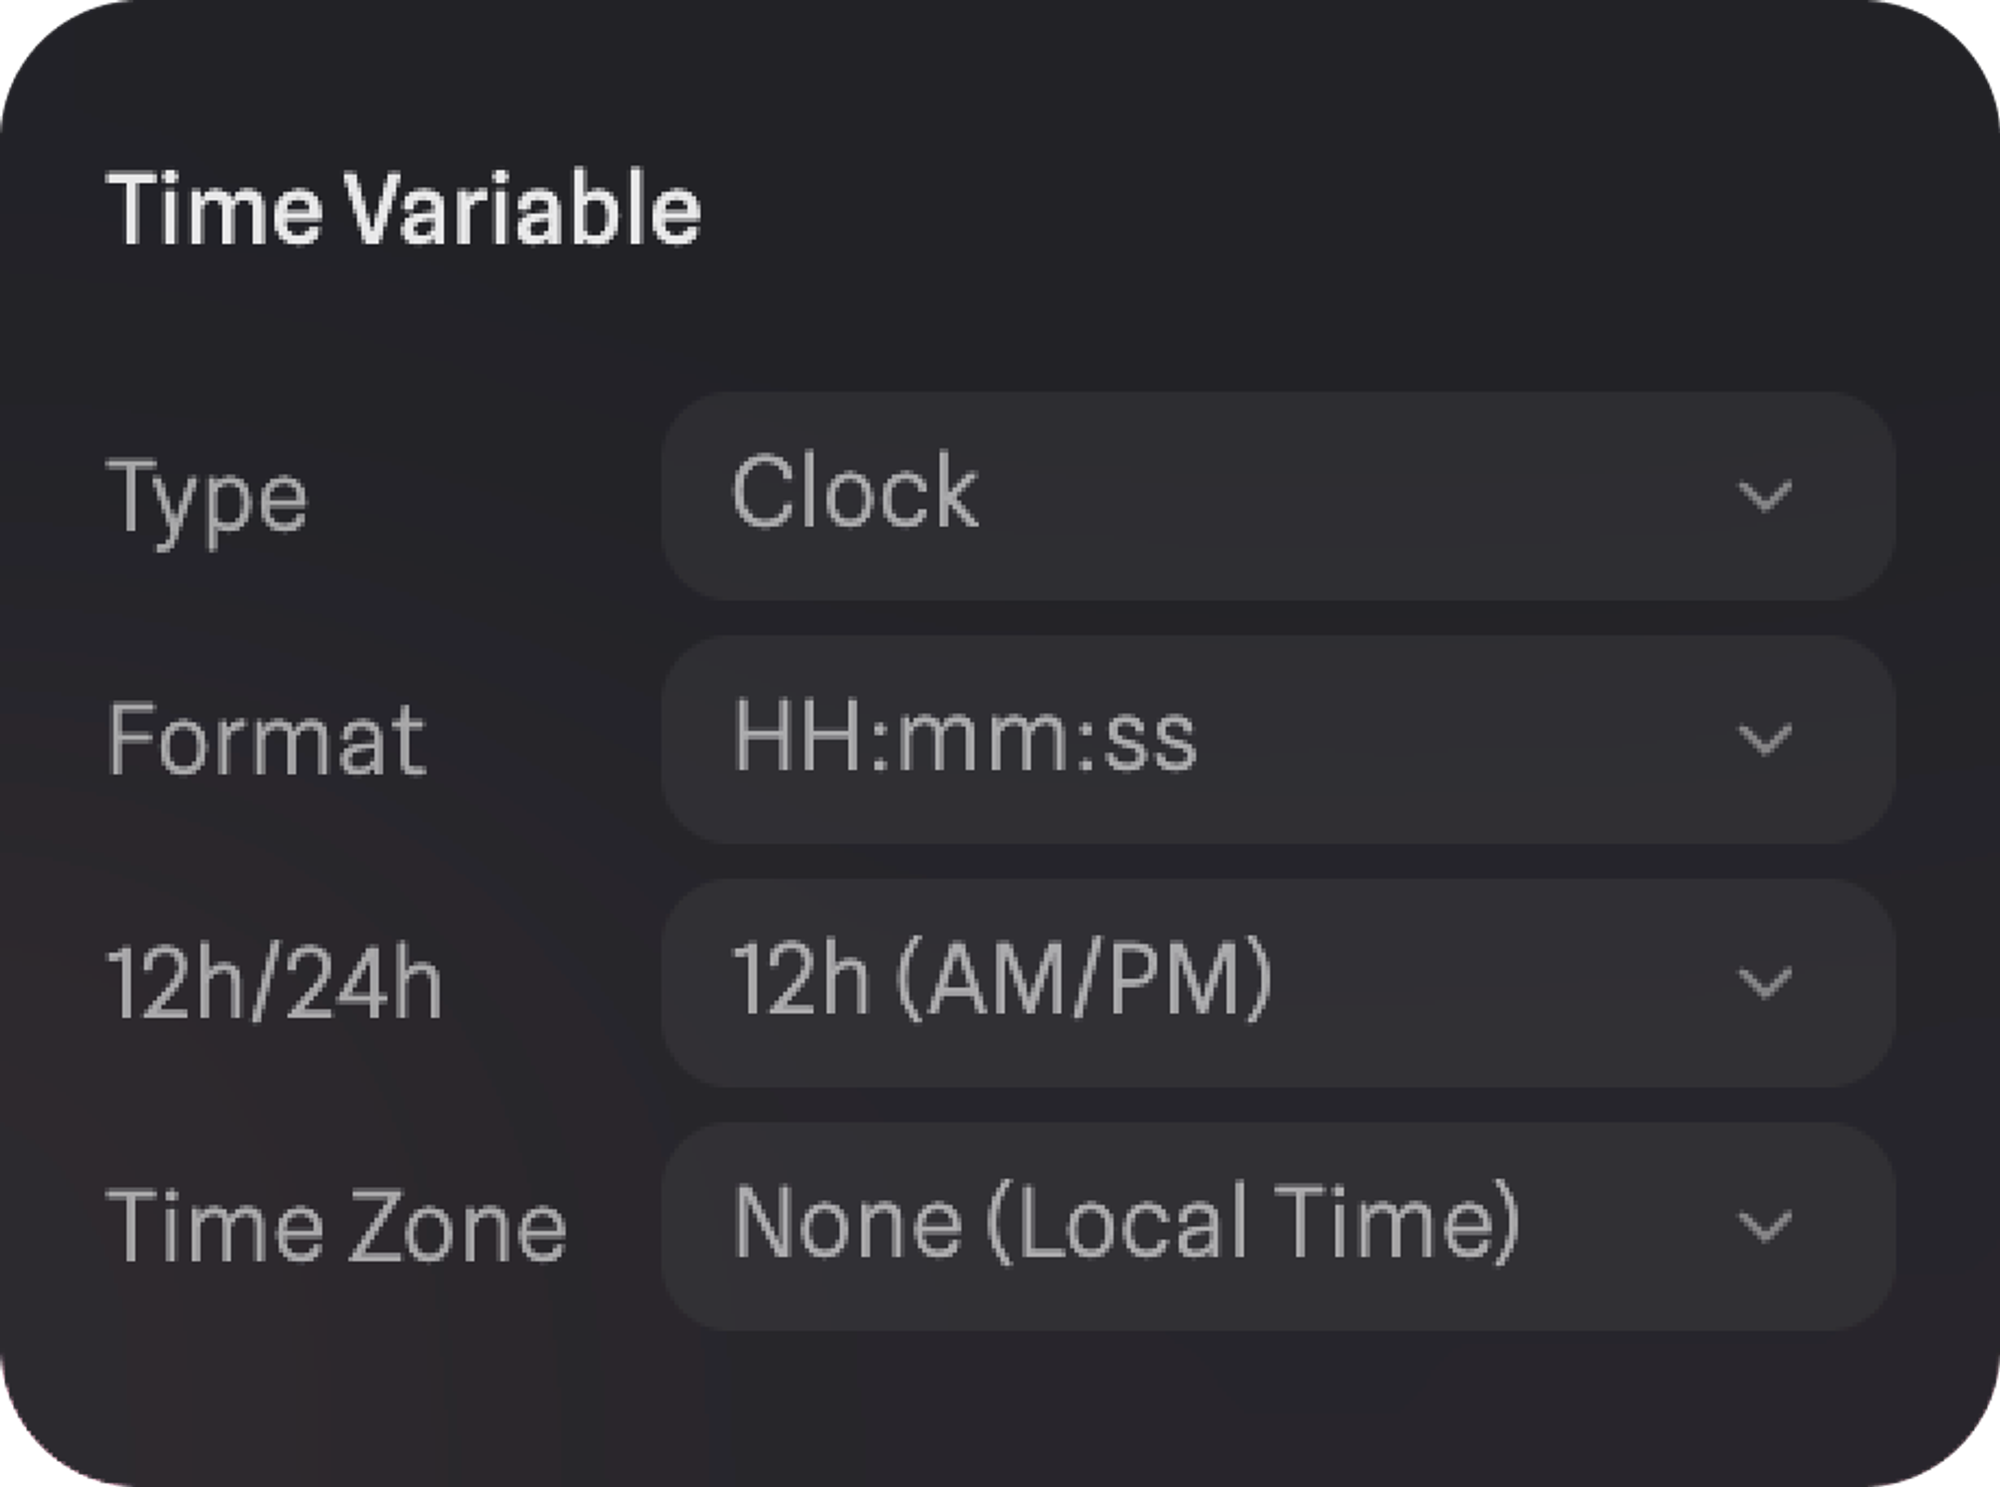 🕓 Clock → Updating time, based on local time or on a specific time zone.
⏲️ Timer → Calculating from a pre-defined time backwards, e.g.: from 30 seconds to 0 seconds
⏱️ Stopwatch → Calculating from a pre-defined time forward, e.g.: from 0 seconds to 30 seconds.
🔢 Counter
The Counter will start counting in seconds with a set interval defined in seconds. It can be great to use it for iterating through dynamic sequences or loops, e.g.: driving an animation with the counter.🔀 Random
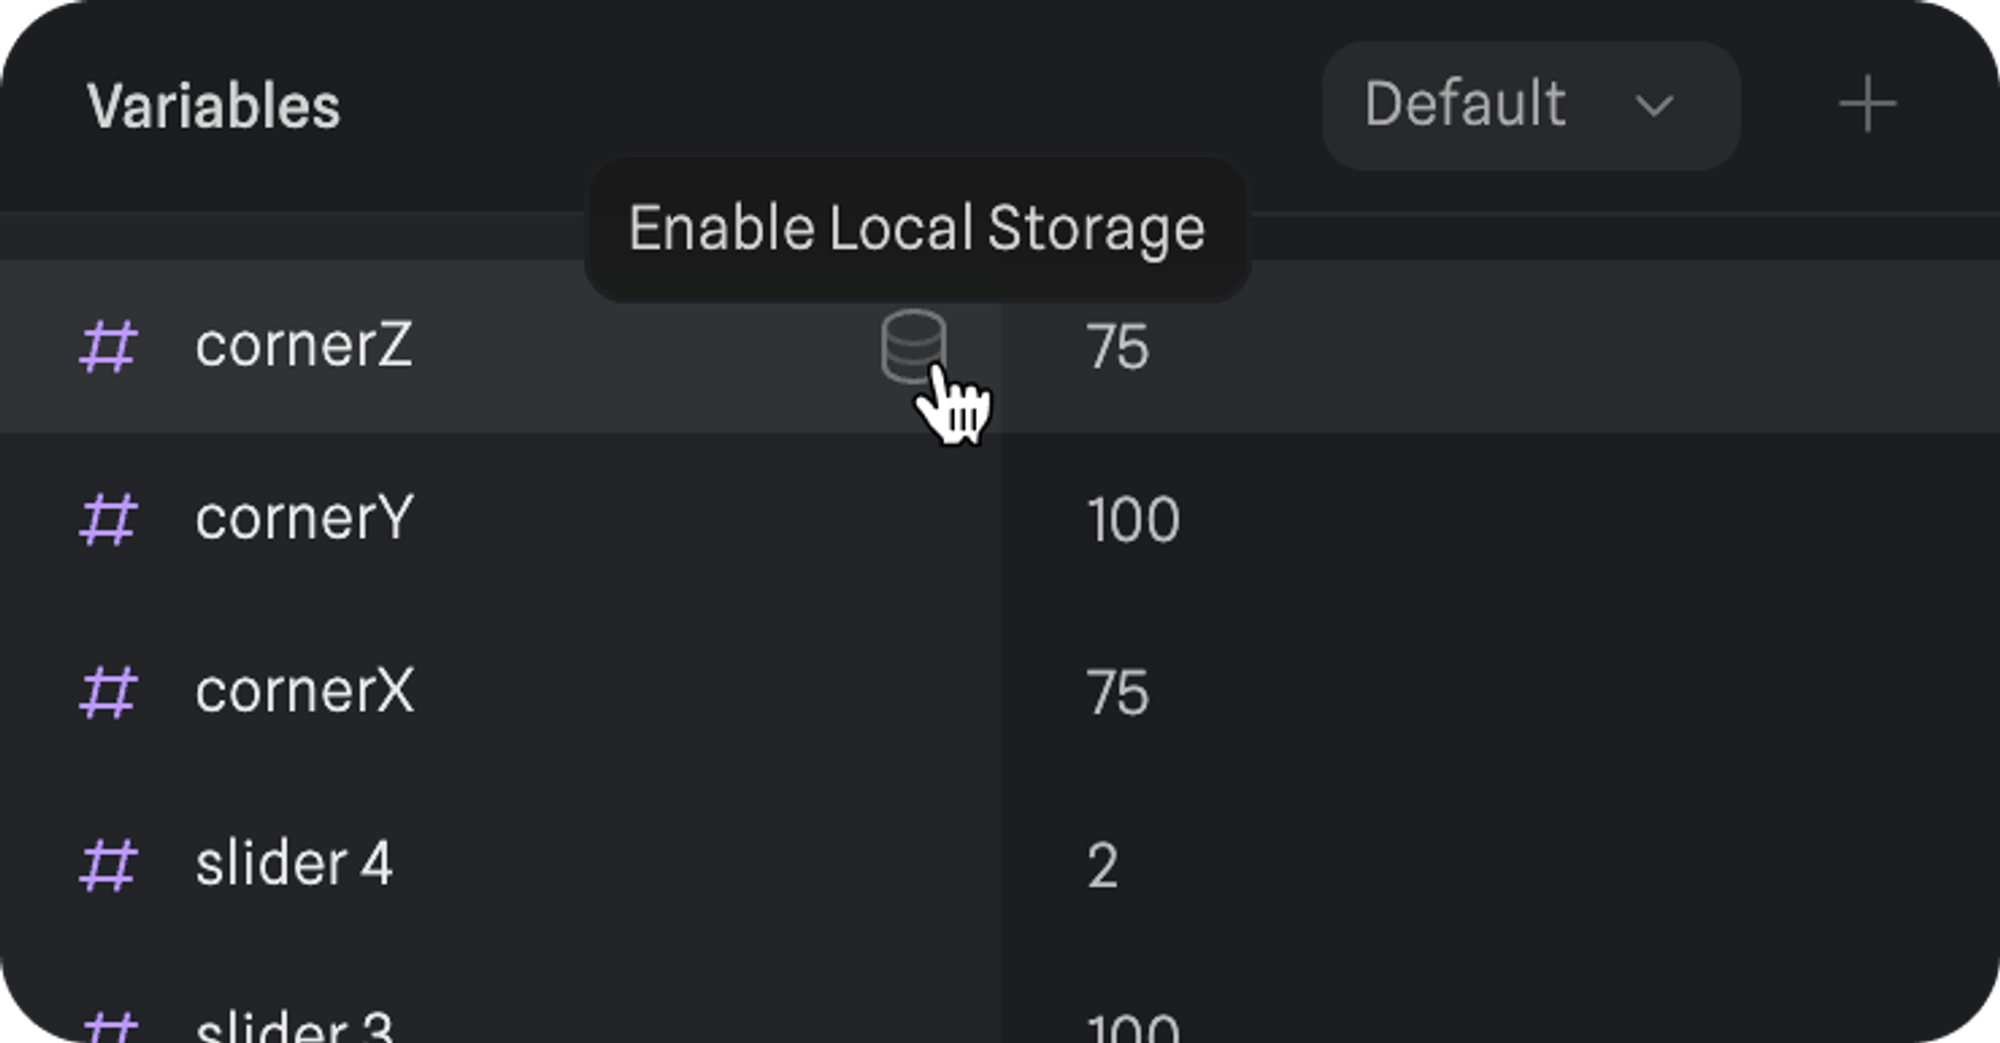
Random will generate a random value within a set range. With random values create randomness and unpredictability in your project, e.g., mini-game logic and procedural visuals.Local Storage
Enabling local storage on your variables will allow you to store persistent data on your exported scenes using variables.Variables Local Storage is a paid feature; you’ll need an active Professional or Team subscription to use it.
Enabling Local Storage
- Open the variables panel, from the right sidebar.
- Find the variable you want to make persistent with local storage.
- Press the local storage icon that shows up on hover.
 To reset the persistent data of your variables back to their default values using an event trigger you can use the Clear Local Storage Action.
Events supporting variables
Following Events have access to the Set Variable Action. This means when any of these events are performed, a variable can be set to a new value via an expression – either another variable or a custom calculation.- Variable Change Event
- Start Event
- Mouse Up Event
- Mouse Down Event
- Mouse Hover Event
- Key Up Event
- Key Down Event
- Key Press Event
- Scroll Event
- Drag and Drop Event
- Distance Event
- State Change Event
- Collision Event
- Trigger Area Event
- Variable Change Event - A special event that is triggered when a variable’s value changes. Pro tip: use these with the dynamic variables (e.g.: counter) to animate an object’s property.
- Set Variable Action - An action that allows you to modify variables and object properties. It can be either another referenced variable or can be a custom calculation.
How to use variables
Here is a simple guide to creating variables, assigning them to a cube, and updating it via an event.Create variables
- Open the variable table from the right sidebar, it’s visible when no objects are selected.
- Select a variable type, for this exercise select “Number”.
- Change the number to a specific value in the right column, e.g.:
100. - Double-click the name of the variable “Number”, to change its name, name it something like
Initial Position. - Right-click the variable and select “duplicate” to duplicate it.
- Name the duplicate something like
New Positionand adjust it’s value to200. - Done, the variables are ready to be used!
Assign a variable to an object
- Create a cube (select it in the top toolbar and click on the viewport).
- Select the cube.
- Hover any of it’s properties (e.g.: Position X).
- Click on the little dot in the upper right corner.
- Select the variable to be assigned,
Initial Positionin this case. - Done, the object is driven by a variable!
Update variables with events and actions
Variables can be updated with all sorts of events and actions. Here is a simple example of updating the variable via a mouse click.- Select the cube.
- Add an event in the right sidebar at the events section.
- Open the event “Start” by clicking on it.
- Change the event type in the top dropdown to “Mouse Down”.
- Add an action “Set Variable”.
- Expand the action by clicking on the “>” icon.
- Select the variable you would like to change, it should be
Initial Positionin this exercise. - In the “To” section there is an “Add expression” field, here is the place where you can define what should be the selected variable updated to when the event is performed. Click in the field and select the initially created
New Positionvariable. - Enter Play mode and click on the cube.
- Congrats! You have created your first variable update via a Mouse Down Event.
Best practices and troubleshooting
- Keep It Simple: Start with a few variables and build complexity as you gain confidence.
- Test and Iterate: Experiment with different variable values to find the perfect balance for your spline project.
- Variable Not Updating?: Ensure that the Variable Change events and Set Variable actions are correctly configured and referencing the right variable. Also, check the formula being used.
- Unexpected Behavior: Double-check your logic to identify any discrepancies in your variable usage.